Remote Application Server ― Configure Parallels Remote Application Server

Last updated on August 17, 2021
Stage 3 – Configure Parallels Remote Application Server
Once your license key has been activated, you can familiarize yourself with the Parallels Remote Application Server interface. At this stage, you may enable the RDS/ TS role on the server on which Parallels Remote Application Server is installed, or add a new server designated for terminal access.

1.Navigate to the Start Click Add Terminal Servers to configure a terminal server.
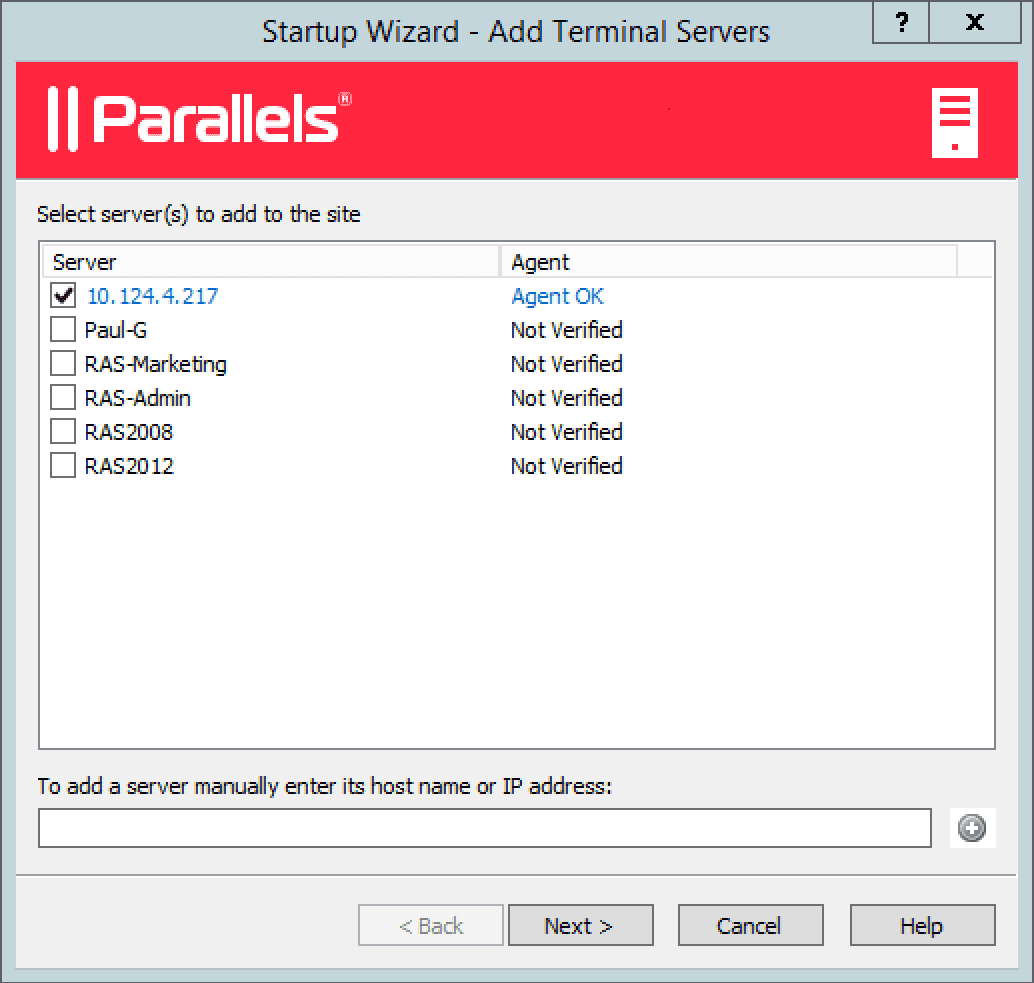
2.The first dialogue box shows a list of current servers from the Active Directory. Select the server or multiple terminal servers on which the Terminal Server Agent will be installed by clicking on the checkbox to the left of the name. Alternatively, if the server does not show up in the list, add an IP/ hostname manually in the textbox below and click the + Click Next to continue.
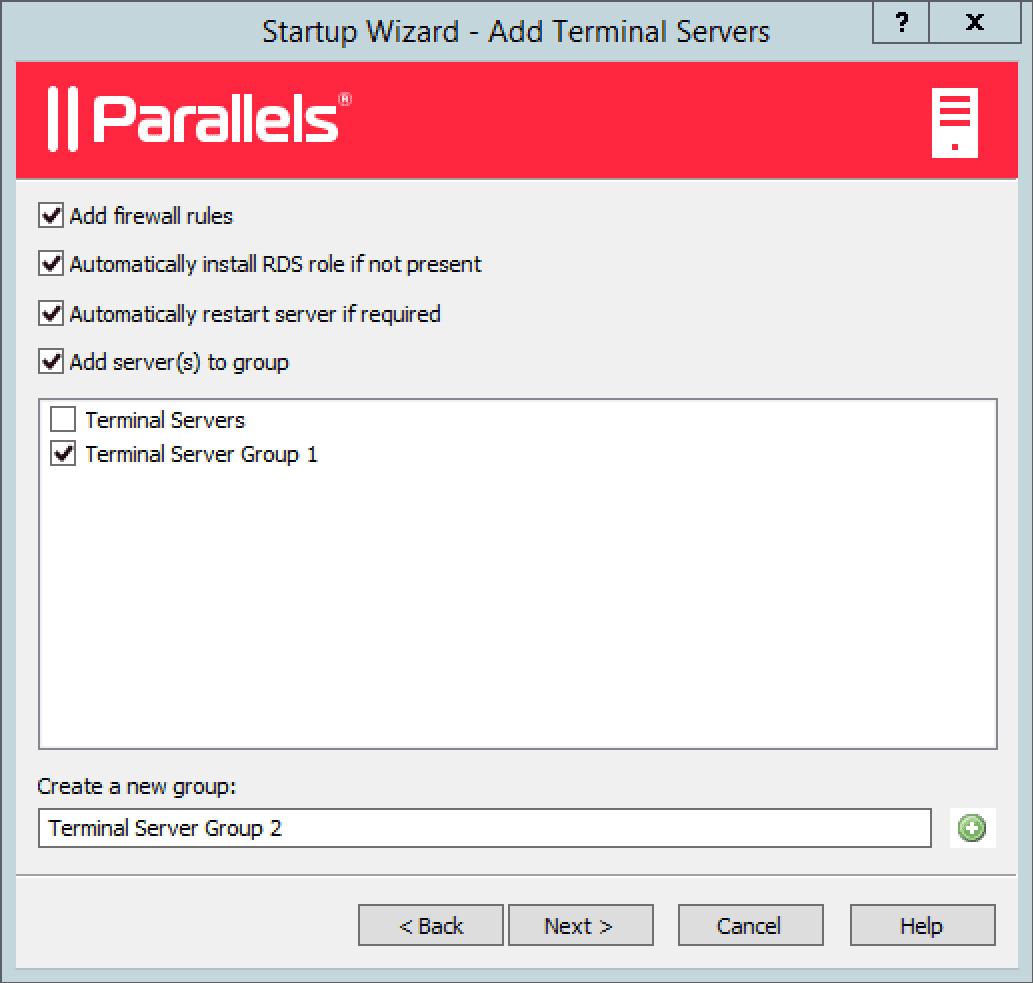
3.You can then choose to enable a set of options that will be applied during the installation of the Terminal Server Agent. Options include automatic firewall configuration, installation of the RDS role, restarting the servers, and adding servers to already existing or new groups. Once satisfied, click Next to continue.

4.Before proceeding, the dialogue box above summarizes the settings which will be executed. Click Next to confirm the previous configurations and start the installation of the Terminal Server Agent, followed by Finish to conclude this Wizard. Once a terminal server has been configured and added, you can publish applications installed on the server directly from the Parallels Remote Application Server Console. These applications will later become available to users authenticated with Parallels Remote Application Server.
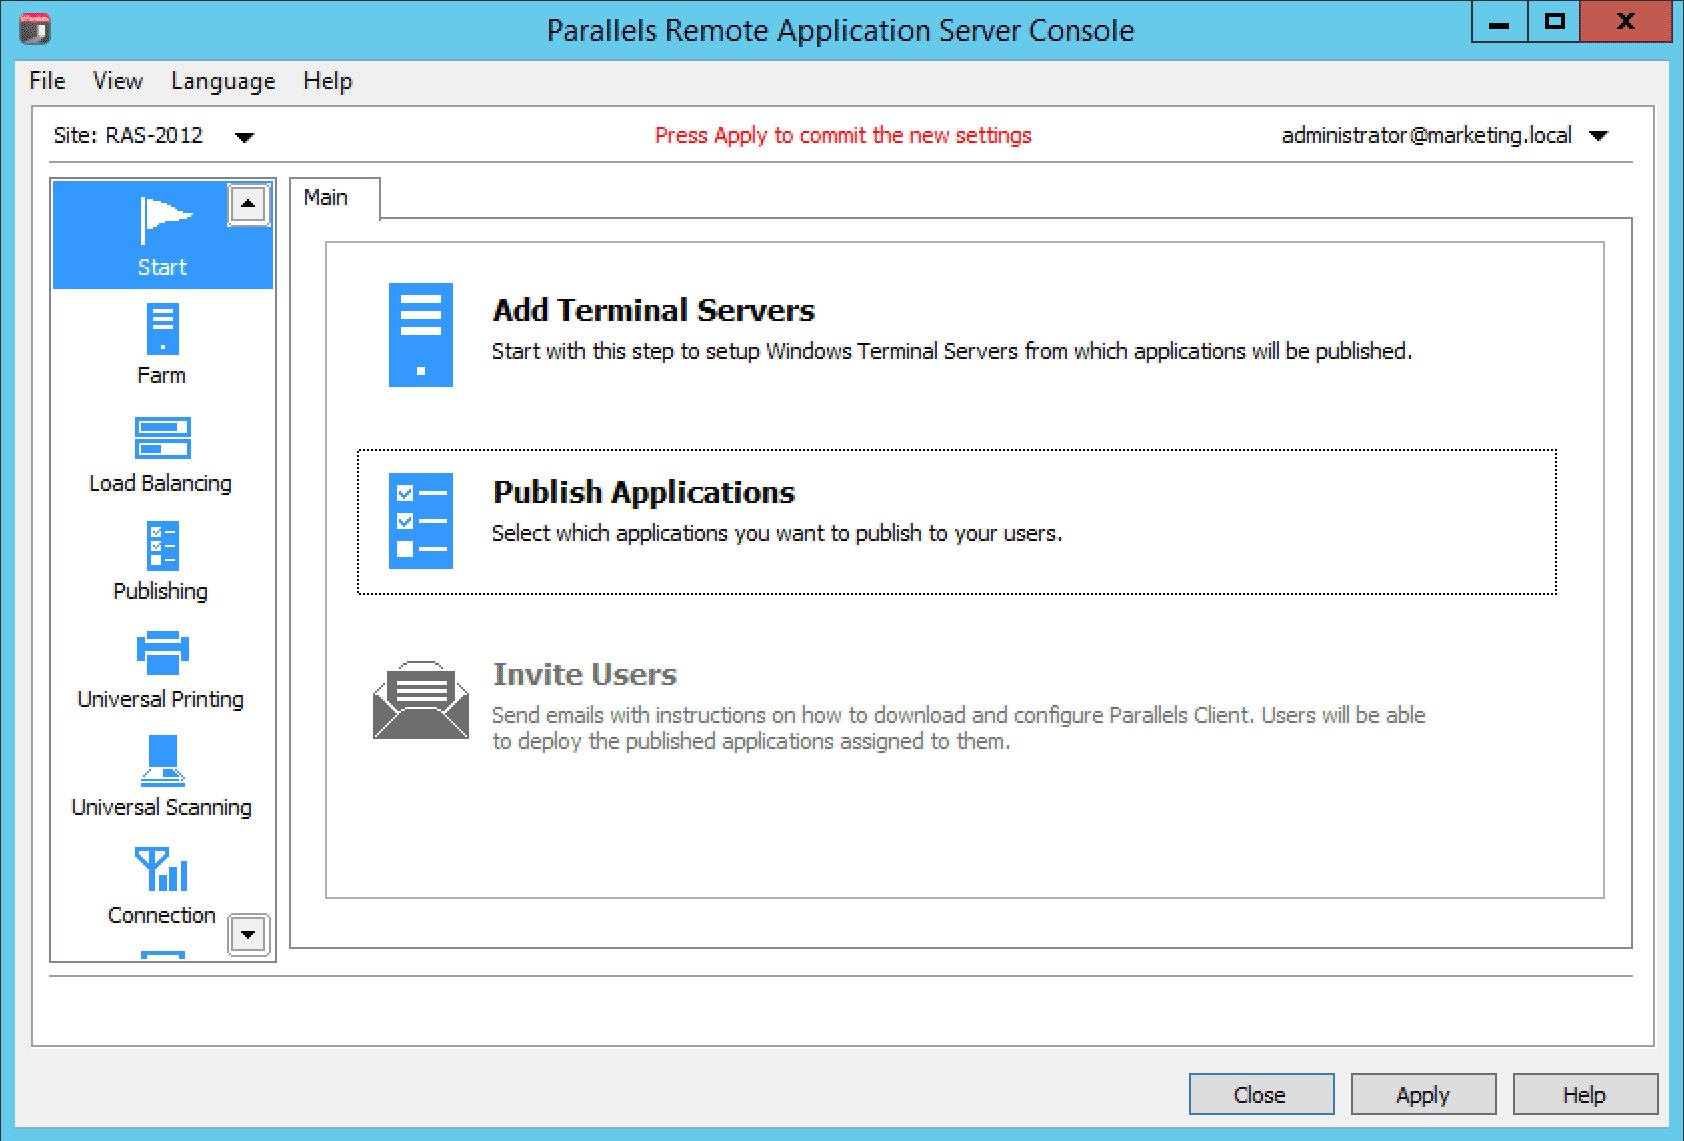
5.The Publish Applications option is now enabled. Click on this option to start publishing applications.

6.Since only one terminal server has been configured, an inventory from that server will instantly be shown. Simply enable the checkbox related to the applications you would like to add and click Next. It’s that easy.
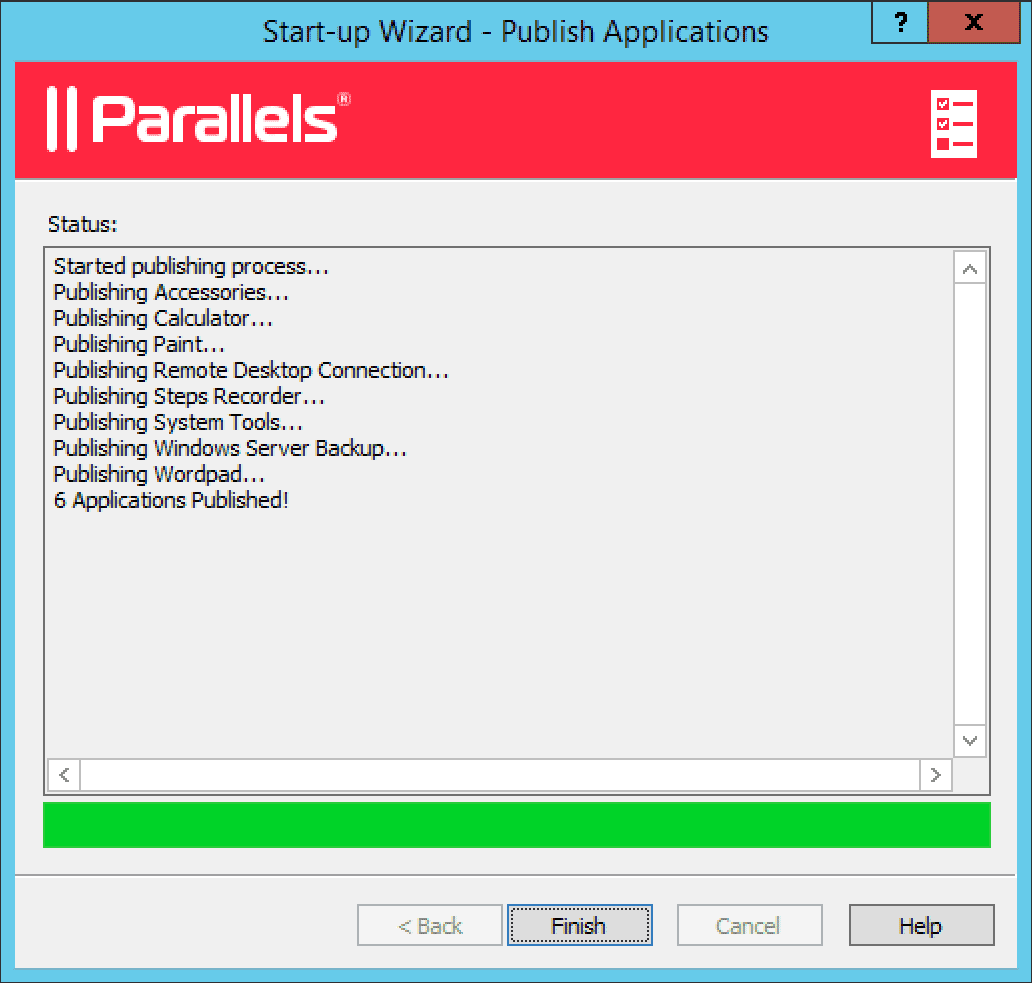
7.The next dialogue box summarizes the applications selected and subsequently publishes the applications. Click Next to publish the applications, followed by Finish to apply the changes.