
Printing in Parallels Desktop
Guest blog by Ramya Subramanian, Parallels Support Team
Wondering if setting up a printer in Parallels Desktop is too difficult? Trust me, it isn’t!
There are several ways to set up a printer depending on your needs and preferences:
- Share a printer from Mac®.
- Connect a USB printer directly to Windows®.
- Connect to a local printer using Apple Bonjour®.
- Connect to a network printer.
Let me walk you through each scenario in more detail.
Share a Printer Connected to Your Mac
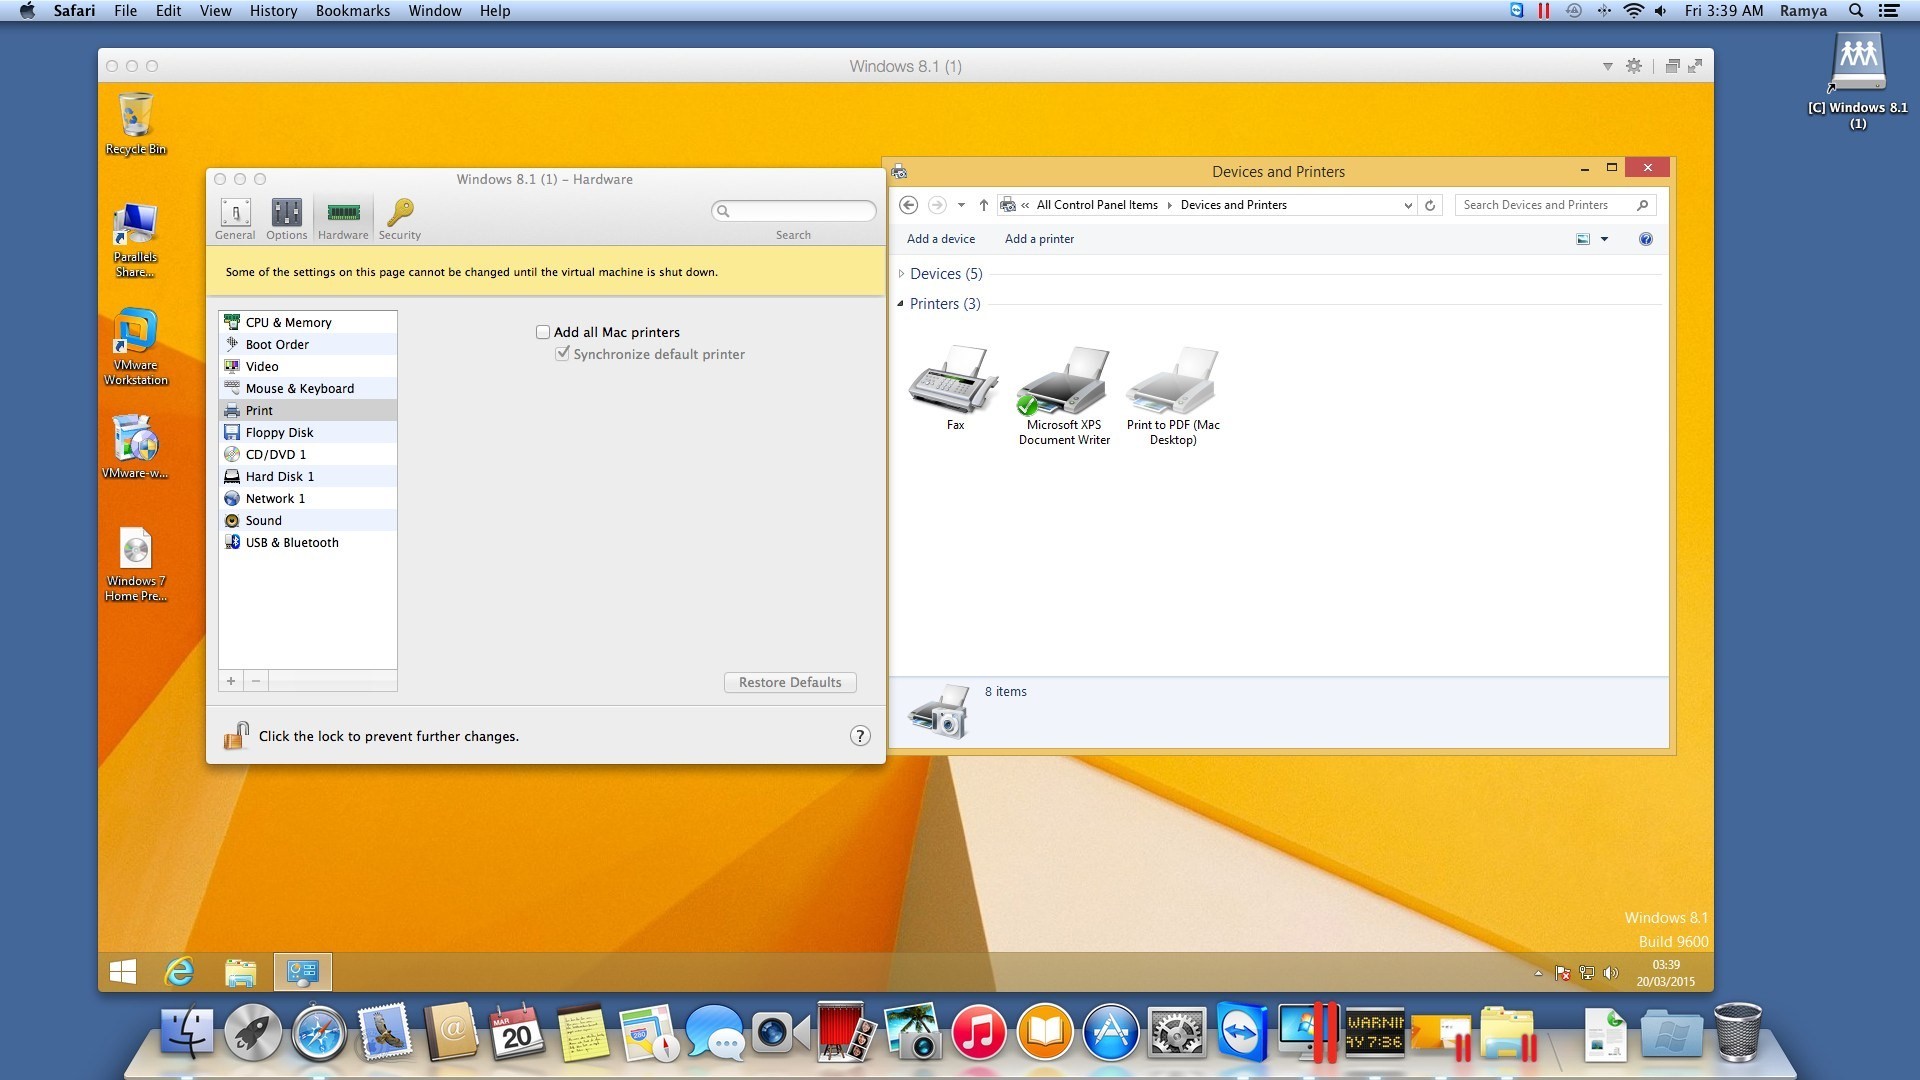
You can share any printer connected to your Mac with your Windows virtual machine as long as it works on the Mac side. By default, your Mac OS® X printers are automatically shared with the Windows VM. If you can’t print, you can see if your printer is enabled by going to VM Configuration → Hardware → Print → Enable Add All Mac Printers and Synchronize Default Printer.
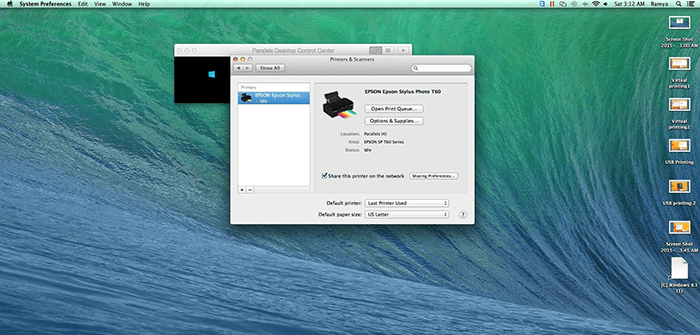
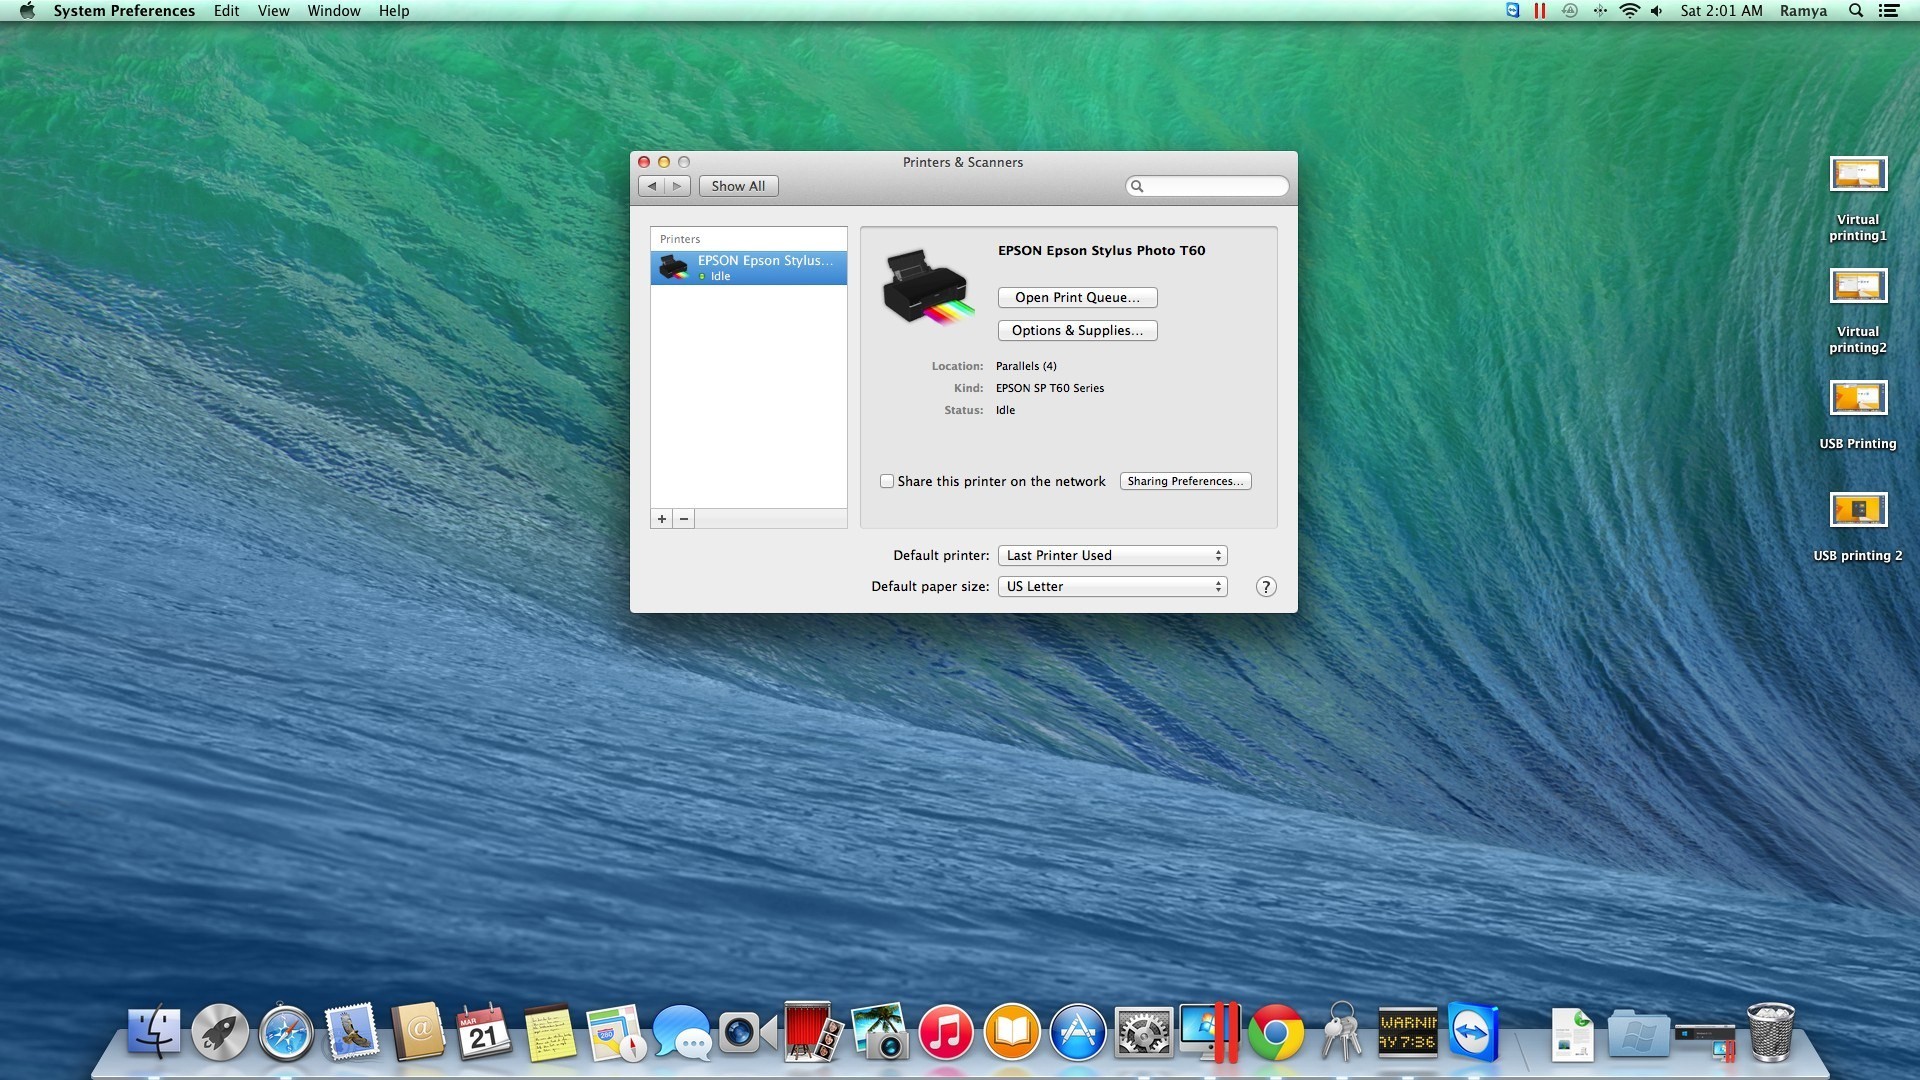
Let’s see exactly how this printer sharing works. I have a USB Epson™ Stylus Photo T60 Printer connected and configured on my Mac:
Now let’s see what’s happening on the Windows side when the option Add All Mac Printers is disabled. As you can see below, Epson is not there:
Let’s enable Add All Mac Printers and see how it goes…
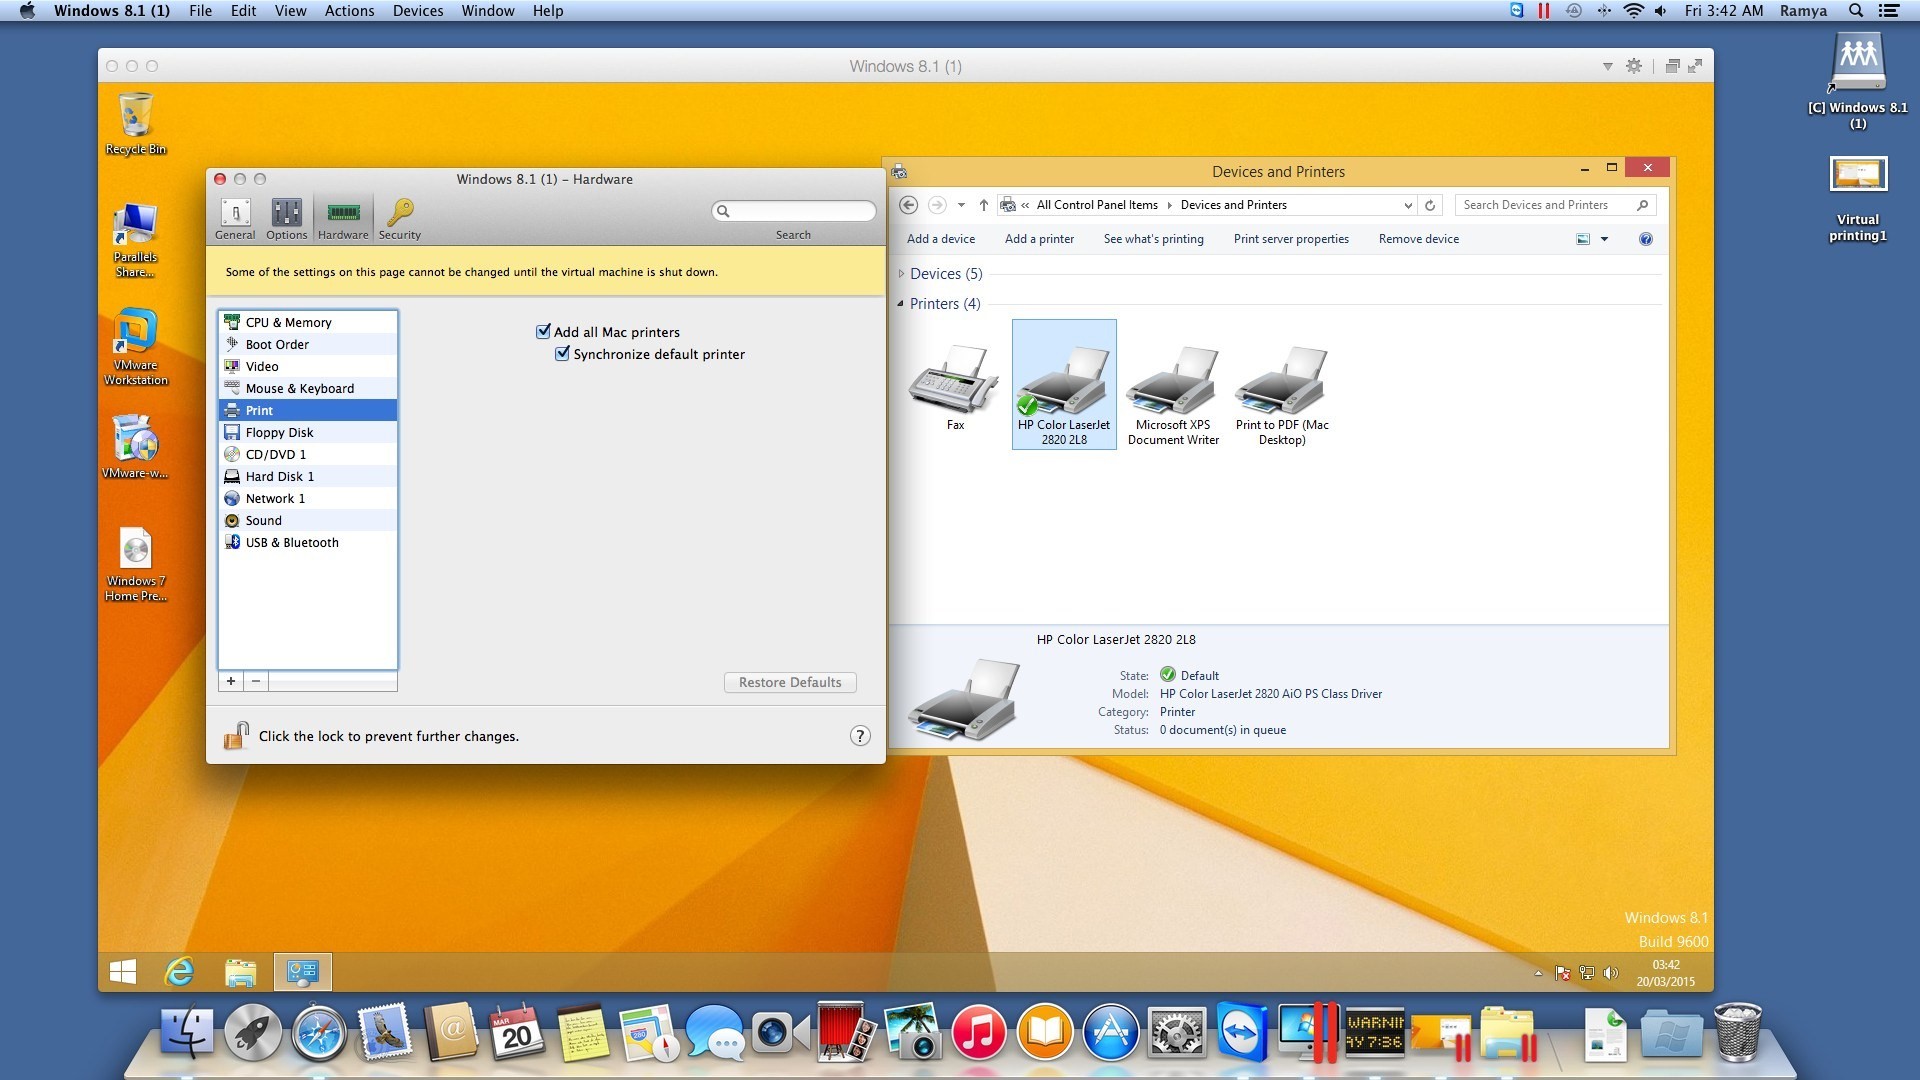
There we go! But wait, it says HP printer and I have Epson. No worries—the reason for that is that Parallels Desktop uses a default printer driver for printer sharing.
The option Synchronize Default Printer will make the default printer of your Mac become your default printer on Windows too.
Disabling the option may be useful if you’re using several different printers on both your Mac and Windows sides and want to choose the right one each time you print.
Let’s print a test page and…voila! My Mac just spit out a shiny piece of paper with beautiful images on it.
The only downside of virtual printing is that the default drivers will not let you use some of the advanced printer functionality and won’t let you use a scanner or fax if you have all-in-one devices. But this isn’t a problem at all–all I had to do was connect the USB printer directly to my Windows VM.
Connecting a USB Printer to the Windows VM
When you connect any USB device to your Mac (in my case, a printer), Parallels Desktop asks you whether you want to connect the device to the Mac or Windows side:
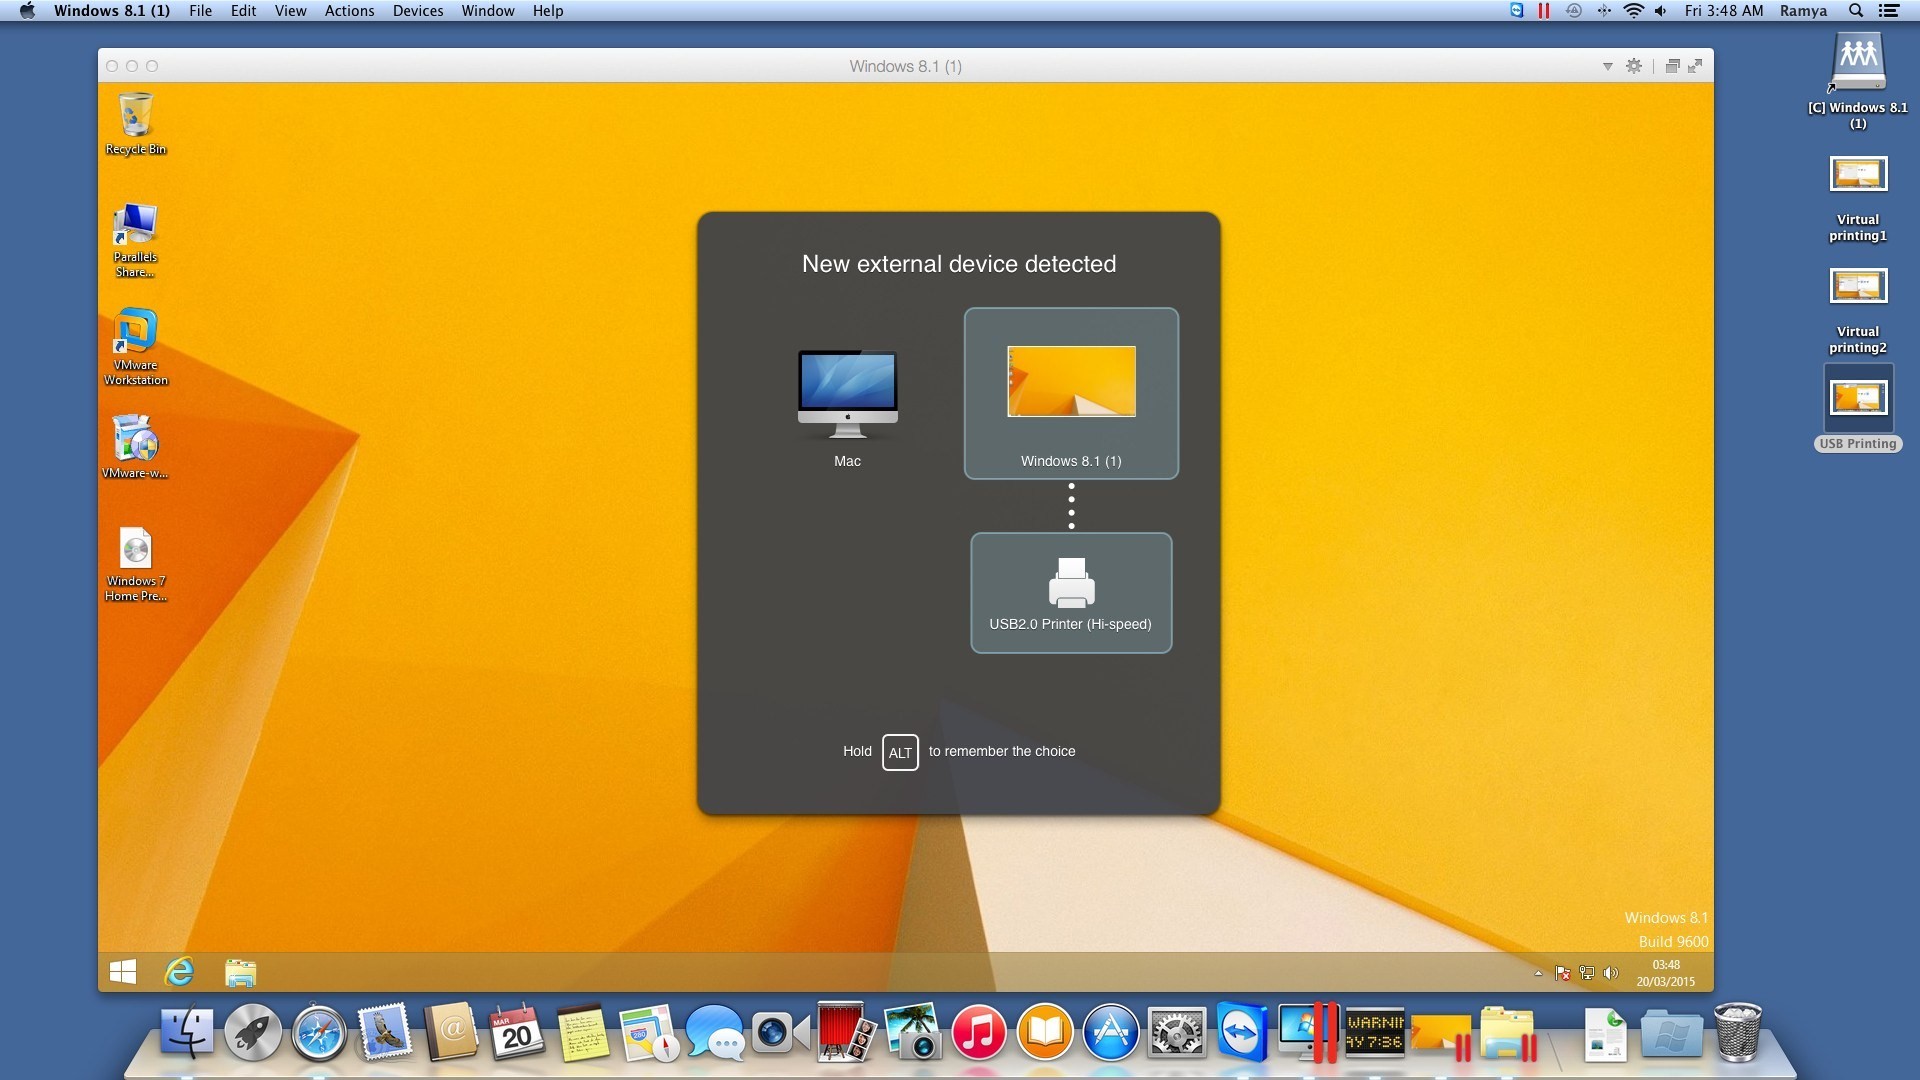
Let’s select Windows. The printer is now connected directly to Windows and starts installing the drivers automatically since most of the latest versions of Windows are smart enough to find drivers. If you’re using an older version of Windows, you can download and install your printer drivers manually from the manufacturer’s website.
If you’ve accidentally chosen to connect the device to Mac, you can just re-plug it in and select another option.
There is also another way to connect the printer directly to the Windows VM. When your printer is already plugged into your Mac, you can click on Devices menu → USB and select your printer from the list:
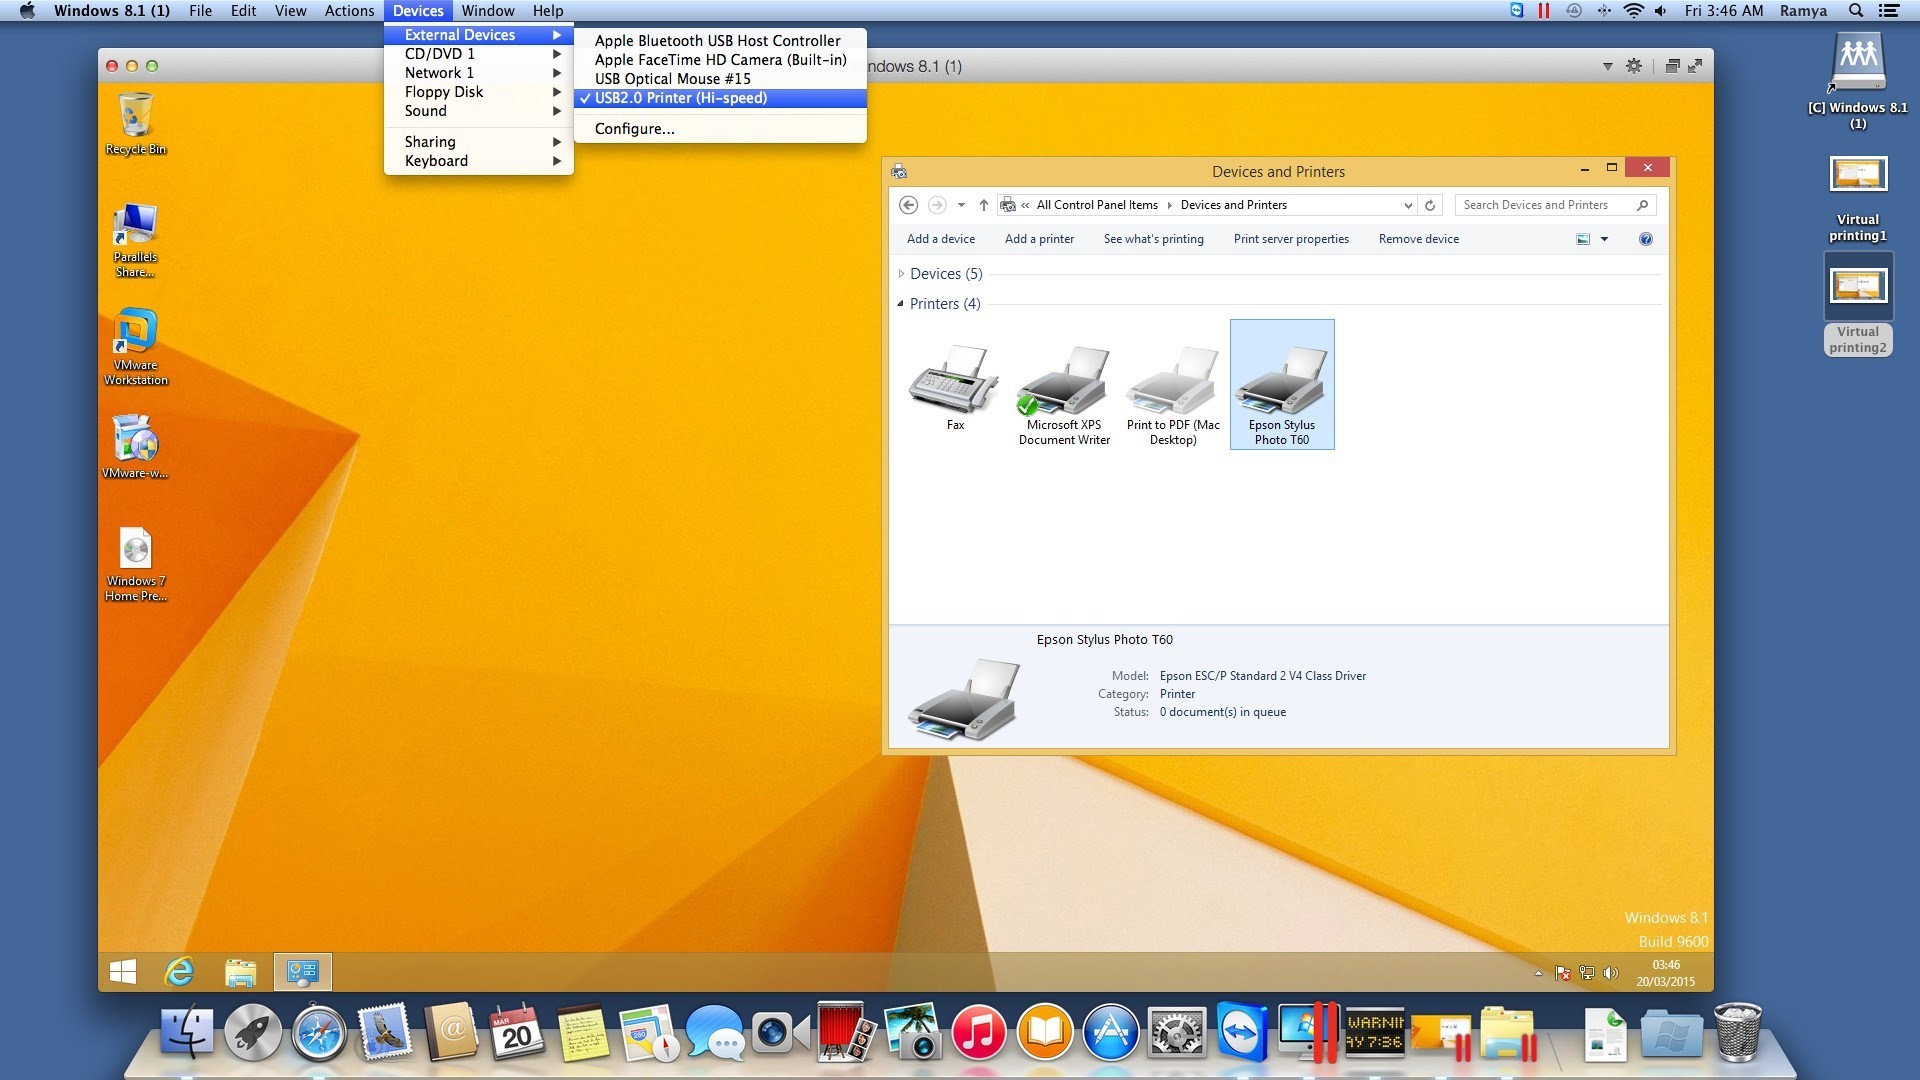
Next, install your printer drivers and you’re ready to go.
When you use this method of printing, your printer will only be accessible from the Windows side. To “return” your printer back to the Mac side, simply uncheck it from the external devices menu.
Setting Up a Network Printer
In large organizations, say, in your office environment, it is not possible to provide USB printers to every employee. Instead, the most common setup consists of several network printers.
Network printer setup in a VM is a bit different from the methods we talked about earlier. Let me shed some light on a few setup tricks.
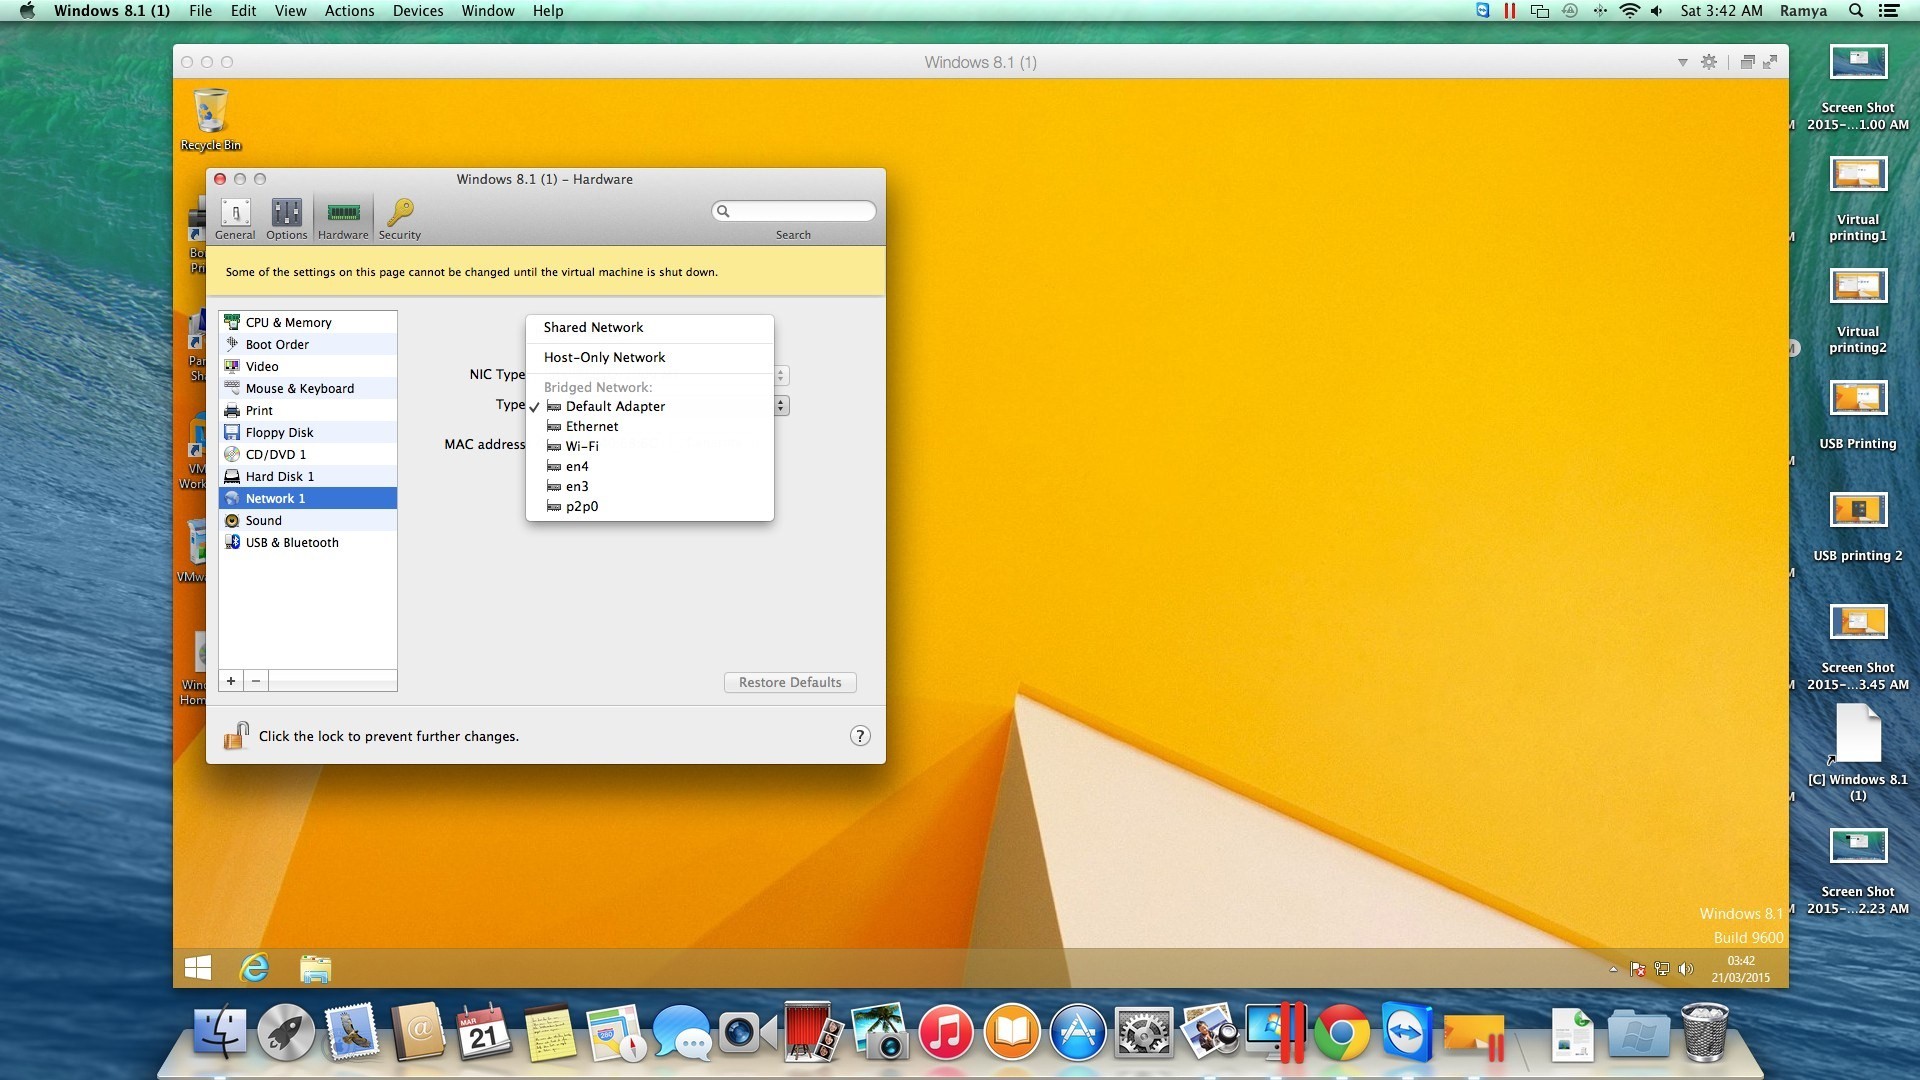
The first thing to check is the type of network mode selected in your VM configuration. It could be either Shared or Bridged. Bridged mode treats your Windows as a stand-alone PC on the network and has its own IP address.
Just go to VM Configuration → Hardware → Network 1 → select Bridged → Default Adapter.
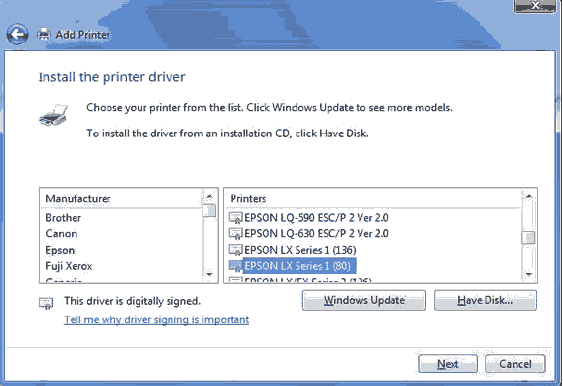
Then go to the Windows Control Panel and click on Printers. Select Add Printer and choose Network Printer.
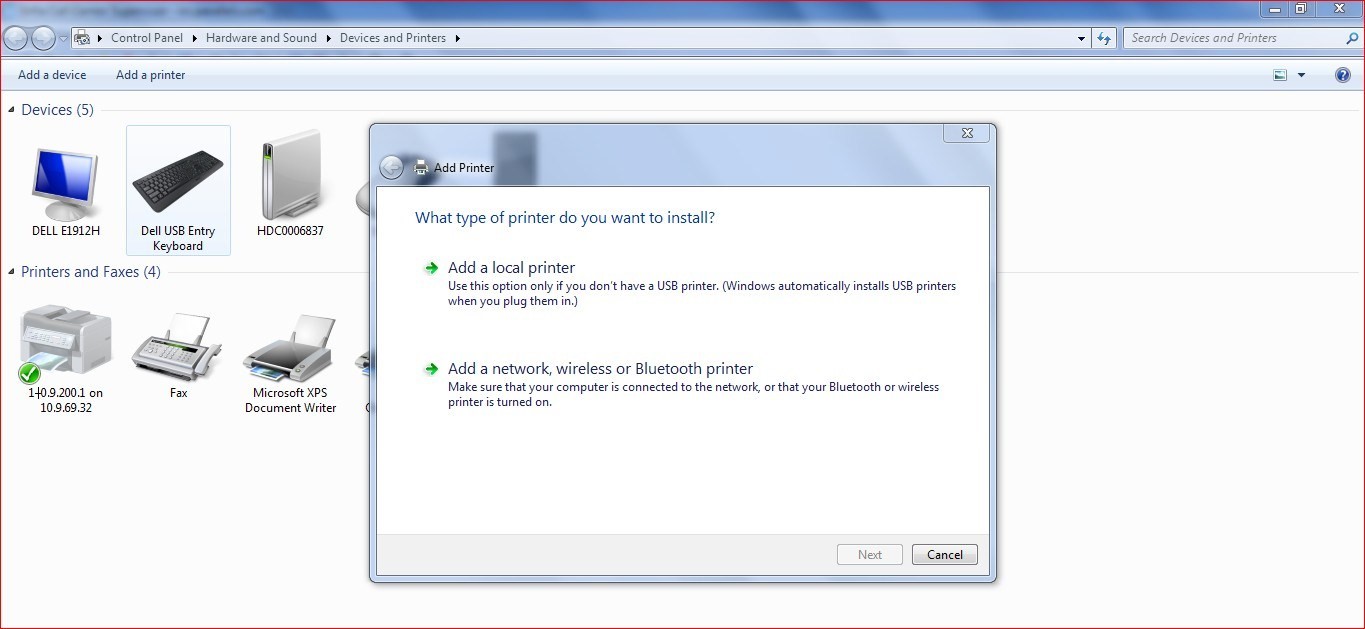
Select your printer from the list of available devices and click Next.
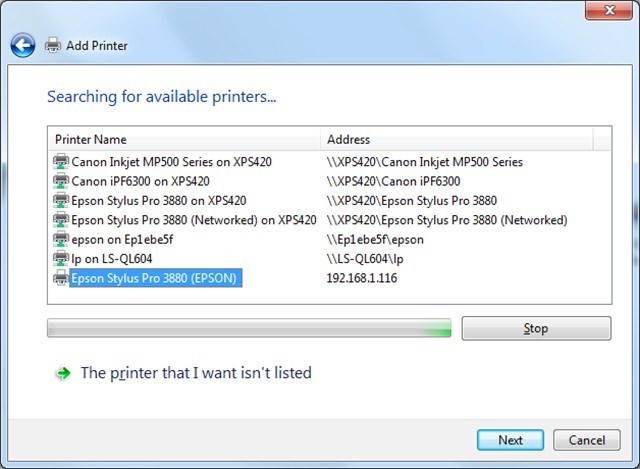
Image courtesy of LH6.
The setup wizard may prompt you to install additional drivers. Click Install Drivers, and follow the on-screen wizard to complete the installation.
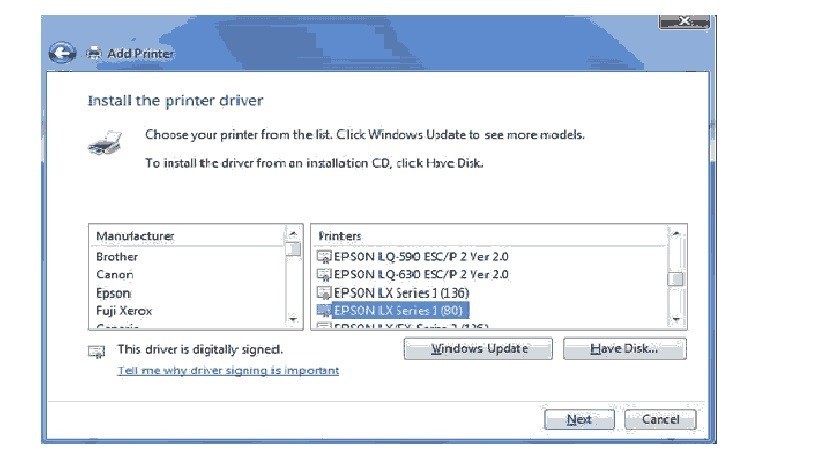
Image courtesy of LH6.
After the drivers have been installed, click on Finish.
That’s it! You’re ready to print now!
Connect to a Printer Using Apple Bonjour
Bonjour is built into Mac OS X and is also compatible with Windows. It’s designed to automatically configure devices over a network without any effort from the user.
Now, let’s see how to configure a printer using Apple Bonjour. On your Mac OS X side, open System Preferences → Sharing → Services and enable Printer Sharing service.
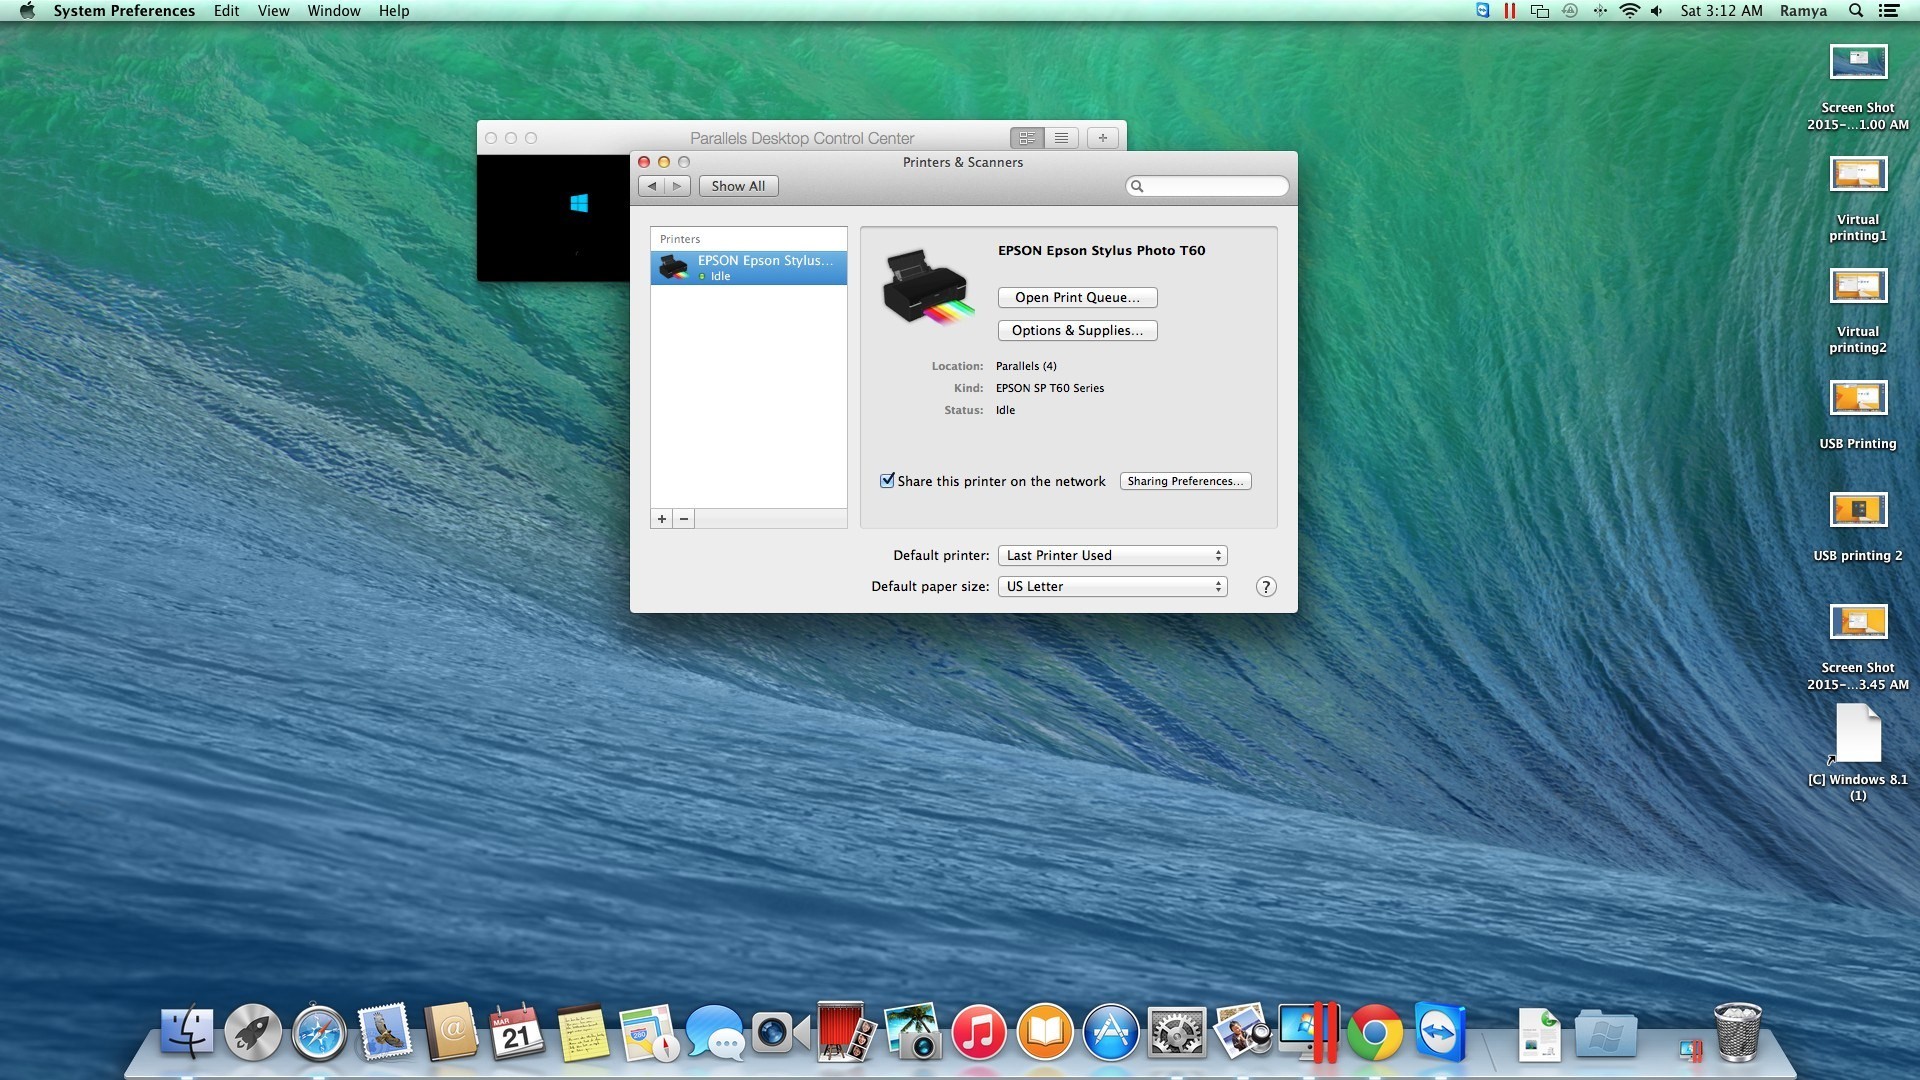
Then click on System Preferences → Print & Fax → Sharing, and make sure your printer is enabled in the Share these printers with other computers list.
In your Windows VM, go to VM Configuration → Hardware → Print and disable Add All Mac Printers.
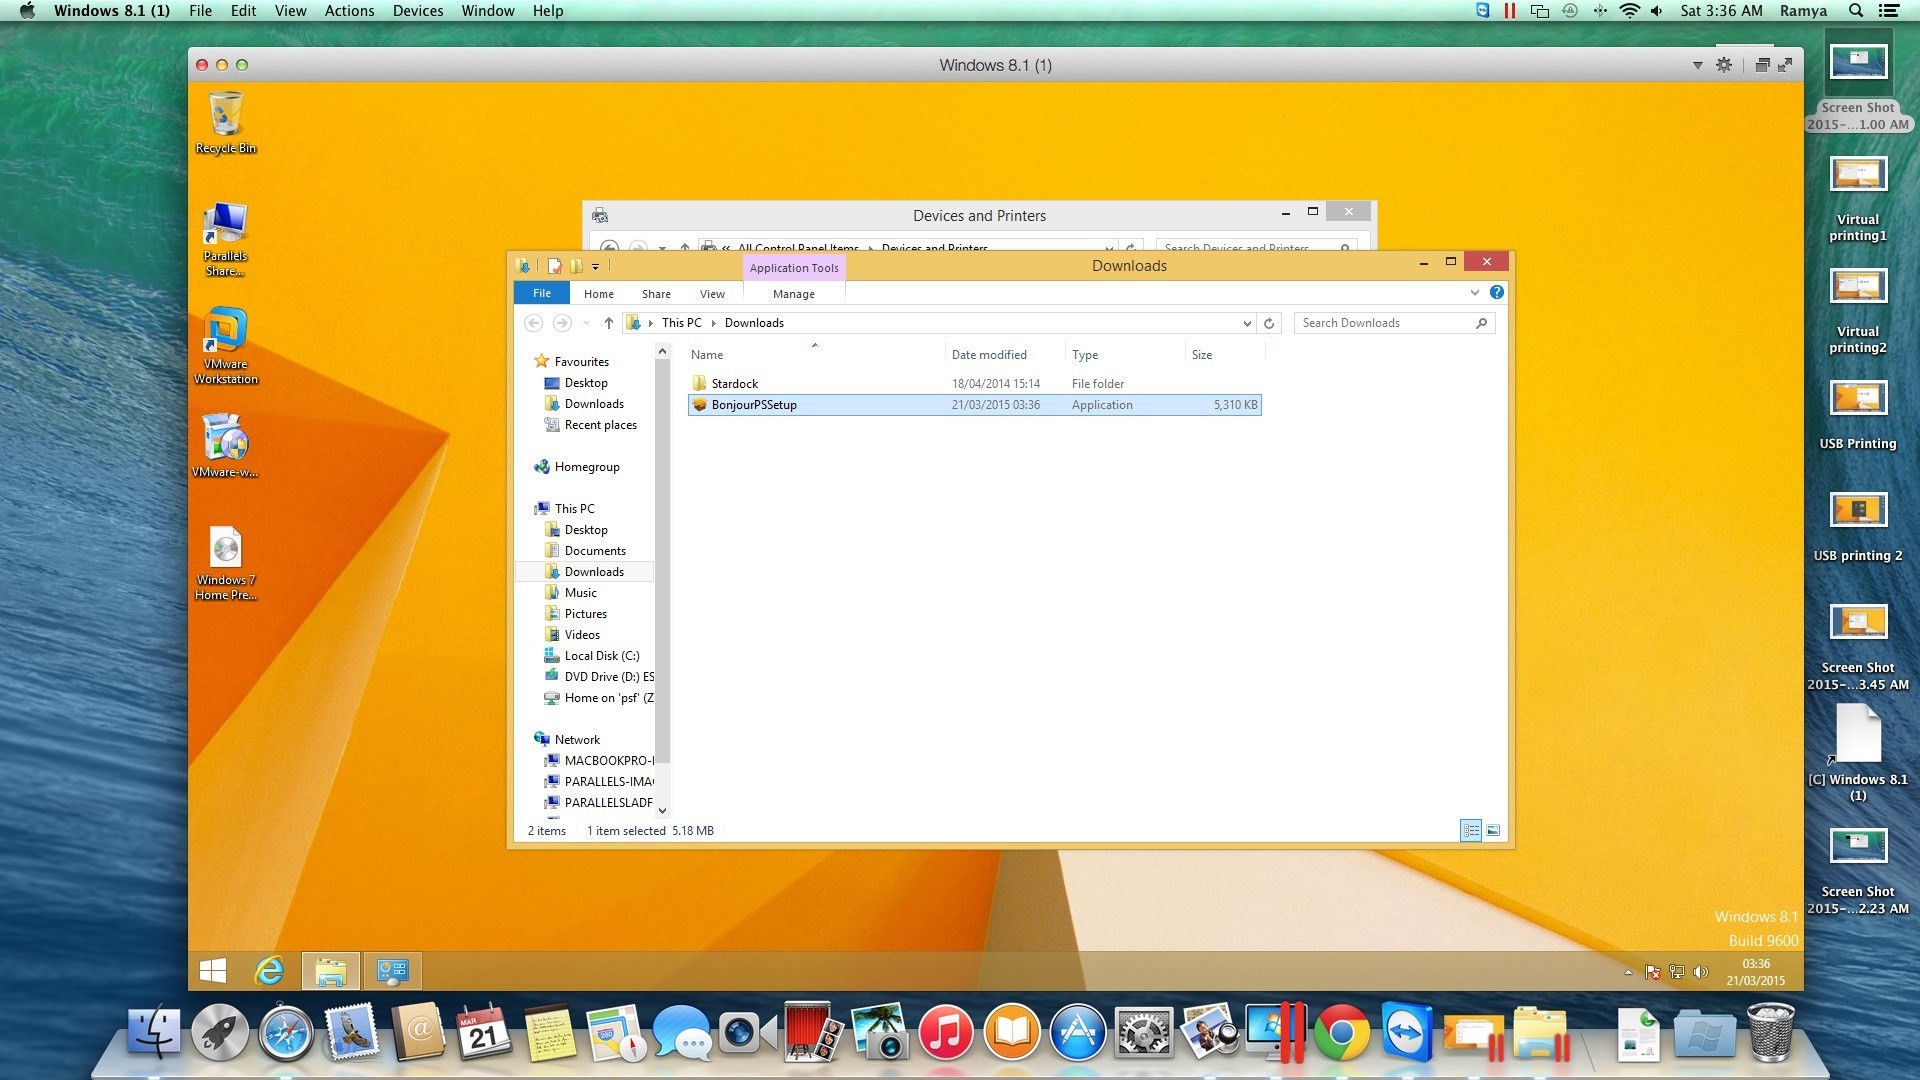
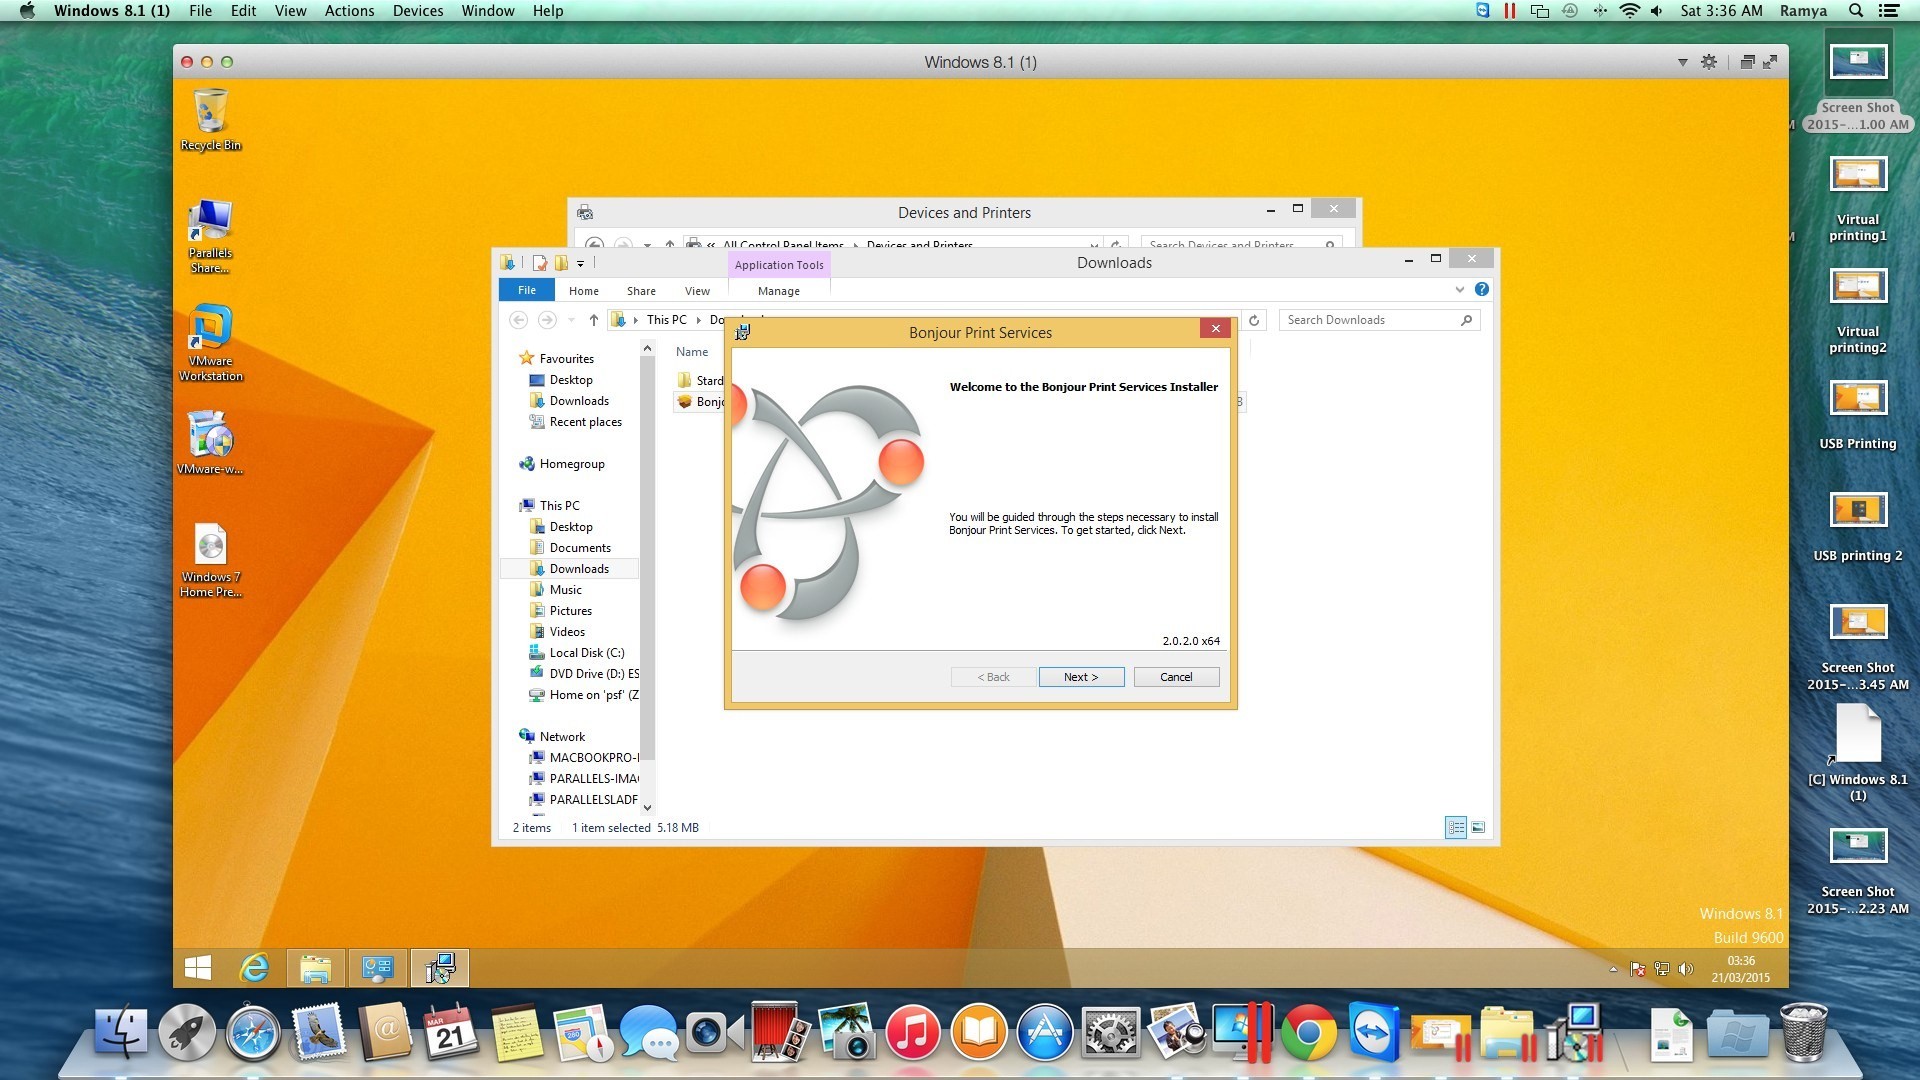
Now, download Apple Bonjour for Windows and install it on the Windows side:
When your Bonjour installation is complete, start the Bonjour Printer Wizard on Windows and click Next:
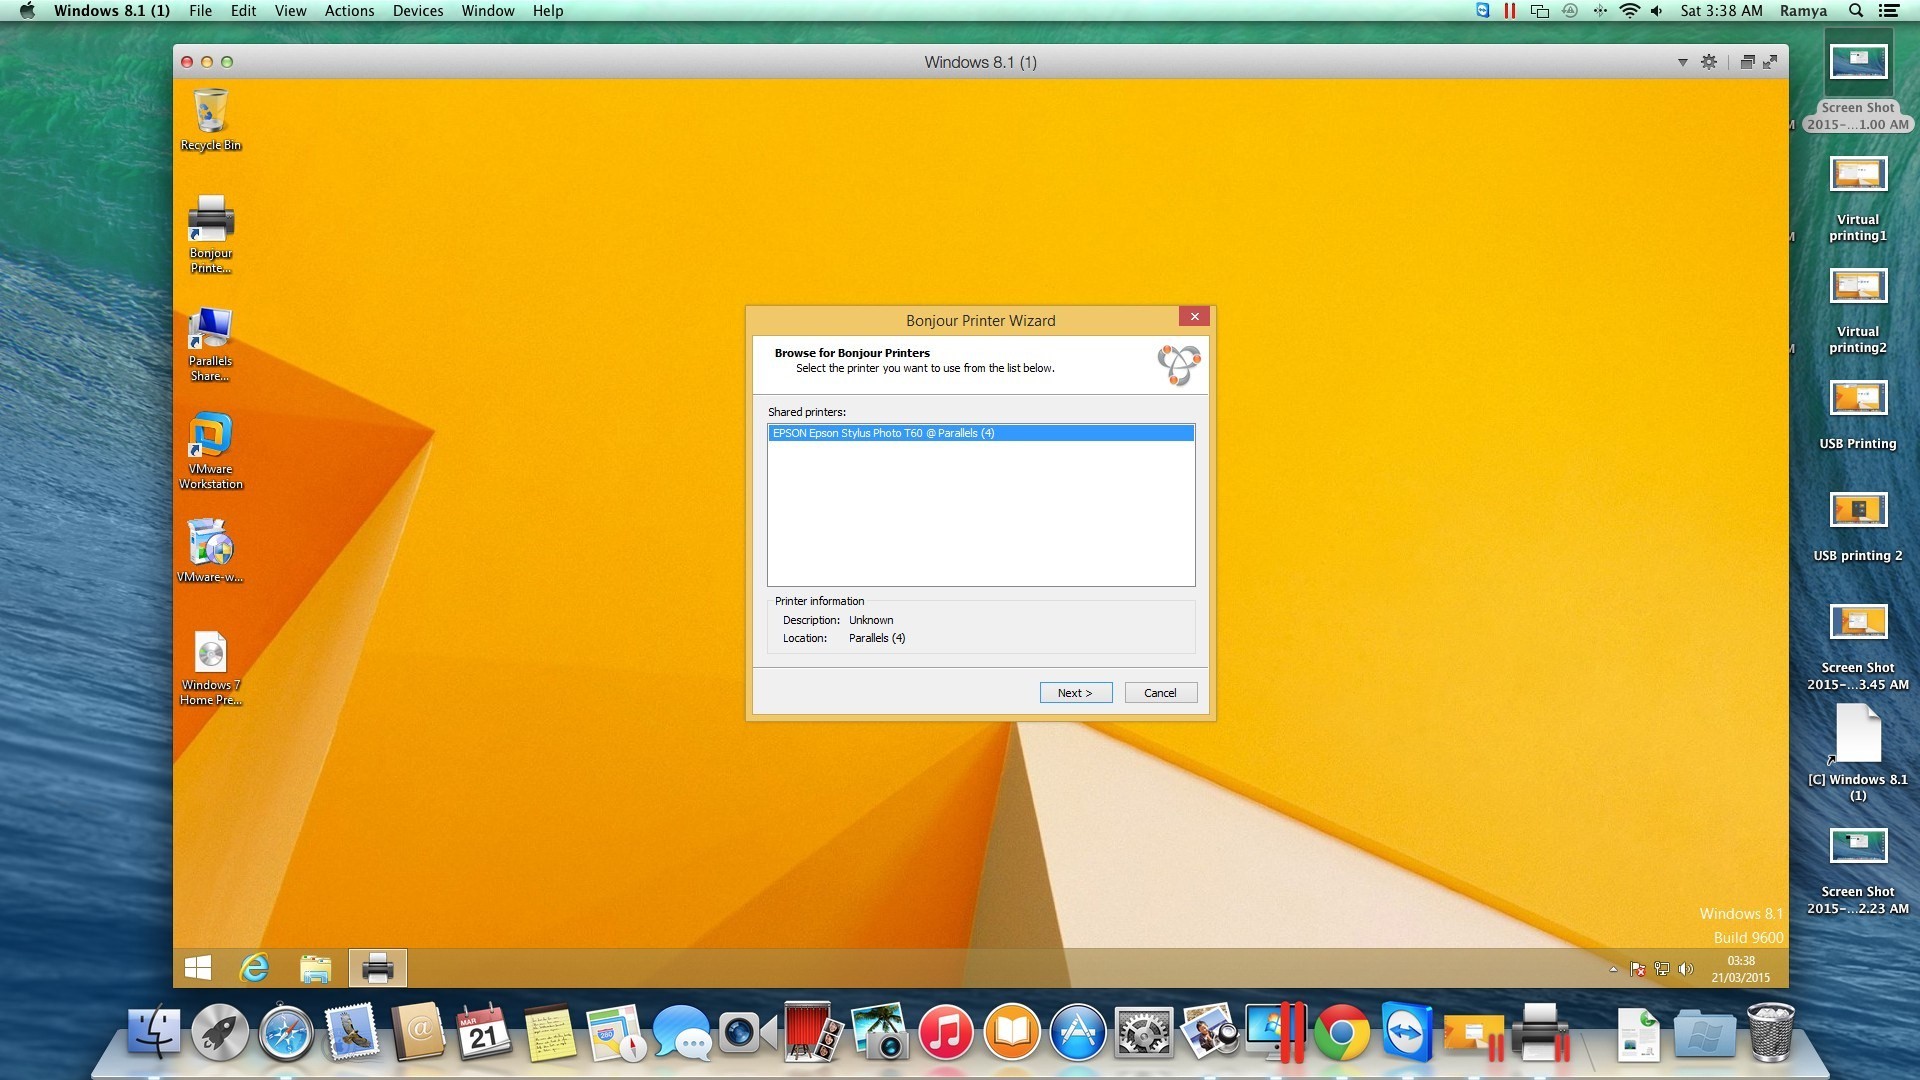
Select your printer from the wizard’s Shared Printers list and click Next. You should select either the Generic/Postscript driver for your printer or your printer’s particular model if it’s available on the list. Hit Next:
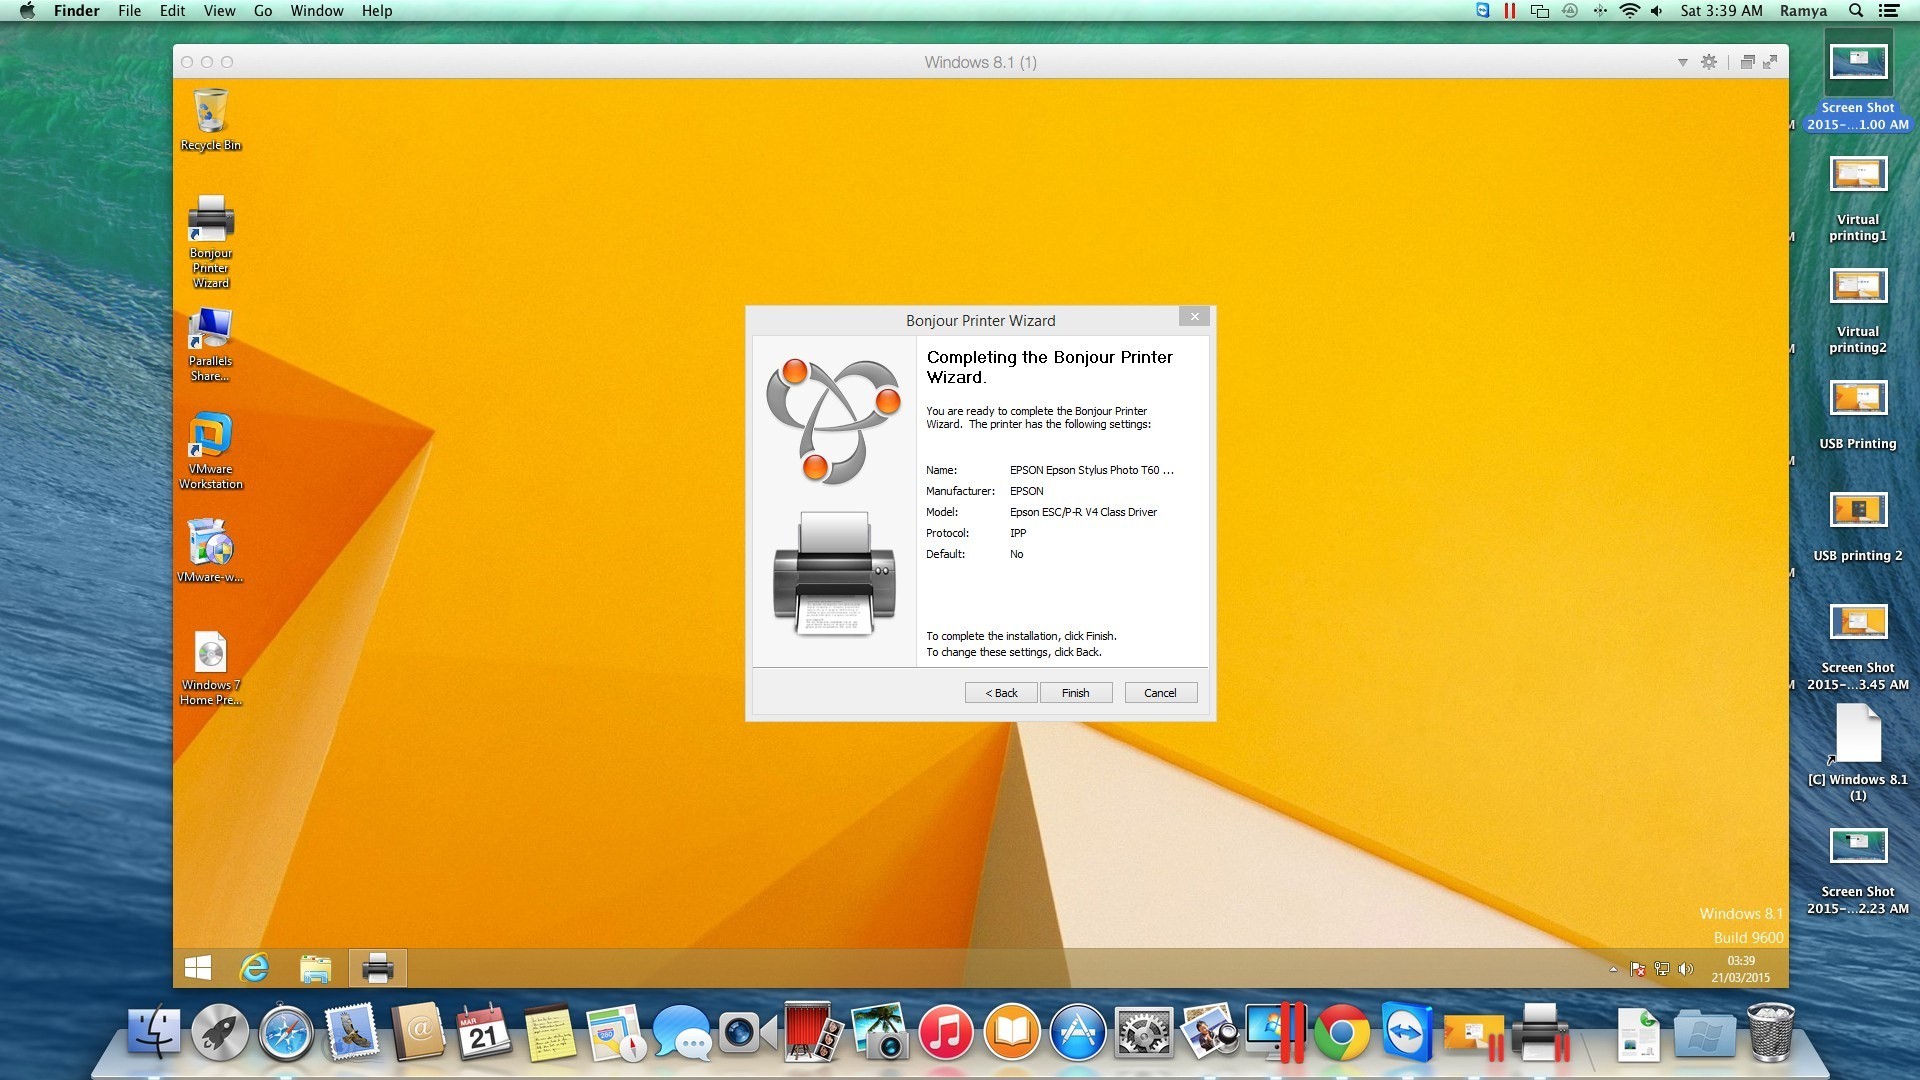
Click Finish and try printing any document using the Bonjour printer.
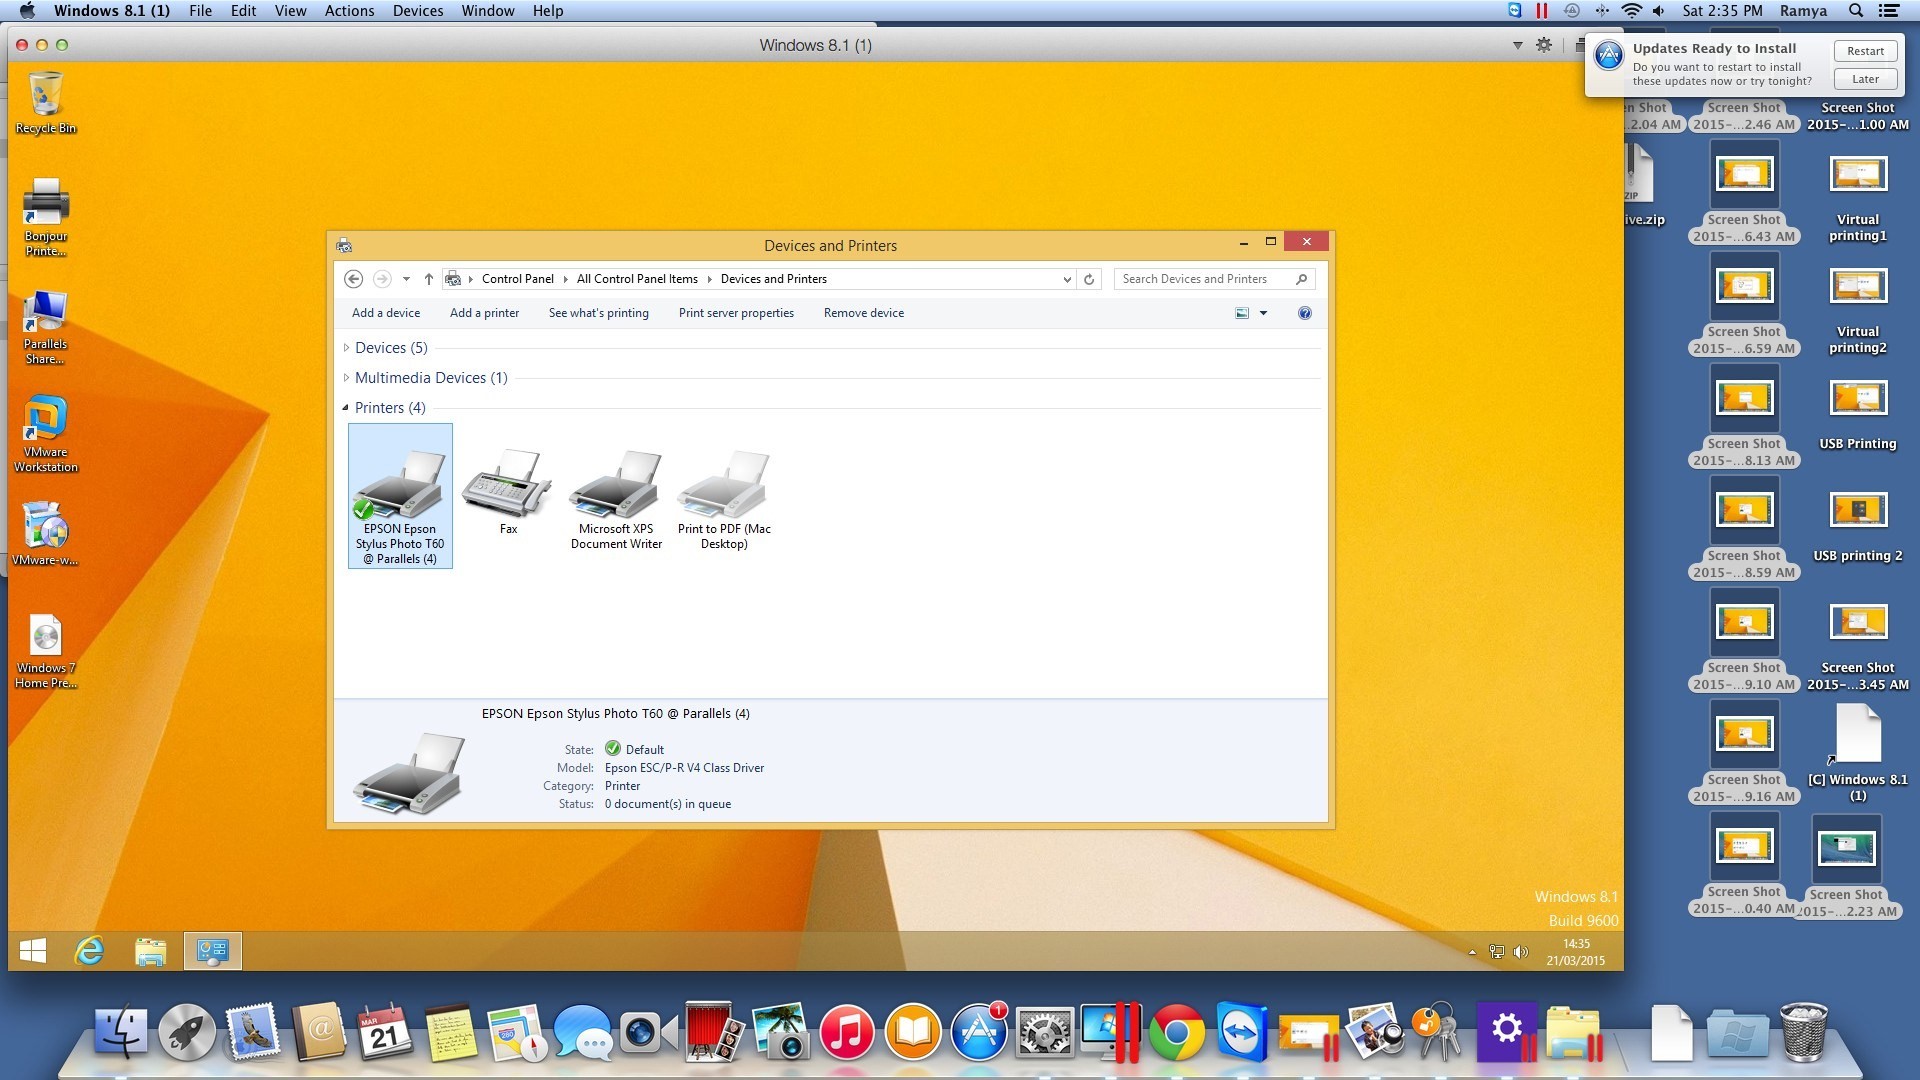
As you can see below, my Epson Stylus Photo T60 Printer is configured using Apple Bonjour driver “Epson ESC/P-R V4 Class Driver.”
We hope this blog post helped you easily configure your printer and don’t forget to follow the Support team on Twitter!
Try Parallels Desktop for free for 14 days!
