Last updated on January 26, 2023
What is Smart Card Authentication Configuration?
A smart card is a micro-controller-based card, like credit cards that can generate, store, and operate on cryptographic keys. Because they offer a flexible and secure way to authenticate entities, smart cards are commonplace in high-security networked environments. But what exactly is smart card authentication configuration?
Well, smart card authentication is a two-factor authentication system that involves the use of a smart card. A smart card authentication-enabled platform validates the identity of a user by using two components: a smart card and the PIN. The PIN acts as a secret key for authenticating the user to the system.
In this post, we look into some factors which would affect the cost, and then we walk you through a four-stage setup process on how to use smart card authentication with Parallels® Remote Application Server (RAS).
Cost Factors for Smart Card Authentication Configuration
You might think of the variables mentioned below as those that impact the cost of running a smart card installation because cost is always a significant factor:
- How many people will participate in the smart card program and where they will be situated.
- The process to follow if users misplace or damage the provided smart cards.
- The process via which the users will receive their smart cards. There should also be provisions for user identity verification.
Stage 1: Smart Card Setup Prerequisites
Before Parallels Remote Application Server can authenticate users with smart cards, the system must be configured correctly according to the prerequisites listed below.
- Active Directory configured for authenticating domain users with smart cards.
- Enterprise PKI and issued user certificates.
- An RDP server (2008, 2008R2, 2012, 2012 R2, 2016, 2019 and 2022) joined to the same domain, and it should allow the domain users to log in via smart card.
- Drivers for the smart card AND the smart card reader installed on the RDP server as well as on the client machines that will connect to the RDP server.
Note: The configuration of these prerequisites may vary depending on the smart card vendor.
Stage 2: Test the Setup
After the prerequisites are configured, a test is required to verify that the smart card authentication configuration in Stage 1 has been set up correctly. This test will attempt to authenticate with the RDP server from a Windows machine using a smart card.
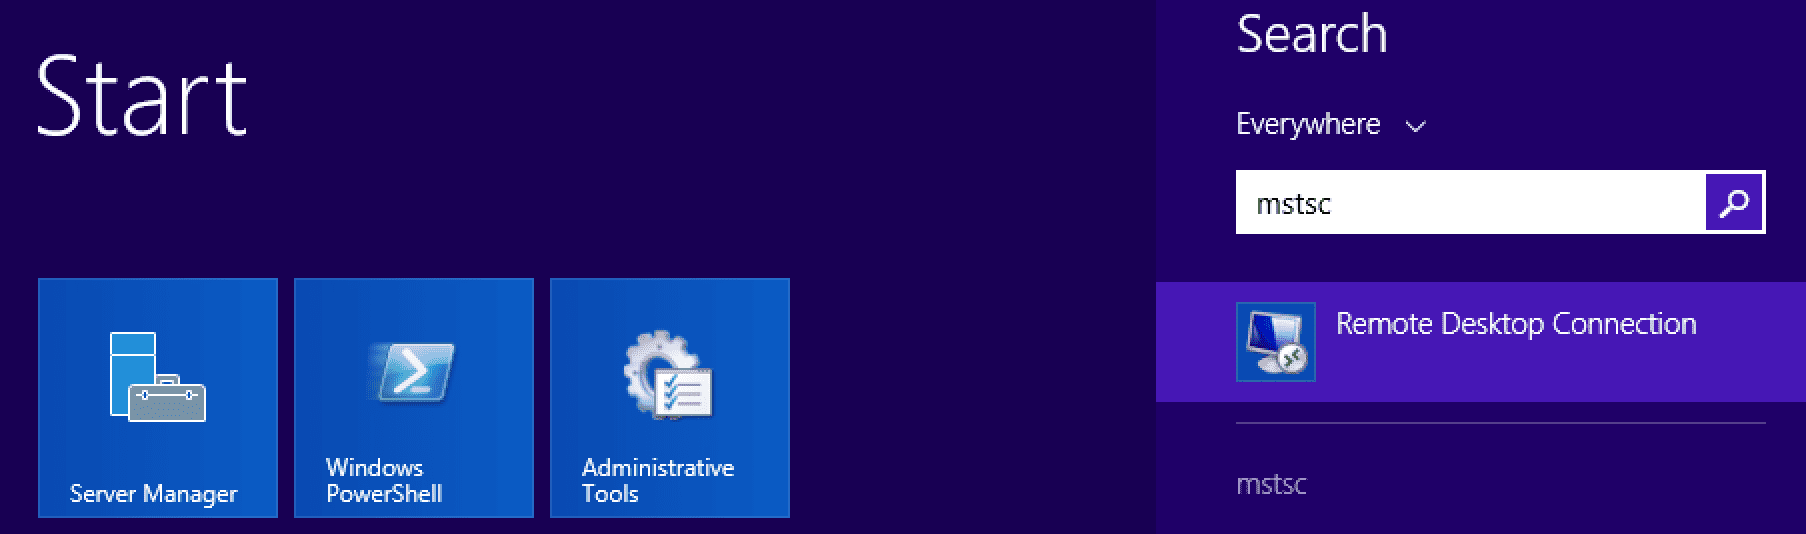
- Click the Windows “Start” menu and search for mstsc. Subsequently, click to run the program.
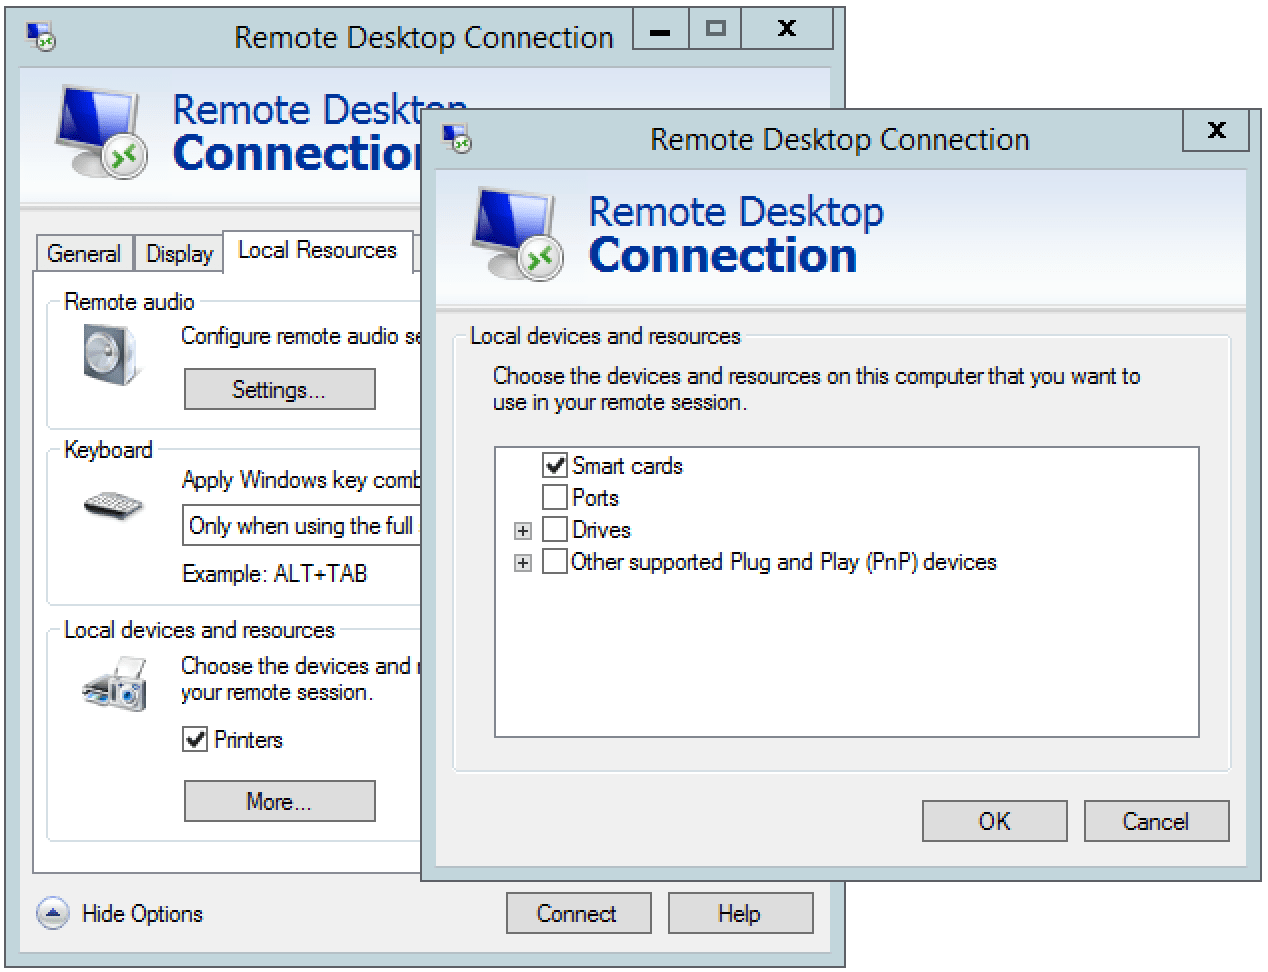
- From the mstsc dialogue, click “Options” → “Local Resources” → “More” and enable the “Smart Cards” option and click “OK” to apply the changes.
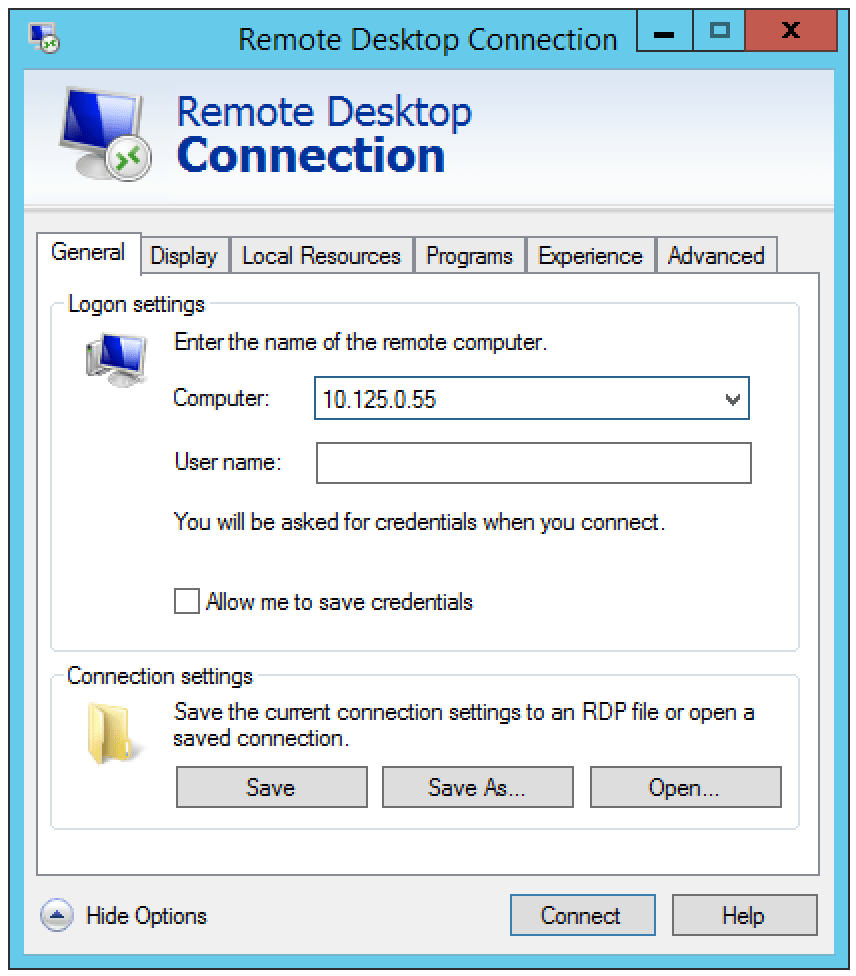
- Next, switch back to the “General” tab and enter the RDP server hostname or IP address. Click “Connect” to proceed.
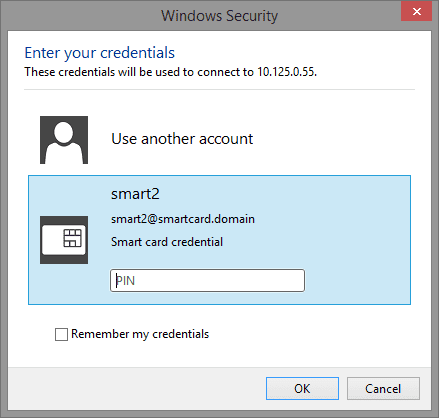
- The “Windows Security” window allows you to connect via domain credentials or smart cards. For this test, ensure that the smart card reader is connected to the client machine, and the smart card is inserted.
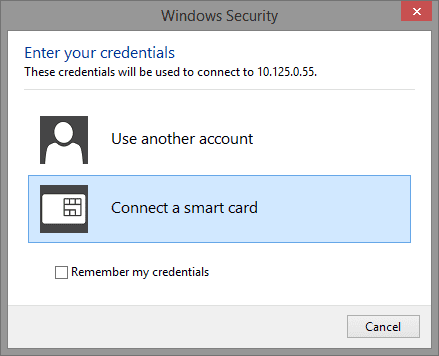
- You will then see the Windows domain user configured in stage 1, point 1. Enter the PIN assigned to the smart card. Click “OK” to connect to the server.
If configured correctly, the remote desktop session should be established without prompting for authentication. If the test is successful, move to Stage 3, otherwise revisit the configuration prerequisites outlined in Stage 1.
Stage 3: Configure Parallels Remote Application Server for Smart Card Authentication
Install the Parallels Remote Application Server Publishing Agent on a Windows server joined to the smart card domain configured in Stage 1, point 1. The Terminal Server Agent should be pushed to the RDP server referenced in Stage 1, point 3. At this stage the Parallels Remote Application Server will be set up to authenticate users via smart cards.
- From the Parallels Remote Application Server console, select the “Connection” category → “Authentication” and from the “Authentication type” dropdown, select “Smart Card.“
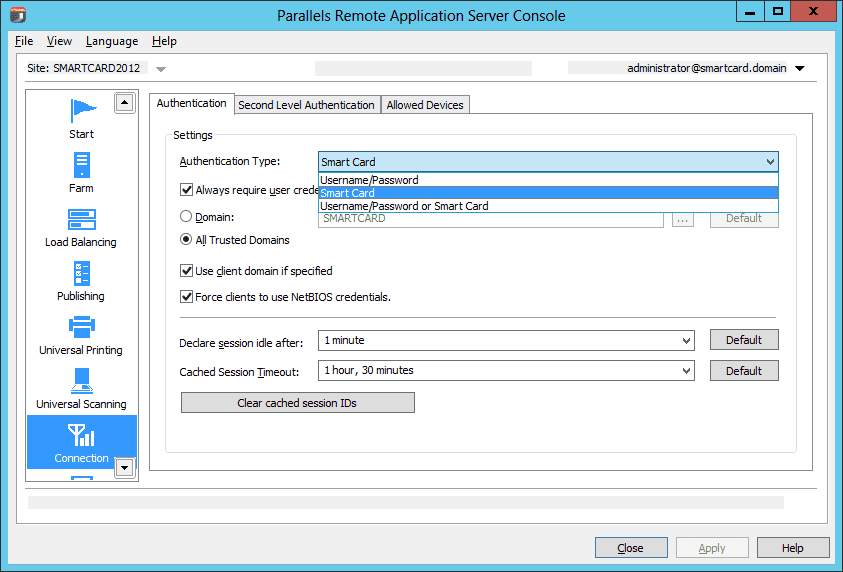
- Click “Apply” to finalize the configuration.
Stage 4: Configure Parallels Client
Smart card authentication configuration is supported on the Parallels Clients for Windows and Linux. In this example, the Parallels Client for Windows will be configured to authenticate with Parallels Remote Application Server via smart card.
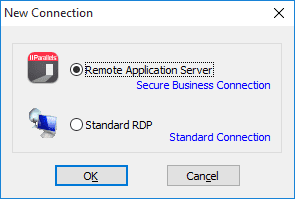
- Run the Parallels Client and click “File” → “Add New Connection” → “Remote Application Server.”
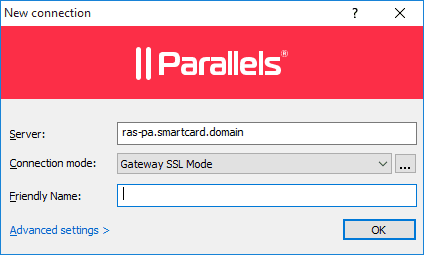
- In the “Server” text box, enter the server IP address or hostname of the server where the Publishing Agent is installed.
- Next from the “Logon” dialogue → “Authentication Type” dropdown select the smart card and click “Connect.”
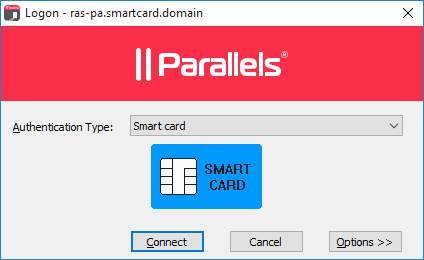
- Ensure the smart card reader is connected and insert the smart card.

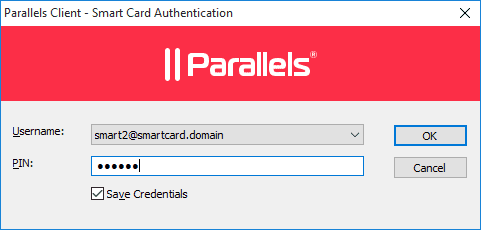
- Next, the user should match to that configured in Stage 1, step 1. Enter the PIN associated with that user and click “OK” to log in.
Applications and desktops published from Parallels Remote Application Server are now listed. Click to access any of these resources without being prompted for credentials.
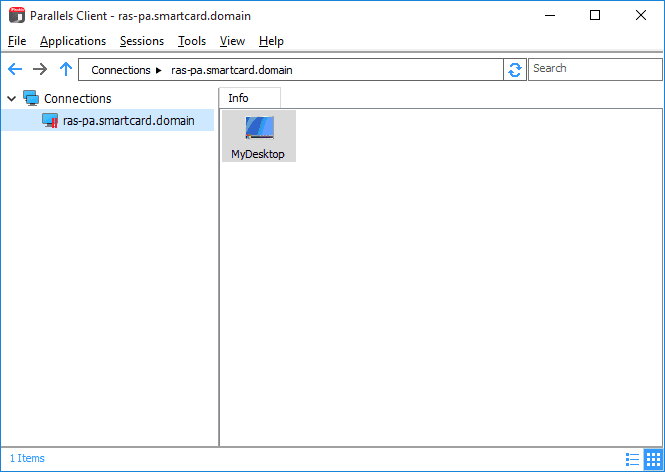
Congratulations! You have successfully logged in using smart card authentication configuration.
Try a free 30-day trial of Parallels RAS today.