
How to “Refresh” Your Windows VM in Parallels Desktop
Guest blog by Sergei Bobrovnik, Parallels Support Team
Sometimes Windows hangs, freezes, or works slowly. Sometimes you can’t install an application, use the Internet, or errors start popping up. There are many different issues that can bar you from enjoying the performance of your Windows virtual machine or PC. These problems may be signs that some of the Windows system files and registry entries have been corrupted.
Once you’ve successfully configured your shiny new VM with your Windows installation, it might become slower after you install programs or antivirus software, or download lots of files from the Internet. If that’s the case, the first thing to do is to tune your VM for the best performance. If tuning does not help, then it’s time to refresh your Windows.
Before getting started, let’s take a deep breath and…backup your virtual machine!
In this post, I will describe how to refresh your system for the most recent Windows OSes–Windows 8.1 and the Windows 10 Technical Preview.
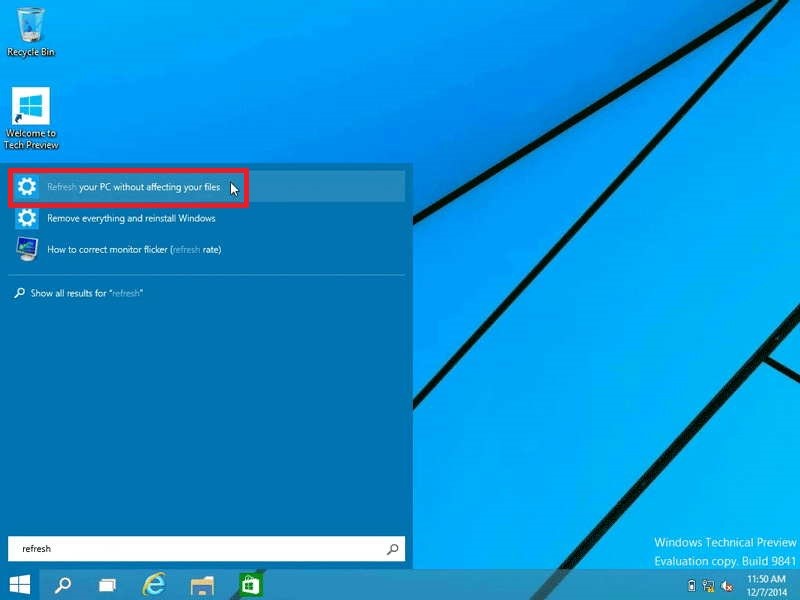
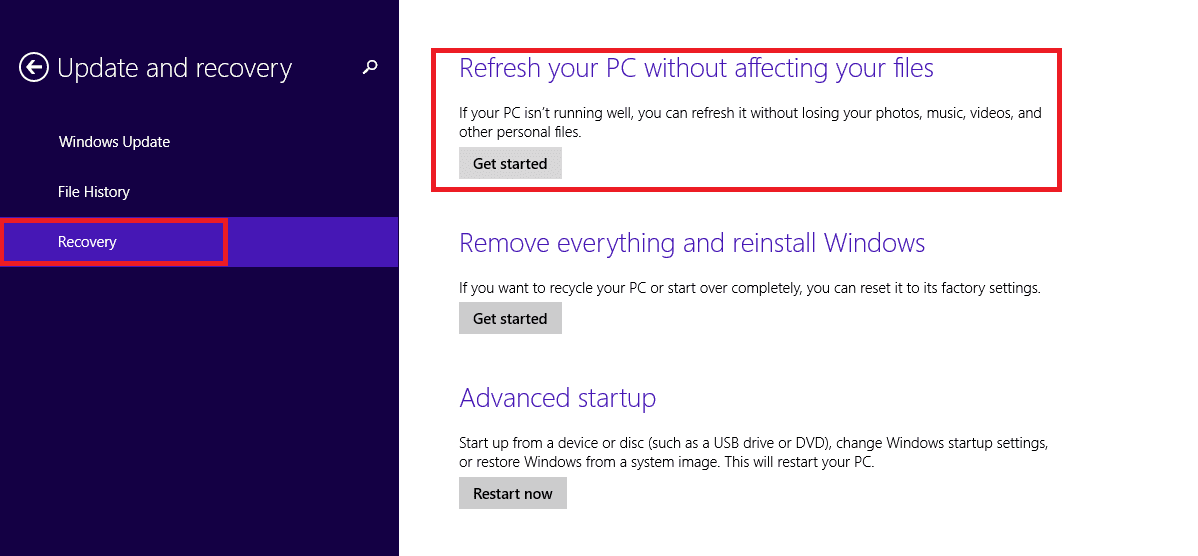
First, you need to open the Recovery section in your PC Settings. The easiest way to do this is to use the search bar (Click on the Windows logo and type “Refresh” in the search line). Once located, choose the Refresh your PC without affecting your files option.
Here’s how that looks in Windows 10:
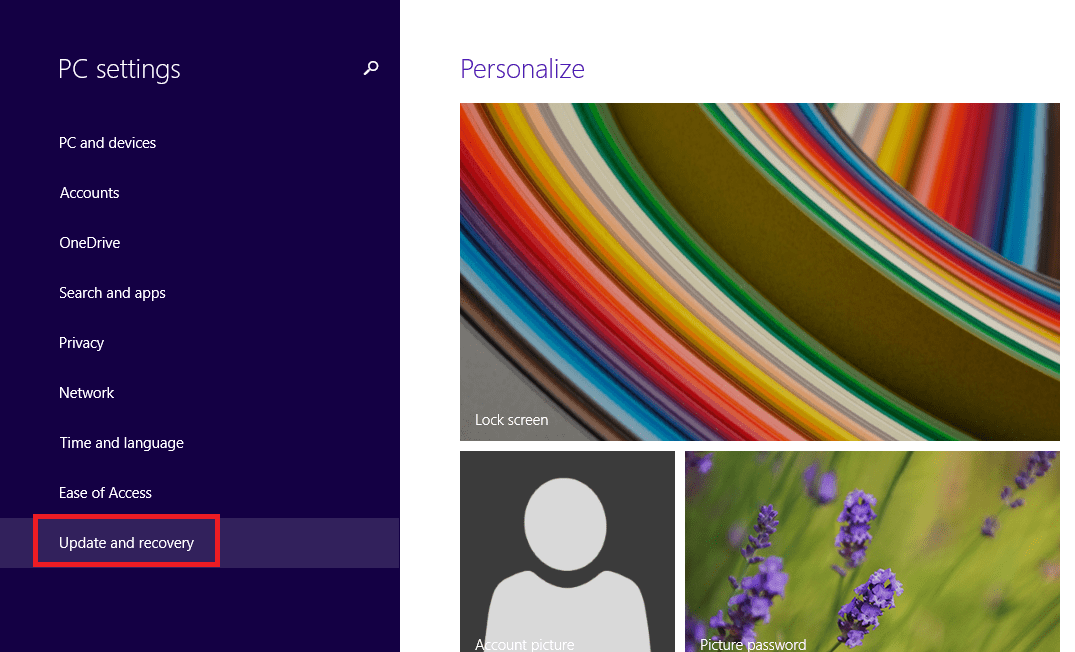
It’s similar in Windows 8.1. Just type in “PC Settings”, click on it, and select Update and Recovery. Again, here’s how that looks:
Next switch to Recovery, choose Refresh your PC without affecting your files and click on Get Started. This step will be similar for both Windows 10 and Windows 8.1:
There is one slight difference between 8.1 and 10—see below:
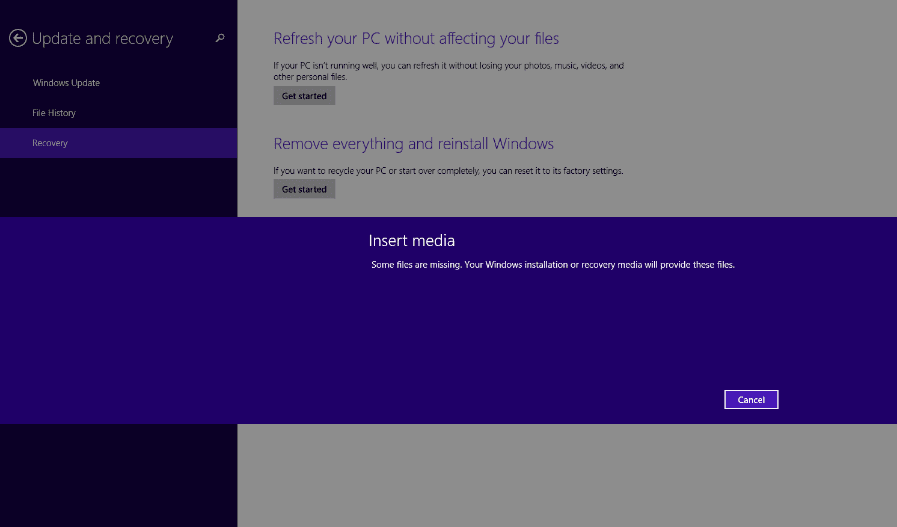
Windows 8.1 will ask you to insert an installation media (ISO file or CD). Please insert (or connect) it and try again–the process should continue. This will not work with an .exe file, even if you used it for upgrading an older version of Windows.
Windows 10 Technical Preview will not require the disk.
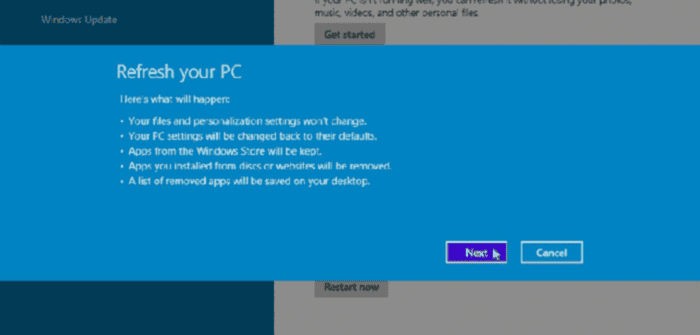
In the next step, Windows will show you a popup with what will happen when you refresh your OS.
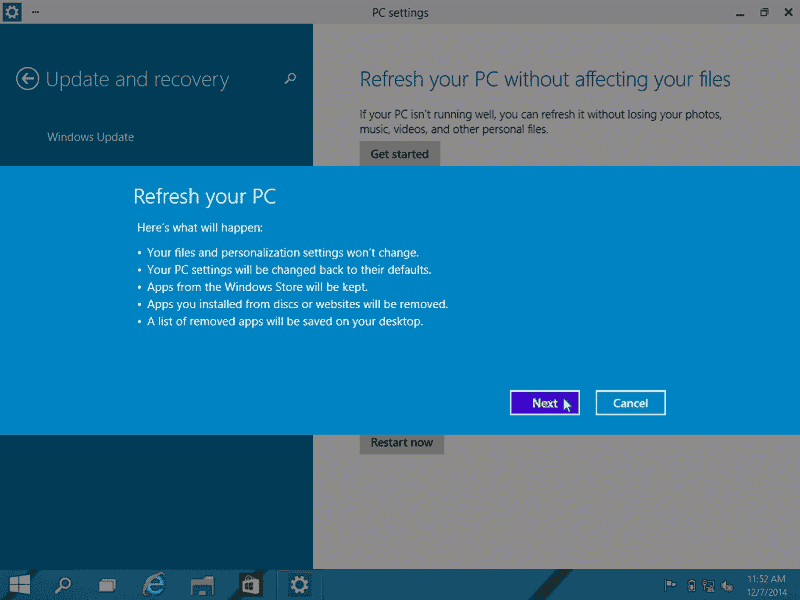
Things that will be removed after refreshing your Windows 10:
- All the applications or software you installed from CDs/DVDs or from the Internet (such as third party PDF reader software or image editing programs) will be removed.
- Your PC settings will revert back to their defaults.
Things that will not be removed after refreshing your Windows 10:
- Personal files such as music, videos, photos, documents, etc. and personalization settings will not be changed or removed.
- Applications that come with Windows 10 and apps installed from the Windows store will not be removed.
In addition, the list of removed apps will be saved on your desktop. The “Removed Apps.html” file on your desktop will list everything that “Refresh” had to remove – this works great as a checklist for reinstalling the required software.
To proceed, click on Next and choose Refresh.
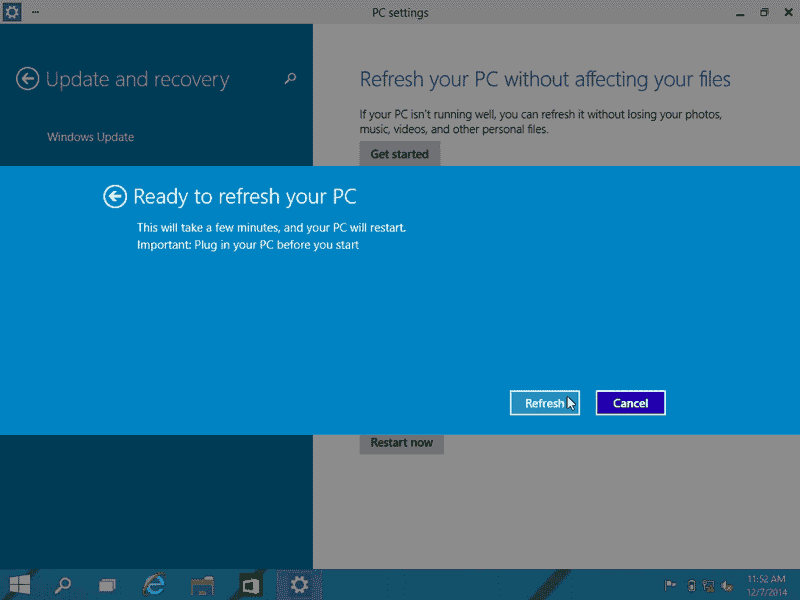
This process will take some time. In my case, it took approximately 20 minutes. (It depends on the resources for your VM.)
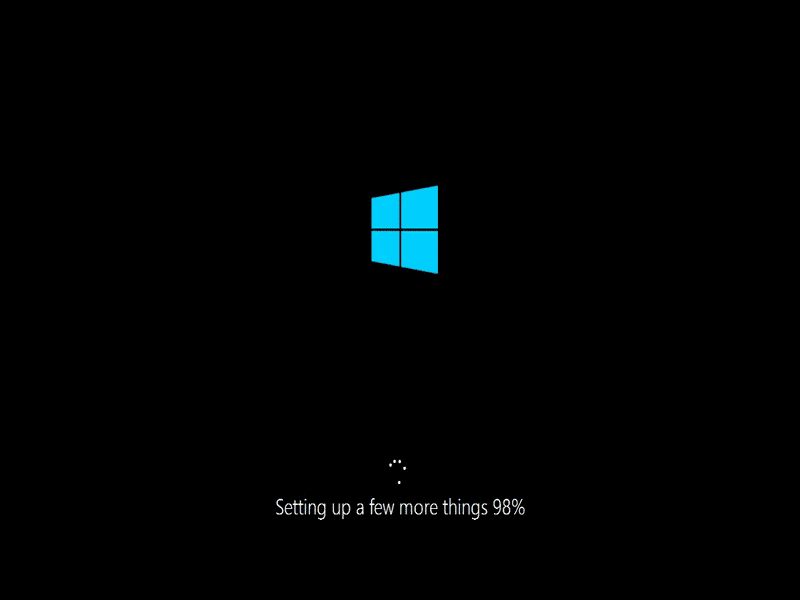
After your VM is refreshed, it should be as fast and reliable as a brand new VM.
What if your Windows fails with BSOD (the dreaded blue screen of death)?
No worries, this doesn’t happen often, but I’ll share some steps on how to handle this rare occurrence just to be on the safe side.
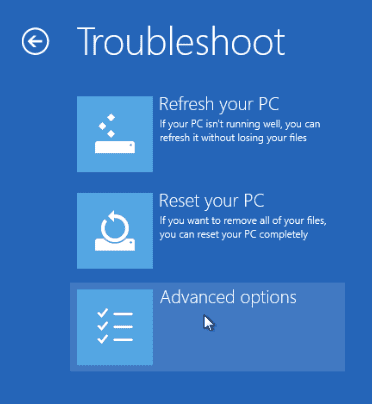
Here’s what to do if you encounter the BSOD:
- Click to start your Windows VM.
- Press F8 immediately after starting Windows (and for best results, continue pressing F8 until you see the Troubleshoot option).
- Click Refresh your PC, and Windows will try to fix your startup issue.
We hope this post helped speed up Windows in your Parallels Desktop VM. Don’t forget to follow Parallels Support on Twitter!