
Last updated on September 25, 2018
How to Remove a VM…and Bring It Back Again
The virtual machine (VM) files in Parallels Desktop® for Mac can be quite large—I have several that are over 100 GB. So if you’re not using a VM anymore (or just rarely use it), you can get back a lot of space on your Mac® by deleting it, or at least moving it to an external drive. In this short blog post, I’ll show you how to remove a VM—and how to bring it back again.
Removing a VM
Removing a VM is most easily done from the Control Center window in Parallels Desktop. Just right-click on the entry for the VM you want to remove, and you’ll get a pop-up menu with the Remove command. (See Figure 1.).
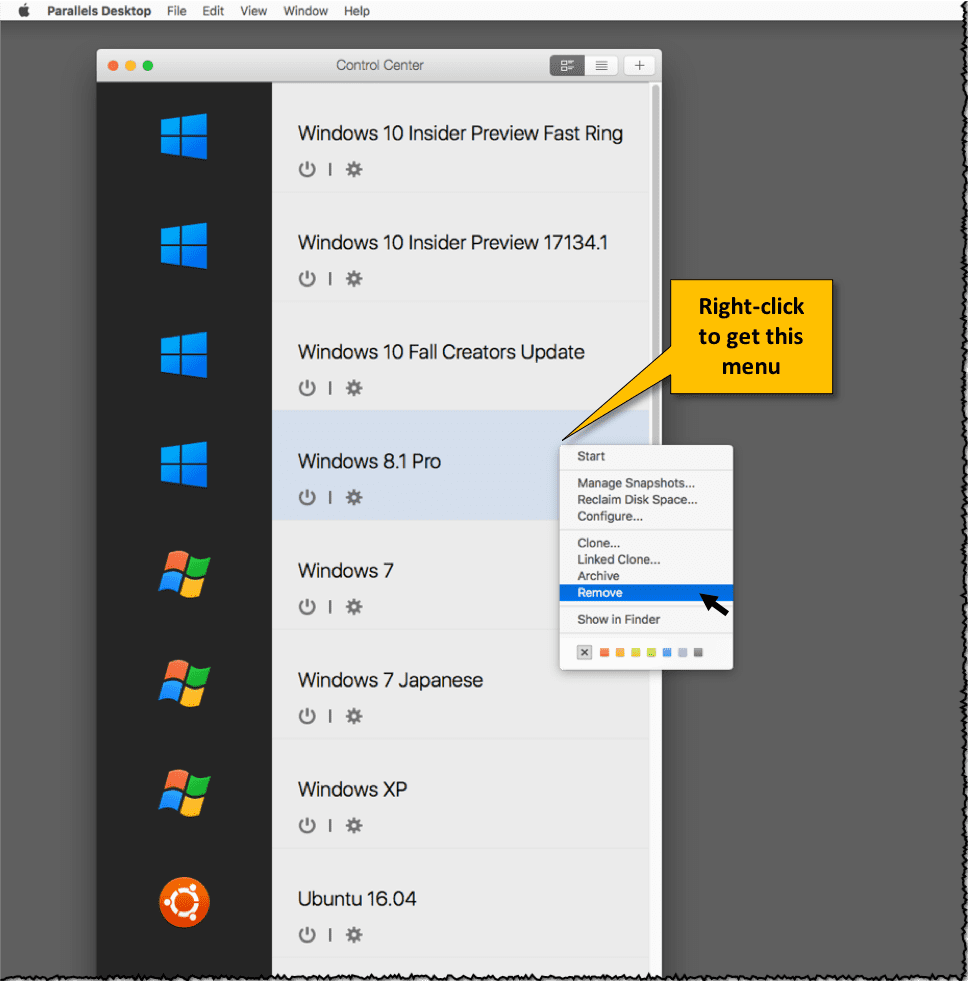
Figure 1_Remove a VM with the menu command in the Control Center
When you choose the Remove command, you’ll get the dialog shown in Figure 2.
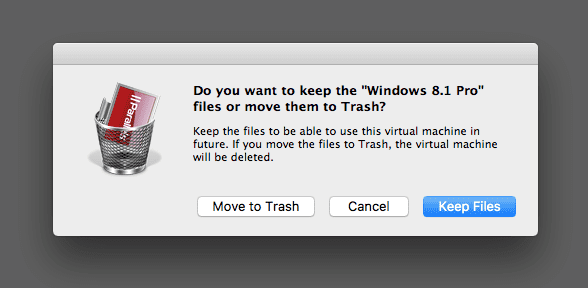
Figure 2_Choose what you want done with the VM
If you want to completely get rid of the VM, use the Move to Trash button. (Don’t forget to empty the trash to recover all that space on your Mac.) However, if you might want to use the VM again, use the Keep Files button.
Store the VM
Storing the VM on an external dive is easy; there’s only one file to put on the external drive, but it might be a rather large file. The .pvm file stores all the VM’s information: Windows itself, all the Windows applications you have installed, all the data files you’ve created, and all the VM settings (the amount of RAM you want this VM to have, the number of CPUs, the network settings, and more). Just move this single file to your external drive, as shown in Figure 3.
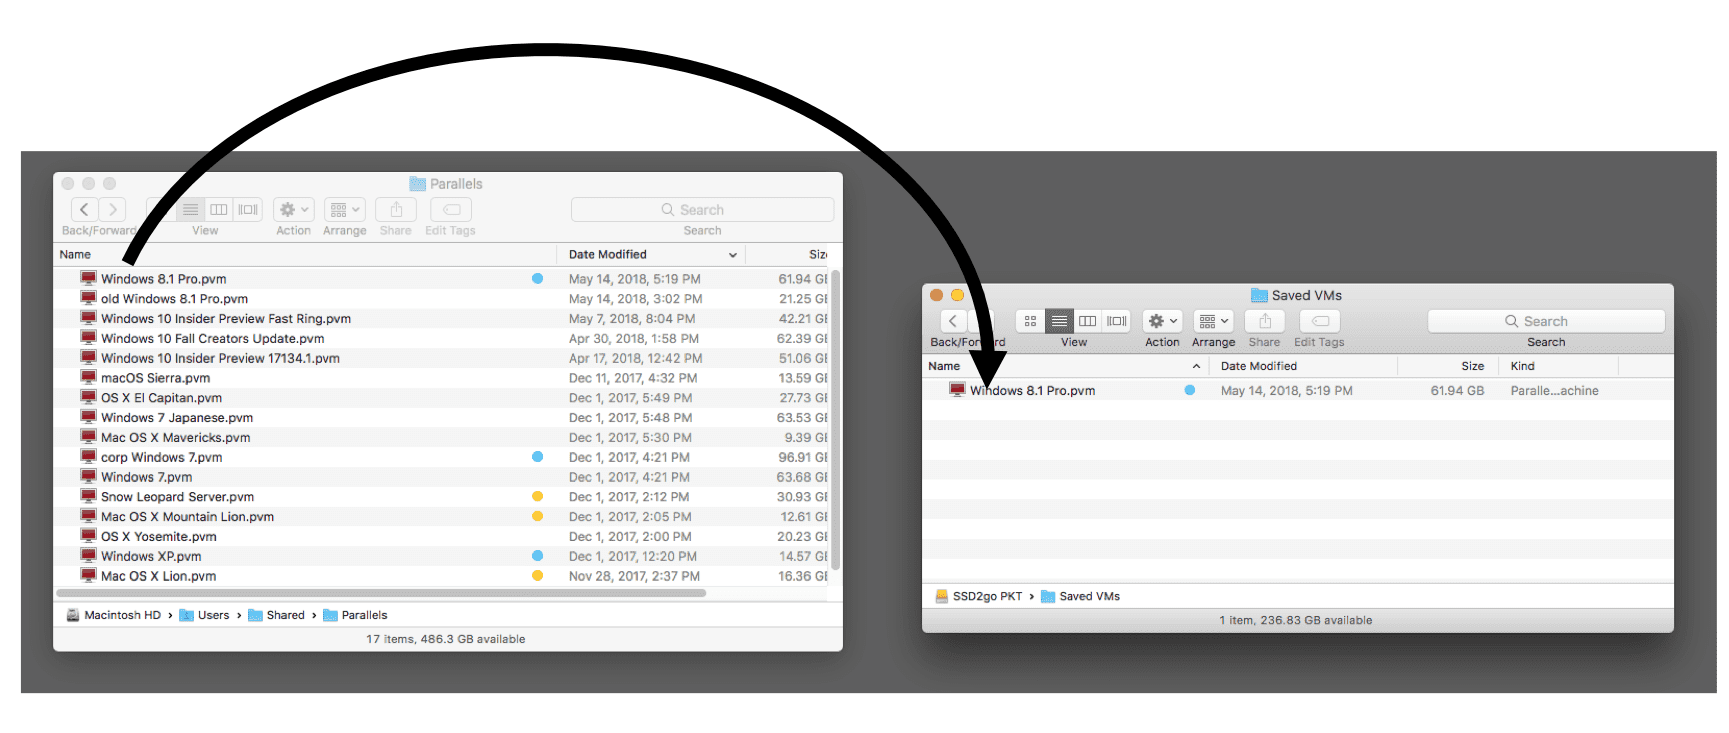
Figure 3_Moving a VM to an external drive
Restore the VM
Restoring a saved VM is also easy. First move the VM back to the place on your Mac where your VMs are located. Then just use the Open button on the Installation Assistant window to restore your VM to the Control Center list (See Figure 4.).
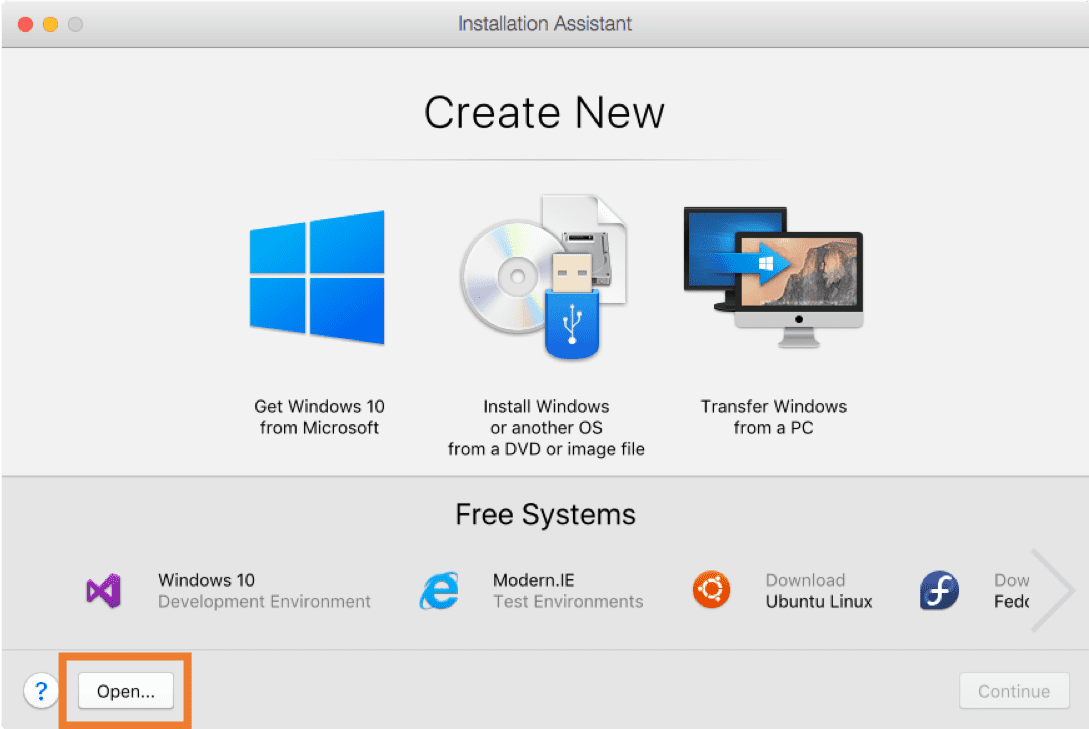
Figure 4_To restore a VM, use the Open button
If you see a dialog about duplicate MAC addresses (Figure 5), just click the Create new button.
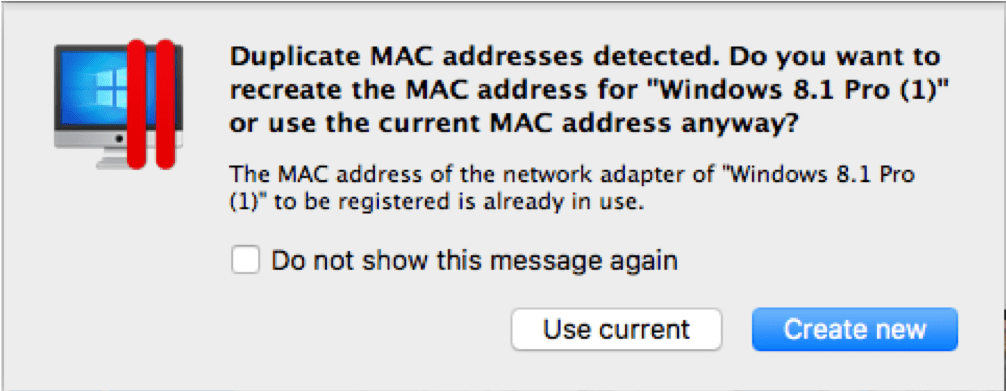
Figure 5_If duplicate MAC addresses are detected, just click the Create new button
I hope this blog post helps you manage VM files and save space on your Mac.
Try Parallels Desktop for free for 14 days!