
Diving Deep into Virtual Machine Performance
Guest blog by Anzhelika Khapaknysh, Parallels Support Team
When I buy new software, I expect it to be fast, smooth and reliable. And it doesn’t matter whether I buy it for my work, for study, or just to play my favorite game. However, sometimes things go wrong and the software becomes slow and unresponsive. Does that sound familiar to you?
Is your Windows virtual machine inside of Parallels Desktop running slow? Do your Windows applications take a long time to start? Many people don’t even try to fix this sort of issue, but in most cases it’s simply a matter of changing just a few settings! So don’t panic–let’s figure out together what’s wrong here.
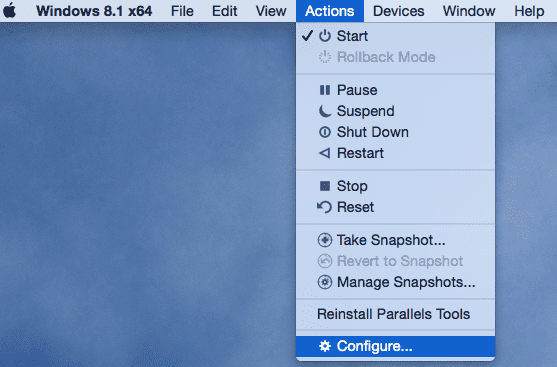
The first thing that you need to check is your virtual machine configuration. I prefer to open it from the Mac status bar:
So what do you need to check in this configuration window?
First, open the Memory & CPU menu under the Hardware tab. Set at least 1GB of memory for a Windows 7 VM, 1.5 GB for Windows 8/8.1 and at least 2 GBs for Windows 10 VM. These are the minimal requirements—you can assign a different amount of memory but make sure it’s within the recommended limits (green zone).
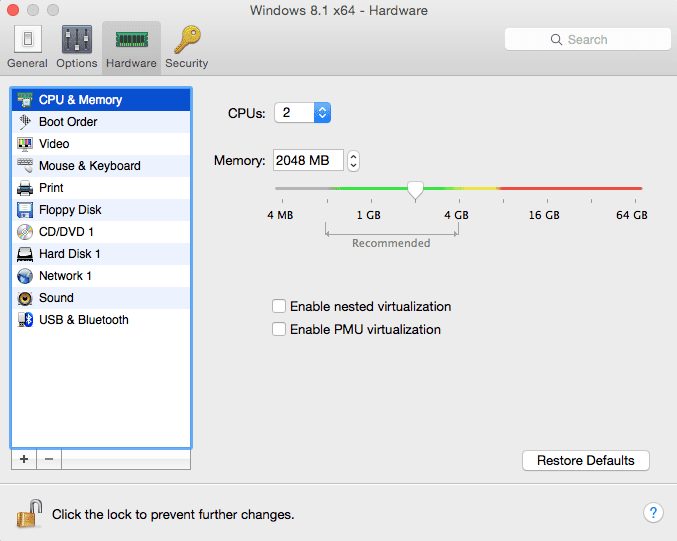
As for the number of CPUs, in most cases you don’t need more than 1 or 2 CPUs. Try both of these options and compare the Windows performance.
You can definitely assign more memory and CPUs but make sure that you don’t dedicate too many resources to your VM—it will only slow down both your Windows and Mac OS.
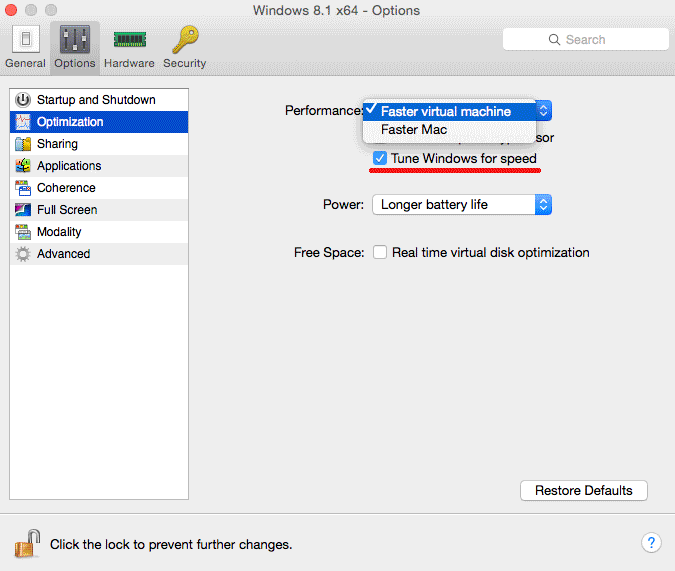
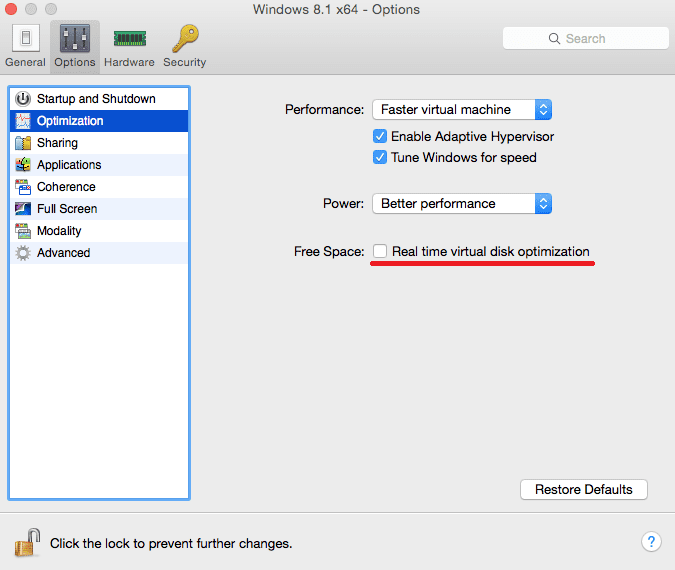
What else do we need in VM configuration? Switch to the Options tab and open Optimization settings. Choose the Faster virtual machine, Turn Windows for speed and Better performance options.
Another thing that will help us is Adaptive Hypervisor. If you have no idea what that is, this article will help. If you’re dreaming about a faster VM, it’s better to keep the Adaptive Hypervisor on.

You might also consider disabling the Real time virtual disk optimization option, as it may cause a slight slowdown to your VM at the time of processing. (Not all the time, of course.)
Now your VM is configured to perform its best. So, what are you waiting for? Fire it up! You should see several improvements—for example:
- It takes less time to start the VM
- There is no spinning wheel after you launch the VM (or it disappears much quicker) and you can start working on the Windows side right away
- Windows programs need less time to start
- Windows doesn’t become unresponsive
If all of the items above are true—congratulations, you did it!
But if you’re still not happy with the VM performance, let’s try a few more steps.
Windows performance depends on:
- Your VM configuration
- Your Windows OS configuration
That means if your VM is still slow after configuring it, you need to configure Windows itself. No worries—you don’t need to be a tech geek to do that. It’s easy—I’ll walk you through the steps!
Let’s start from the beginning.
After launching the VM, your spinning wheel doesn’t disappear fast enough and you need to wait before you can start working in Windows.
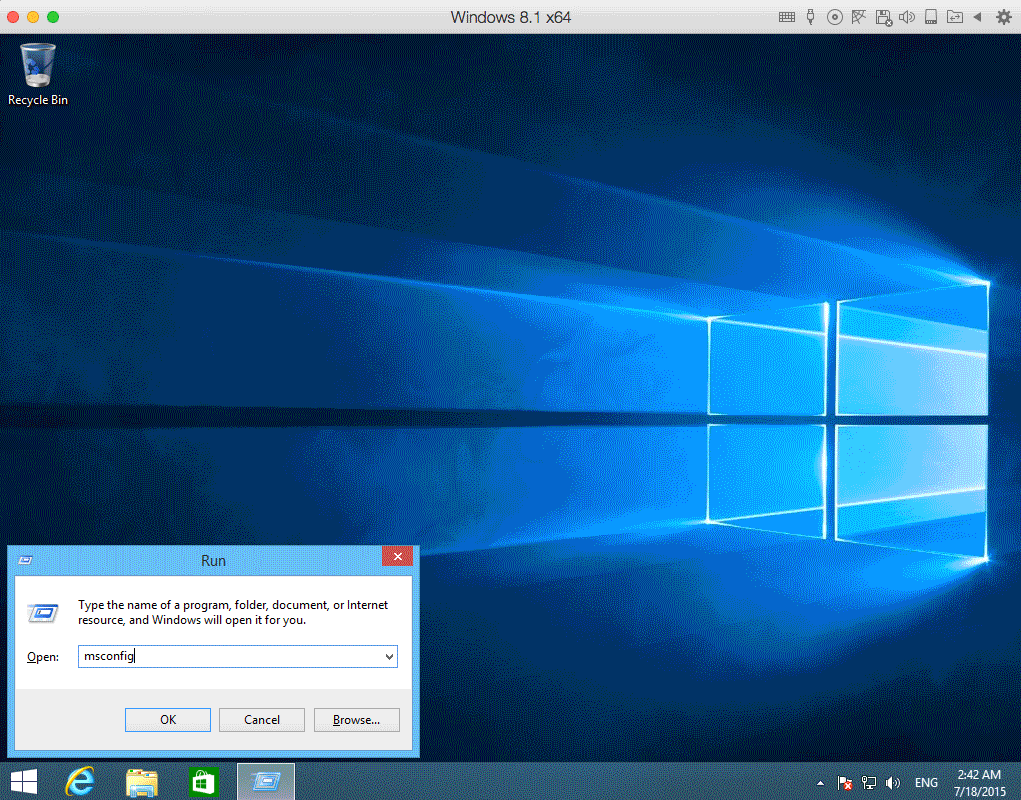
Most likely, you have way too many programs in Windows startup items. To check that, press CMD + R, type msconfig and press Return/Enter.
Go to the Startup tab (if you’re using Windows 8/8.1/10 you’ll be prompted to open Task Manager) and disable all the processes which aren’t related to the programs you really want to start automatically with Windows. Make sure you leave Parallels Tools and Coherence services on the list since these processes are an integral part of Parallels Desktop.
If you’re using Windows XP/7 you will be also asked to restart the system. You’ll see changes in your system performance for sure.
Let’s get back to another issue:
Looks like Windows works better. However, Windows applications need a lot of time to start.
Most likely this happens because of your antivirus. When you launch any Windows application, antivirus scans for any suspicious behavior. This takes CPU resources and prevents applications from starting faster.
To check if antivirus is the reason behind this, try to disable it and compare the difference in performance. It’s actually normal for antivirus to slow down the process of launching your programs. After all, you’ve installed the virus protection software to keep your system safe. Totally worth waiting a few extra seconds!
Now it’s time to discuss one last point:
Windows becomes unresponsive from time to time.
As we’ve already configured your VM, we need to find the reason for the slow performance inside Windows.
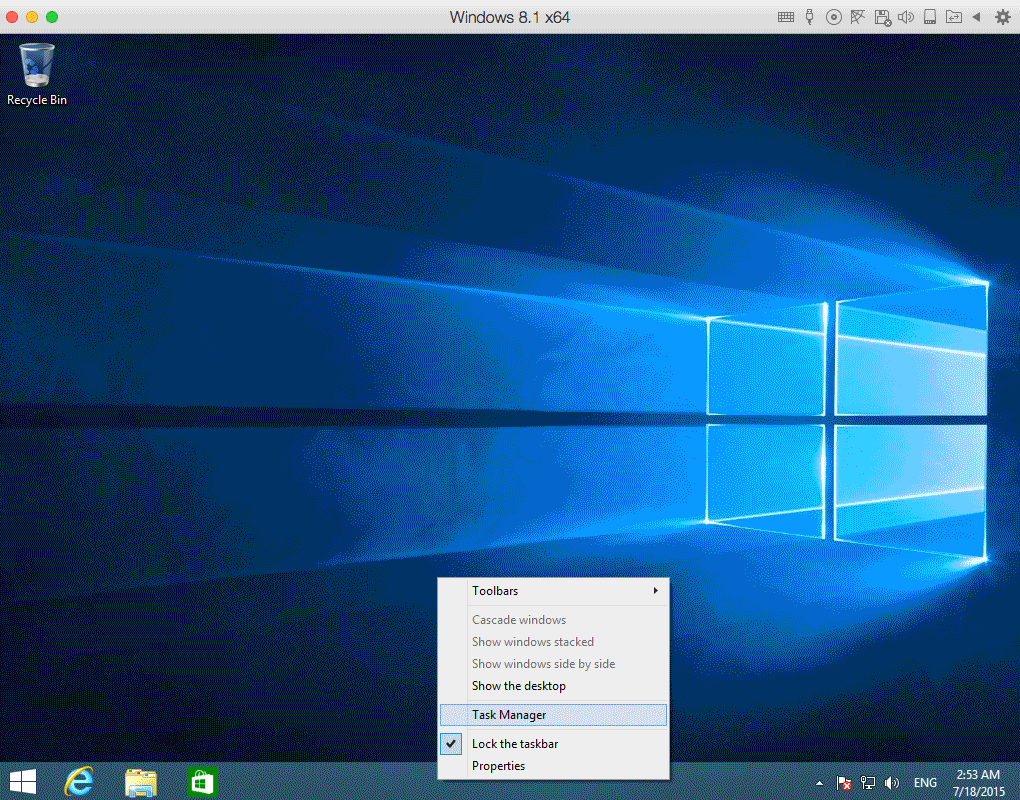
Let’s open Task Manager and see all the processes running in your Windows OS. Here’s how to do it: right-click on task bar and choose Start Task Manager from the pop-up menu.
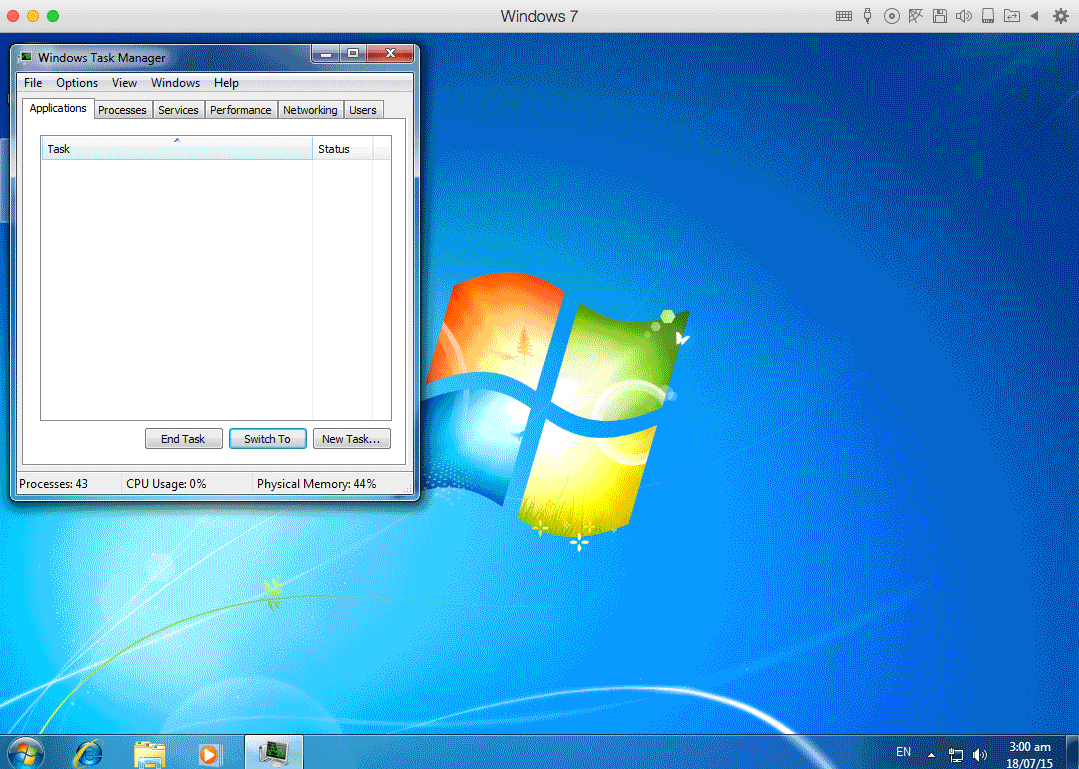
If you’re using Windows 7, switch to the Processes tab and choose Show processes from all users in the left corner to see all the processes:
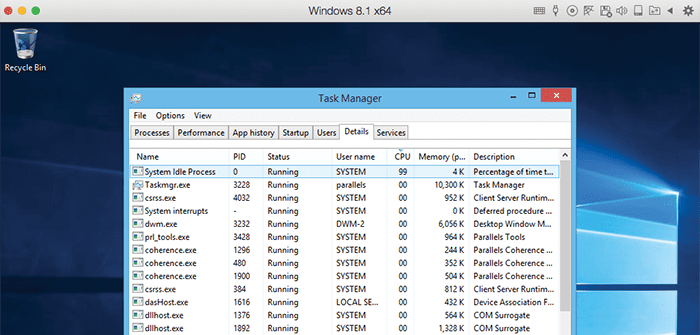
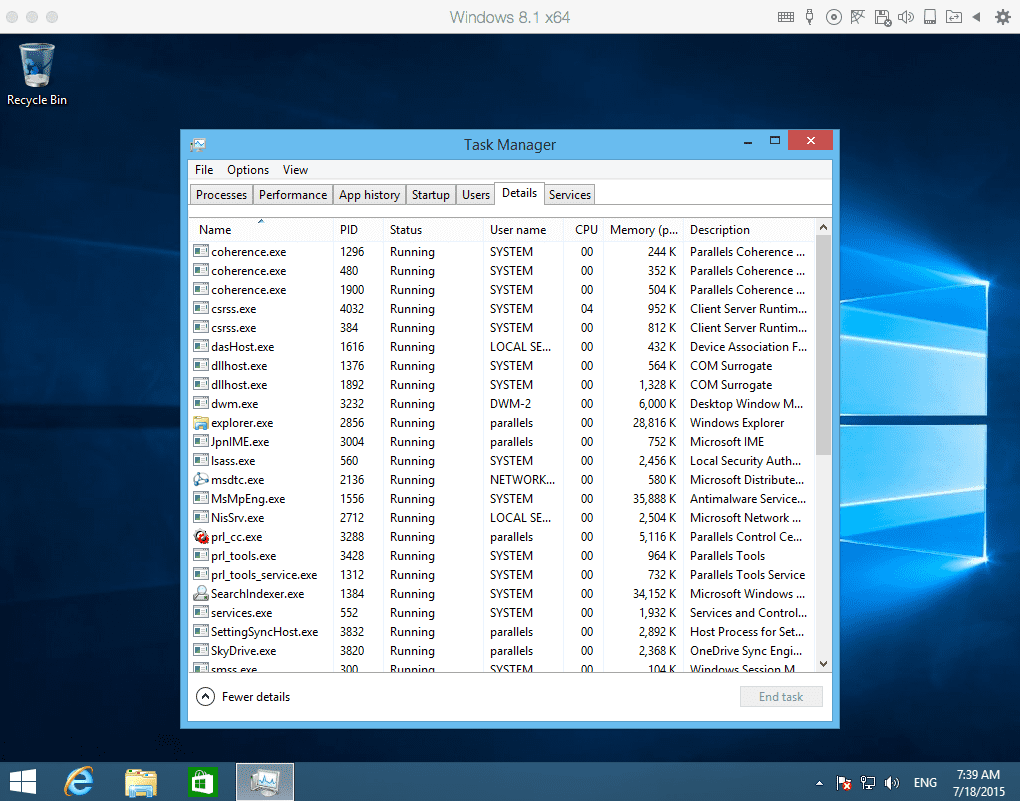
If you use Windows 8/8.1 or 10, then open the Details tab:
Now click on the CPU column and you’ll see that all processes are now displayed in descending order. Normally you should see that System Idle Process take 85+%:
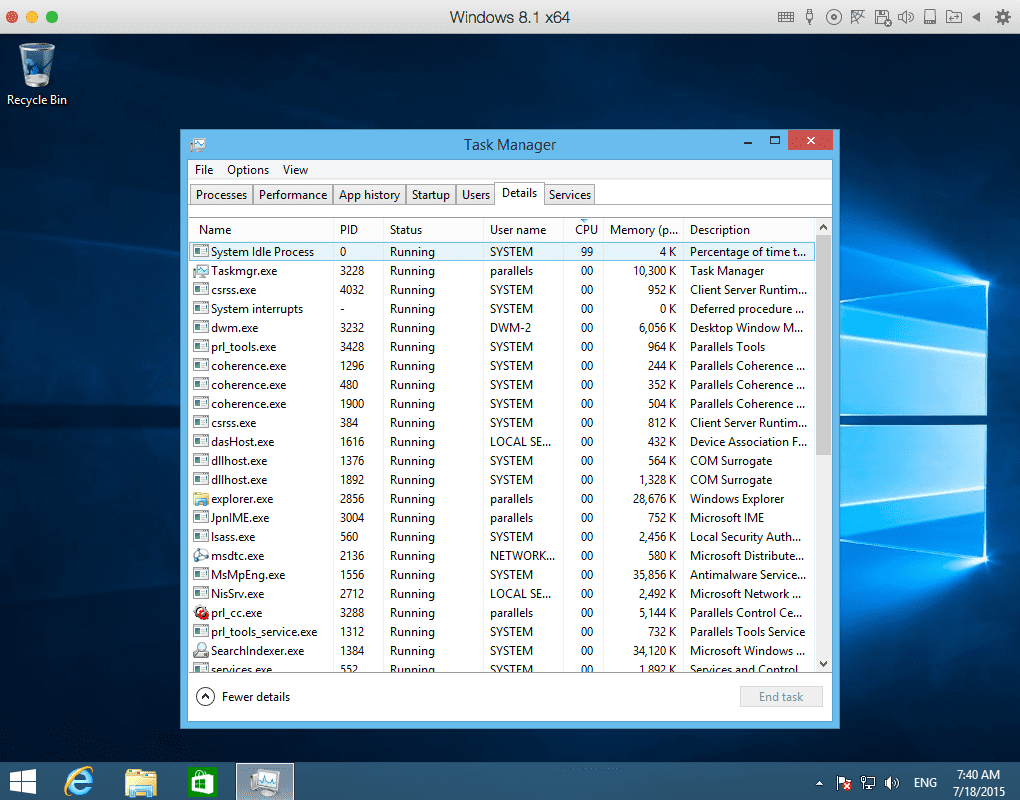
This process shows you how many CPU resources are free in your Windows OS in real time. What do we need to check in the Task Manager? Spot all processes that take more than 15% of CPU. Some solutions on how to get rid of them are available in our knowledge base by searching the name of the process. Others can be found on the Internet.
Most of these processes are Windows-related and this slow performance issue can occur on a real PC, not just in a VM. When you Google it, you may find a solution which worked for other users. Just make a backup if you aren’t sure if the fix is safe.
As you can see, it’s pretty simple and straightforward to turn your VM into a rocket (performance-wise, of course!).
We hope this blog helped you speed up your VM—don’t forget to follow the Parallels Support team on Twitter!