
Last updated on July 19, 2022
0
Configuring RDSH Server and Adding Publishing Agents to Parallels RAS
This section outlines how to add Remote Desktop Session Host (RDSH) servers and Parallels® RAS Connection Brokers (formerly Publishing Agents) to a Parallels RAS Farm directly from the Parallels RAS Console.
Add RDSH Servers
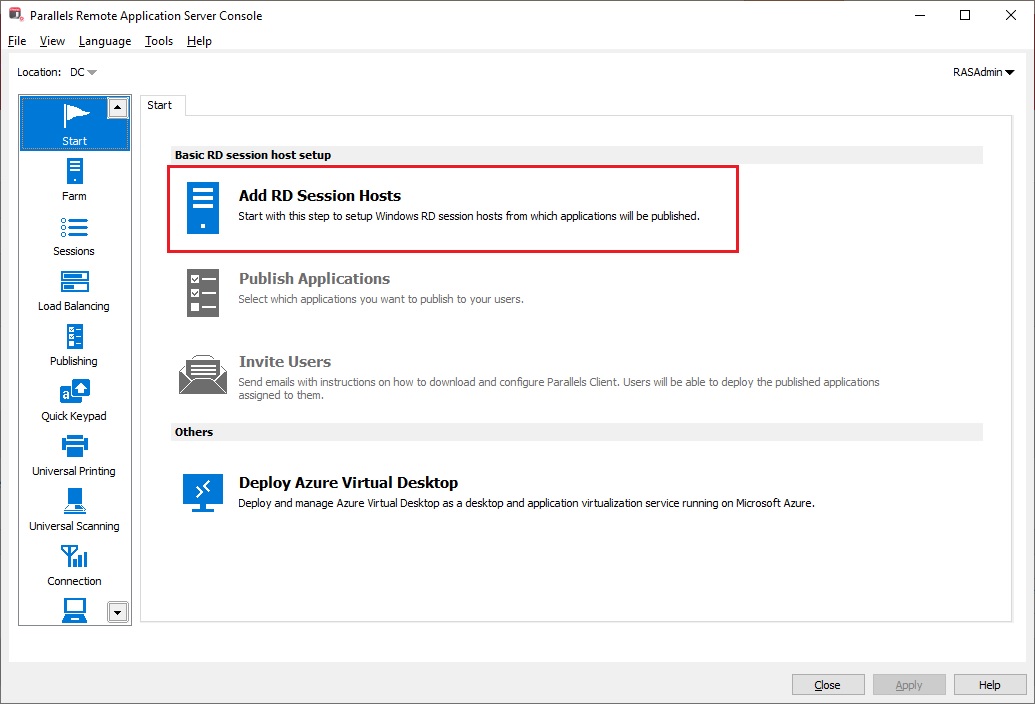
To add an RDSH to the Parallels RAS Farm, follow the steps shown below. This guide will add the local server on which Parallels RAS is installed.
- Click Add RD Session Hosts. The Add RD Session Hosts wizard opens.
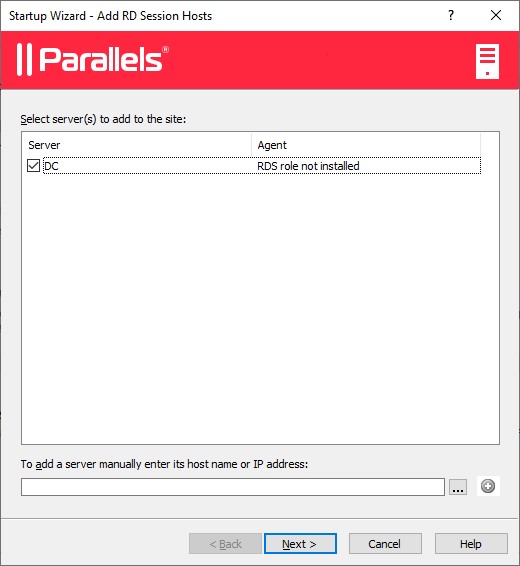
- Select a server or type a server fully qualified domain name (FQDN) or internet protocol (IP) address and then click the plus-sign icon to add the server to the list. If you are testing this by adding the localhost and see the FQDN warning, you can ignore it. Click Next.
- The page with general settings opens:
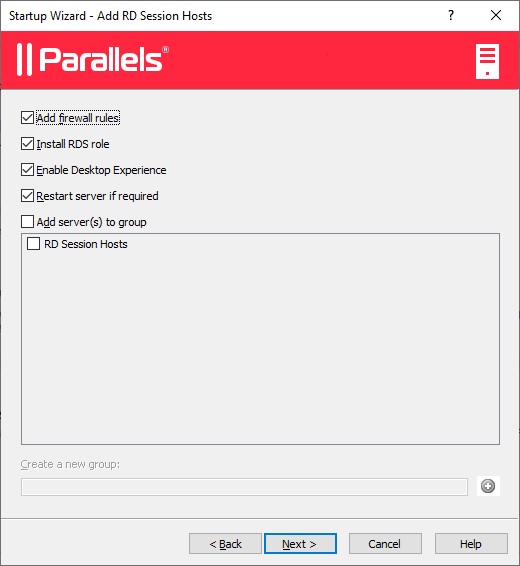
-
- Add firewall rules. Add firewall rules required by Parallels RAS in Windows running on the server.
- Install RDS role. Install the RDS role on the server if it is not installed. You should always select this option.
- Enable Desktop Experience. Enable the Desktop Experience feature in Windows running on the server.
- Restart server if required. Restart the server automatically if necessary. You can restart the server manually if you wish.
- Add server(s) to group. Add the server or servers to a group. Select the desired group in the list box located below this option.
Click Next.
- In order for end users to access published resources on the RDSH, they must be added to the Remote Desktop Users group in Windows running on the server. To add users to the Remote Desktop Users group using the wizard, select the Specify users or groups to be added to the Remote Desktop Users group option and then click the [+] icon. In the Select Users or Groups dialog, specify a user or group and click OK. The selected user/group will be added to the list on the wizard page.
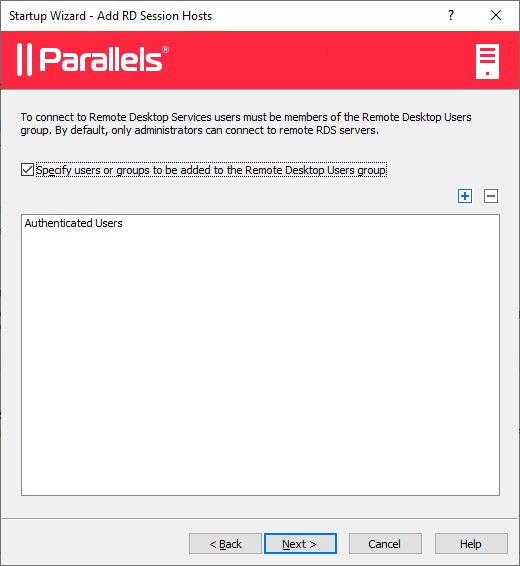
Click Next.
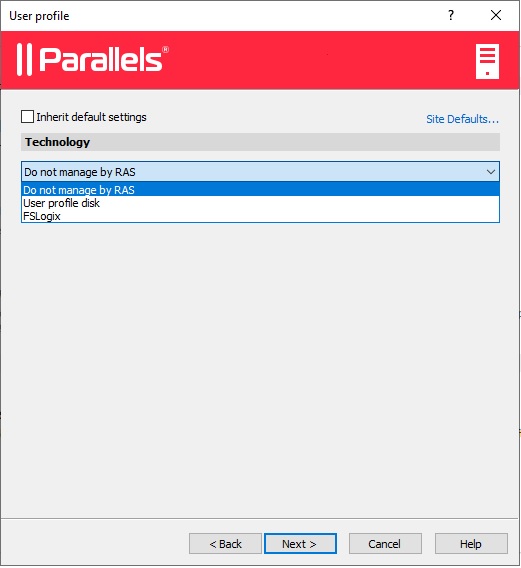
- The User profile page allows you to select a technology to manage user profiles. You can select User profile disk or FSLogix.
- The Optimization page allows you to specify settings that will be used to optimize Windows on the RDSH for best performance in a Parallels RAS environment.

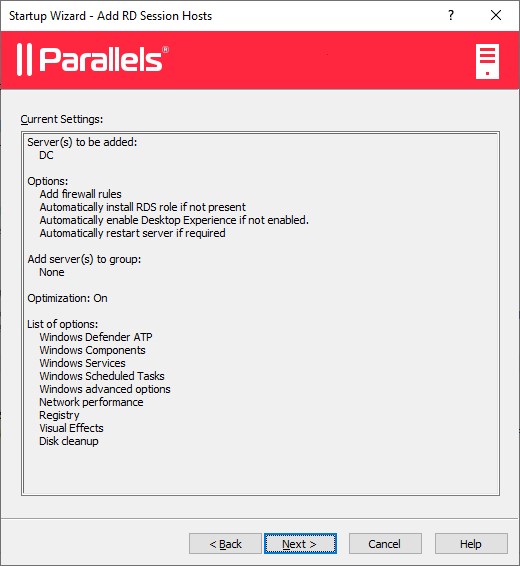
- On the next page, review the settings and click Next.
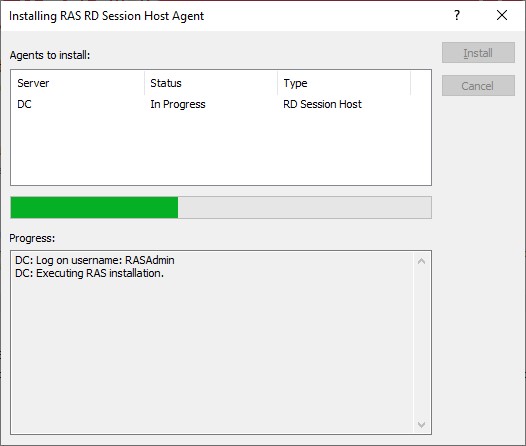
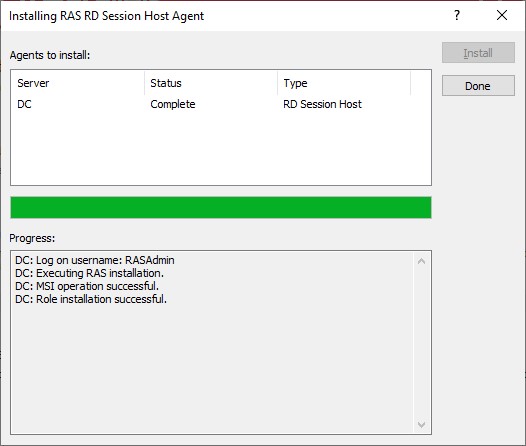
- The Install RAS RD Session Host Agent dialog opens. Follow the instructions and install the agent. When the installation is finished, click Done to close the dialog.
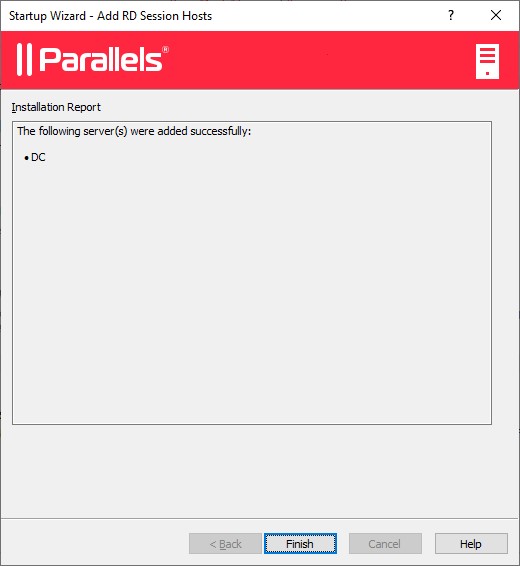
- Back in the wizard, click Finish to exit.
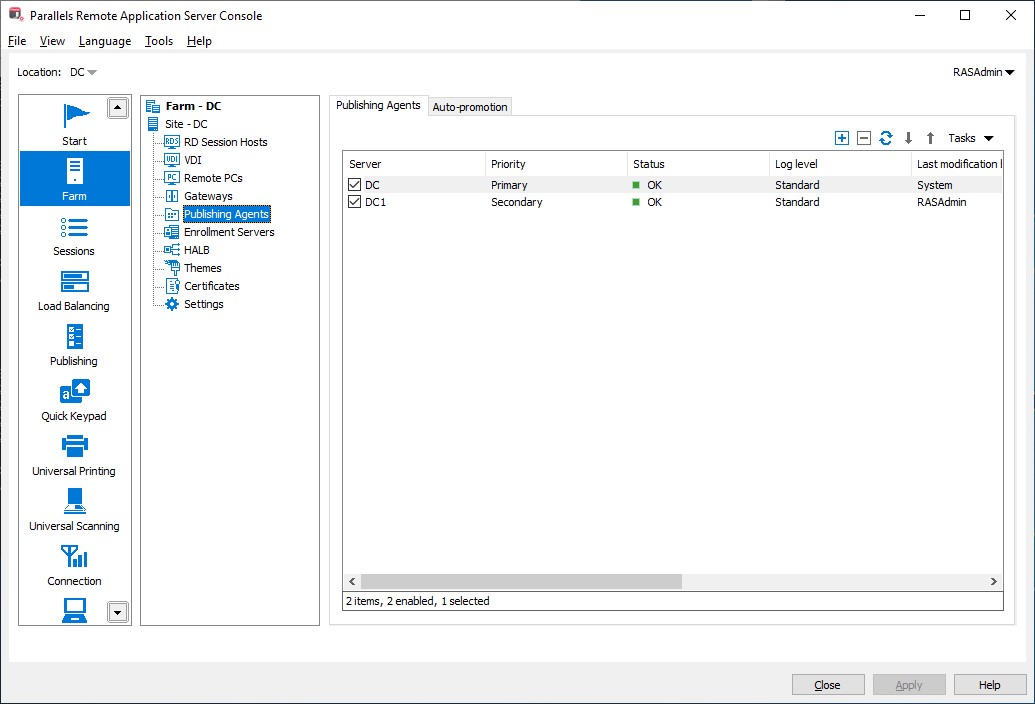
Add Publishing Agents
To add a secondary Parallels RAS Publishing Agent to a Parallels RAS Site, follow these steps:
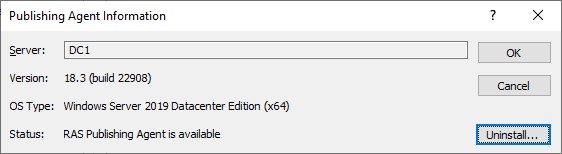
Note: From Parallels RAS 19, the terminology for Publishing Agent will change to Connection Broker.
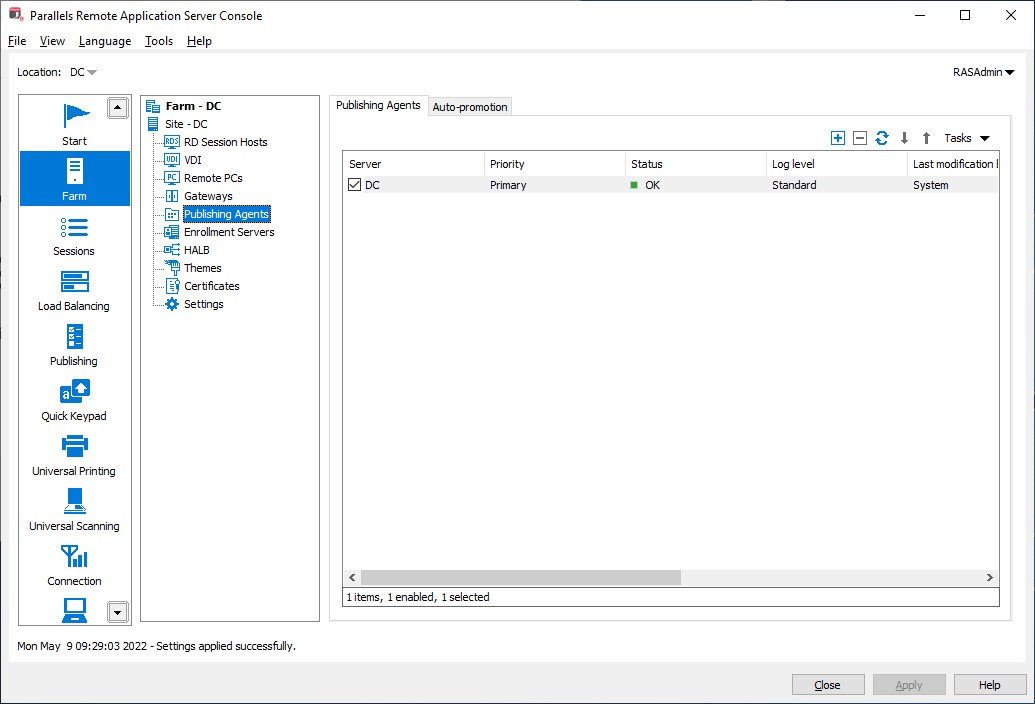
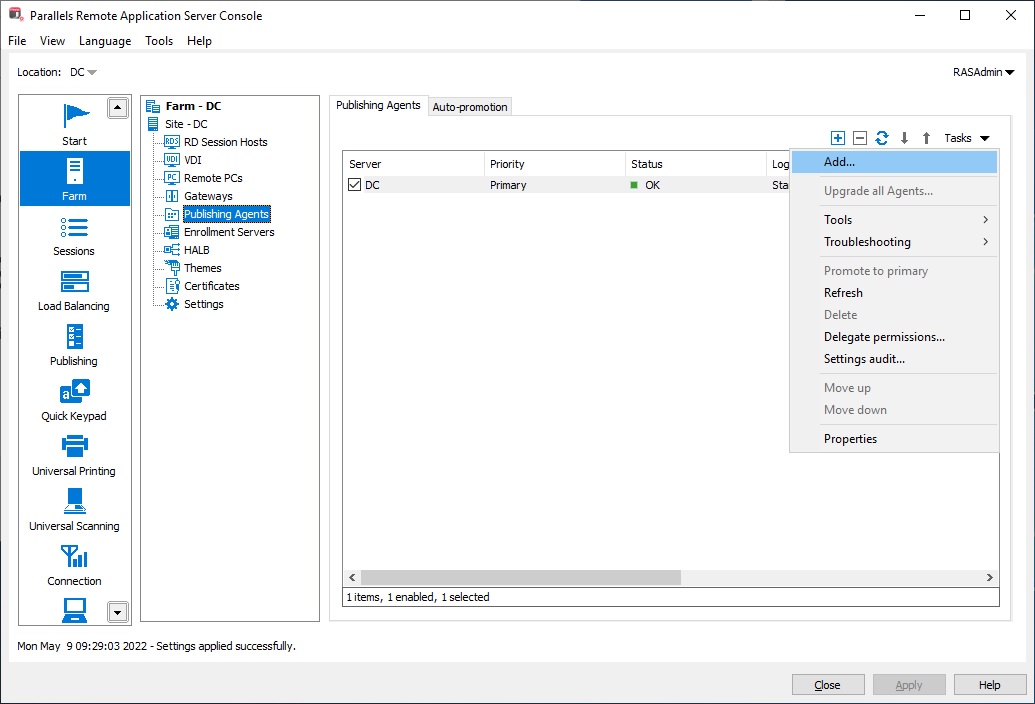
- In the Parallels RAS Console, navigate to Farm <Site> Publishing Agents.
- Click the Tasks drop-down menu in the upper-right corner and choose Add to launch the Add RAS Publishing Agent wizard.

- Select the Install a gateway with a publishing agent option if you also want to install a Parallels RAS Secure Client Gateway on the specified server. If you select this option, you may also select the Add an SSL certificate and enable HTML5 Gateway option.
- Select the Add Firewall Rules option to configure the firewall on the server automatically.Click Next.
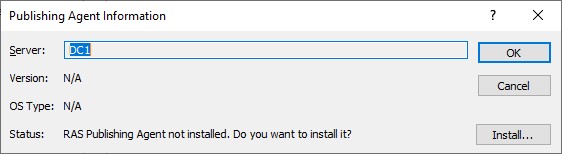
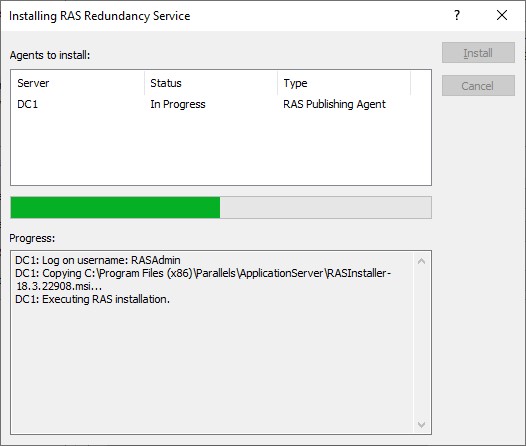
- On the next page, click Install to install the RAS Publishing Agent on the server.
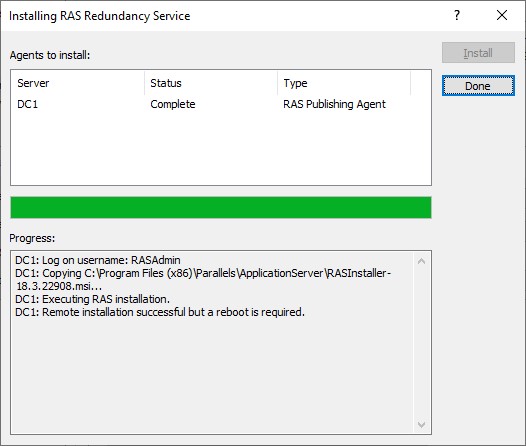
- Click OK to add the server to the Farm.