


Student discount on Parallels Desktop: 50% off
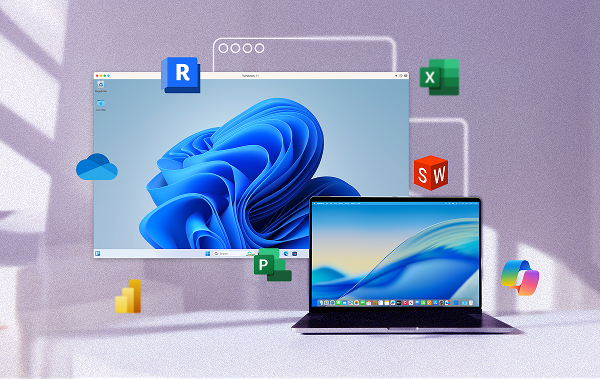
Run Windows-only class software like SOLIDWORKS, Revit, and Power BI right on your Mac with Parallels Desktop Pro Edition—and save when you verify your education status.
Parallels Desktop for students and educators
Run every Windows app your courses require, right on your Mac. No second device needed.
One student discount program. Three types of learners.
Students, educators, and parents all qualify for 50% off Parallels Desktop Pro Edition. Verify your status once. Discount renews annually.


Find the right fit for your academic needs
| Standard | |
| Best for Light home use | |
| Core components |
|
|
Maximum virtual RAM and CPUs
|
8 GB vRAM, 4 vCPUs |
|
Supports latest versions of macOS, Windows, and Linux
|
Subscription only |
|
Authorized by Microsoft and SOC 2-certified
|
|
|
3D acceleration—DirectX and OpenGL
|
|
|
Run thousands of Windows apps on your Mac
|
|
| BuyUpgrade | |
| Most Popular | |
| Pro All the Standard features PLUS: |
|
| Best for Power users and developers | |
| Core components |
|
|
Maximum virtual RAM and CPUs
|
128 GB vRAM, 32 vCPUs |
|
Supports latest versions of macOS, Windows, and Linux
|
|
| Advanced capabilities |
|
|
Run Windows apps with intensive graphics and processing needs
|
|
|
Command line interface
|
|
|
Built-in developer tools
|
|
| System tools |
|
|
Disk cleanup and memory cleaner
|
|
|
System and performance monitoring
|
|
|
Multimedia download and conversion
|
|
|
Productivity and privacy boosters
|
|
|
Screen capture and recording
|
|
| BuyUpgrade | |
Parallels Desktop for Education: FAQs
For students
Parallels Desktop is professional-grade software that lets you run Windows-only apps like SOLIDWORKS, ArcGIS, Power BI, and Revit directly on your Mac.
When you sign up for Parallels Desktop through an education plan, you get the full Pro Edition experience at 50% off, with no hidden costs or limited features.
Both run Windows on your Mac, but Pro Edition is built for performance. It allows higher resource use and availability, making it ideal for design, data, and engineering programs that require more power and flexibility.
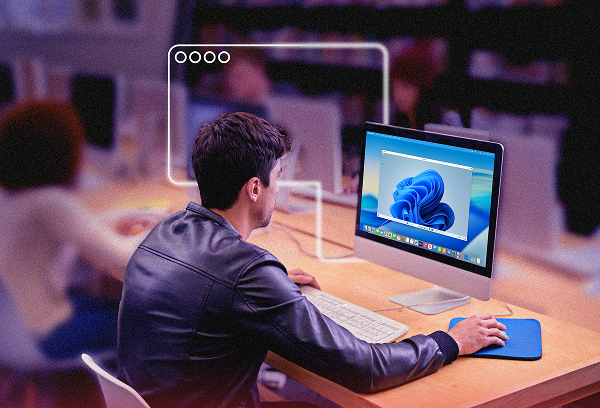
Macs are incredibly capable. They're flexible, fast, and powerful enough for most coursework.
But some classes require software that's only available on Windows. Parallels Desktop bridges that gap, so you can use your Mac, run Windows at the same time, and use every program your courses require.
Once you verify your academic status, you'll automatically receive 50% off at checkout.
Your discount renews each year as long as you remain eligible—no need to reapply every semester.
Yes. Parallels Desktop runs natively on M1, M2, M3, M4, and M5 Macs, including MacBook Neo. It’s fully compatible with macOS 26 Tahoe.
Yes. You'll need a valid Windows license to install Windows in Parallels Desktop. You can use your school's license if available or purchase one from Microsoft.
If your coursework requires Windows-only applications, you can use them on your Mac with Parallels Desktop. This allows you to run many Windows applications alongside macOS without needing a separate PC. Parallels Desktop also supports Linux if your coursework requires it. You can also view supported applications to check compatibility with the tools you need.
For educators
Yes. The same education offer applies to teachers, professors, and school staff. Once verified, your discount renews annually—no need to reapply.
Yes. Many universities and schools use Parallels Desktop for shared devices and labs. Educators can request multiple seats or academic licenses through their Parallels Desktop dashboard.
Parallels Desktop Pro Edition supports advanced configurations, so it's great for running multiple virtual machines, managing coursework apps, or demonstrating technical tools in class.
Yes. Parallels Desktop runs natively on all Apple silicon Macs, including M1, M2, M3, M4, and M5 chips, and all MacBook Neo models. No compatibility issues. See our MacBook Neo blog post for more detail.
Yes. Parallels Desktop Business Edition and Parallels Desktop Enterprise Edition support volume licensing and centralized IT management. Schools can provision Windows environments across labs and shared devices. Contact Parallels Desktop sales for institutional pricing.
For parents
Macs handle most schoolwork beautifully, but many courses still rely on Windows-only apps.
Parallels Desktop lets your student use those programs right on their Mac, saving the cost and space of a second computer.
Some schools use specialized software that's only available for Windows, like Revit, ArcGIS, or Power BI.
Parallels Desktop gives those programs a Windows environment to run in on your student's Mac, so students can stay in the Apple ecosystem they know and love.
No. Once verified, your student saves every year as long as they remain eligible.
Their account will renew automatically, and they'll receive reminders as needed.
Yes. We provide setup guides and resources to make installation simple and stress-free.
Still have questions? Learn more about verification
How to claim your Parallels Desktop education discount
It’s easy to claim your education discount—all you’ll need is your student or faculty ID. The program is open to current and newly accepted students, faculty, and staff at any accredited college or university. Verification takes under five minutes and the discount will apply automatically at checkout.
- Verify your academic status at checkout.
- Your 50% discount applies automatically. No coupon needed.
- Download Parallels Desktop and run Windows on your Mac in minutes.