


Run Windows 11 on Mac with a Microsoft-Authorized Solution
The only Microsoft-authorized solution for running Windows 11 Pro and Enterprise on Apple silicon Macs, including M1, M2, M3, M4, M5, and MacBook Neo.
The Simplest Way to Run Windows on Apple Silicon
Microsoft authorization for Windows 11 on Apple silicon Macs
Parallels Desktop is the only virtualization solution Microsoft has authorized to run Windows 11 Pro and Enterprise on Apple silicon Macs (M1-M5 and MacBook Neo). That authorization means your Windows environment is properly licensed, receives updates through Windows Update, and remains eligible for Microsoft support. Parallels Desktop validates each Windows release before it rolls out, so updates do not break your environment.
Secure and compliant Windows 11 virtualization on Mac
Parallels Desktop meets strict security and compliance standards with virtual TPM chips and Secure Boot technologies. Running Windows 11 in Parallels Desktop on your Mac protects your environment, whether you’re working on business-critical applications or handling sensitive data.
Optimized performance for Windows 11 on Apple silicon Macs
Parallels Desktop is optimized across Apple silicon generations, from M1 through the latest models, including MacBook Neo. Windows 11 on Arm runs at near-native speed, while Microsoft’s Prism translation layer handles x86 and x64 apps seamlessly in the background. As Apple silicon evolves, Parallels Desktop continues to take full advantage of improvements in CPU, GPU, memory bandwidth, and Neural Engine performance—so Windows apps stay fast and responsive.
End-to-end tech support from Microsoft and Parallels
Using a Microsoft-authorized solution means you retain access to Microsoft support for your Windows 11 licenses on Apple silicon. For everything related to virtualization, the Parallels team provides 24/7 technical support, keeping your Windows VMs running without gaps in coverage.
Fully optimized for Apple silicon
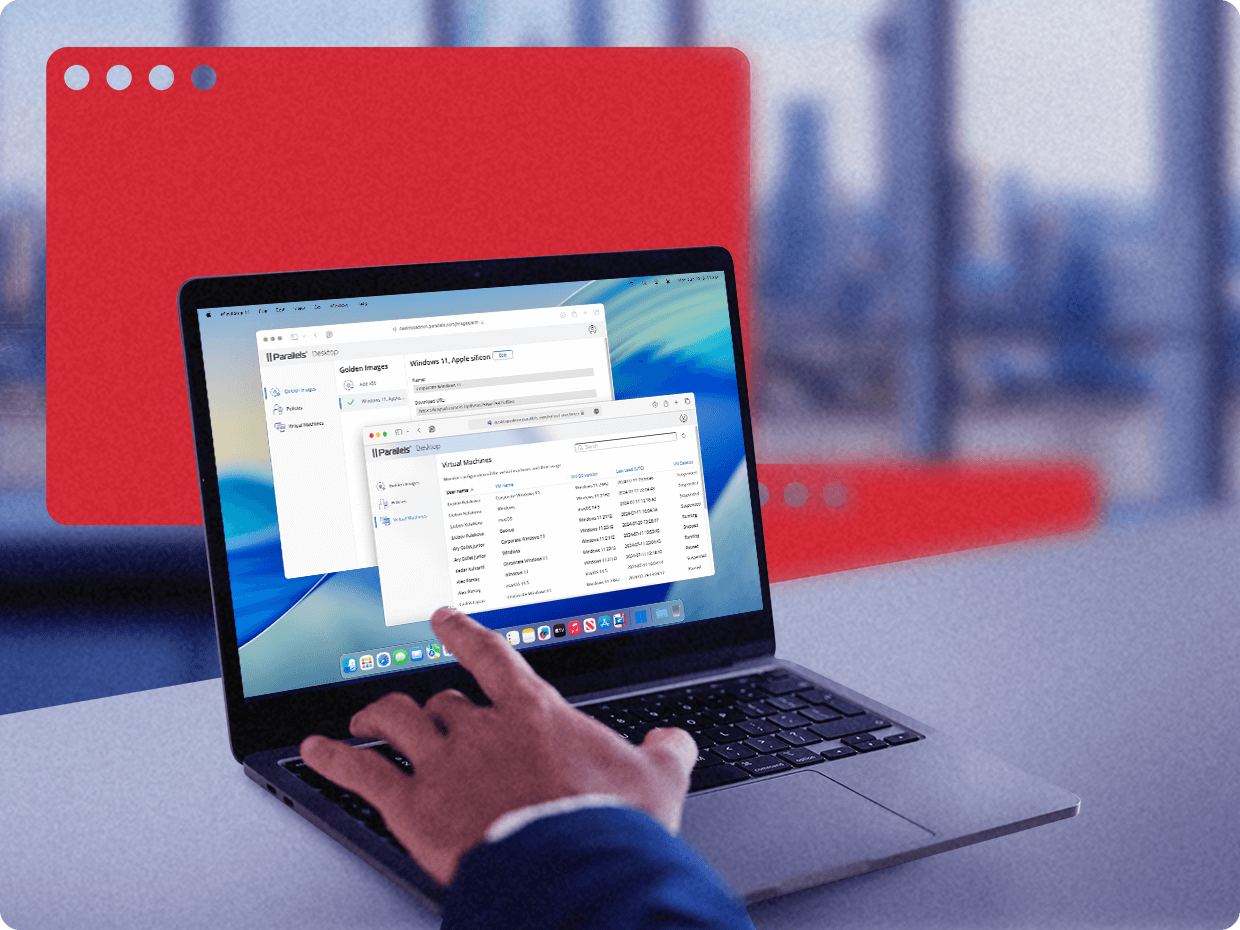
Seamless Windows compatibility with Parallels Desktop
-
Pre-release testing
Parallels receives early access to upcoming Windows updates, including Windows 11 25H2, and tests them before release, so your environment stays stable as new versions roll out.
-
Quick issue resolution
Close collaboration with Microsoft allows Parallels to identify and resolve compatibility issues quickly across supported Apple silicon hardware.
-
Support for new Windows features
Parallels Desktop is continuously updated to support the latest Windows features, including Prism translation improvements and built-in security features like Windows Defender.
Why Microsoft Endorses Parallels for Windows on Mac
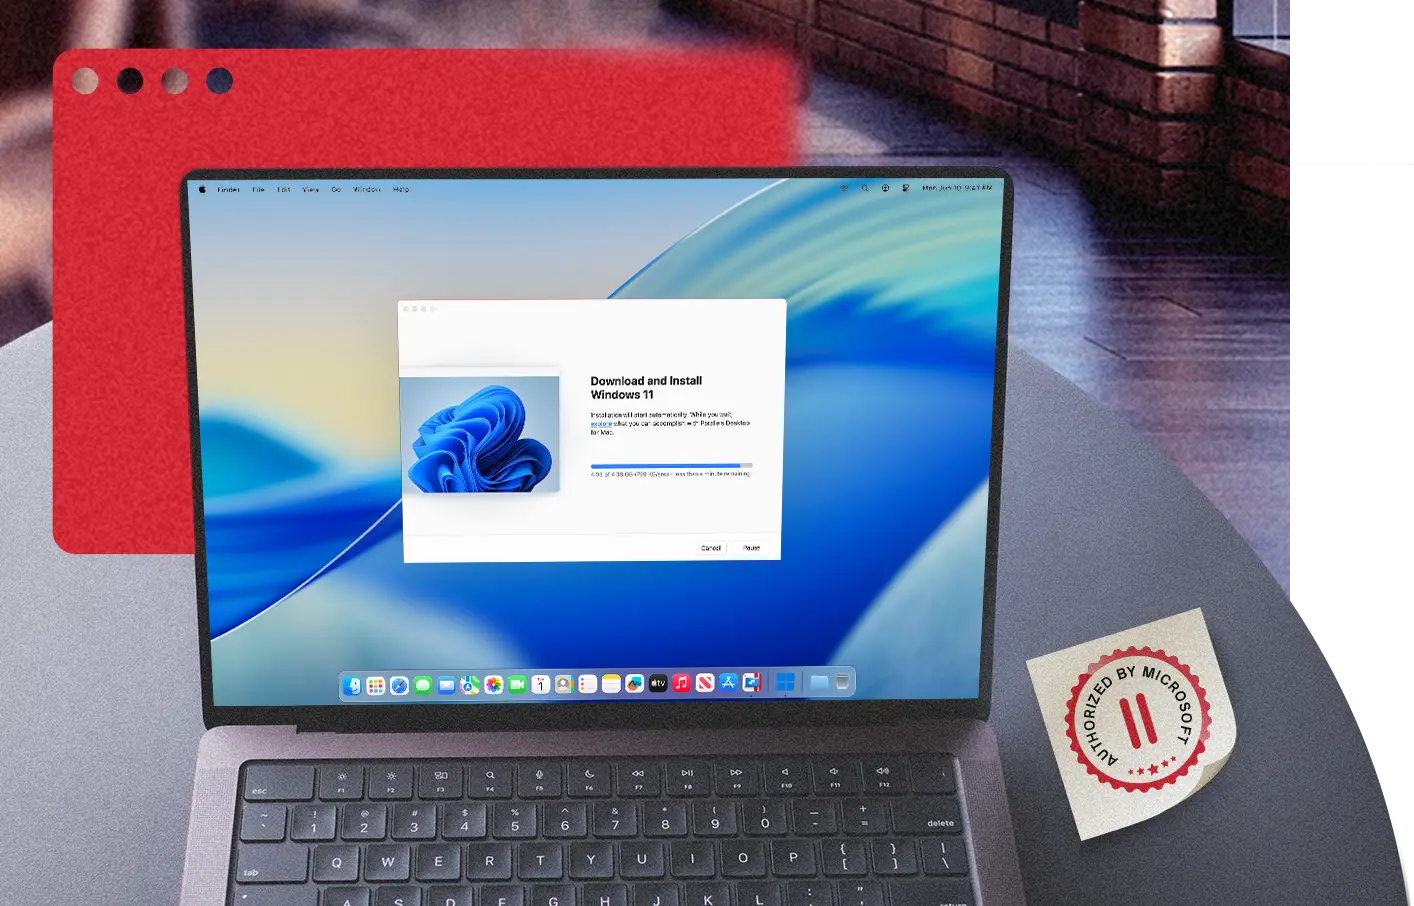
1. Install Windows 11
To install Windows 11 on your Mac, launch Parallels Desktop. Then install Windows.
2. Complete Microsoft EULA
Windows will be downloaded and installed automatically and you’ll be prompted to complete the Microsoft EULA.
3. Activate Windows 11
Next, you’ll need to activate Windows 11 on your Mac. Purchase a license from the Microsoft Store or activate an existing license for Windows 11.
4. Run and enjoy
Windows 11 is now installed and activated on your Mac, and you can start running Parallels Desktop. Enjoy!
Real-world use cases
Whether you need Windows for business apps, development, or enterprise environments, Parallels Desktop is the best solution.

For small and medium businesses (SMBs)
Small and midsize businesses running Mac hardware often rely on Windows for accounting tools, industry-specific apps, or client deliverables that depend on Windows environments. With Microsoft authorization, IT teams can confidently deploy Windows 11 Pro and Enterprise with compliant licensing, standard update delivery, and uninterrupted support.
See SMB solutions
For Enterprises
Enterprise IT teams adopting Mac hardware still need Windows 11 environments that meet security and licensing requirements. Microsoft authorization ensures Parallels Desktop supports key capabilities like vTPM, Secure Boot, Windows Update, and Microsoft support eligibility across current Apple silicon systems.
See Enterprise solutions
For developers
Developers and QA teams need consistent, supported Windows environments for cross-platform testing. With Microsoft authorization, Windows 11 in Parallels Desktop follows the same update cycle as standard Windows hardware, making test results more reliable and reducing surprises at deployments.
See developer solutions
For students and faculty
Universities and schools using Mac hardware often require Windows for coursework, exam platforms, or research tools. Microsoft authorization helps ensure institutional license compliance and enables access to Windows 11 Enterprise through standard academic volume licensing programs.
See education solutionsWindows Arm FAQ
New users must download and install the latest Parallels Desktop version to start running Arm versions of Windows 11 Pro or Enterprise.
Existing Parallels Desktop users can continue to use Windows without making changes to their current device setup. However, if you are not using one of the Windows supported editions, we recommend upgrading to Windows 11 Pro or Enterprise.
If you run Parallels Desktop 17 or a later version, you can continue to use Parallels Desktop on Mac with Apple silicon or Apple M-series Mac with Apple silicon.
All Parallels Desktop versions (Standard, Pro, Business) support the ability to run Windows 11 Pro and Enterprise with Apple silicon.
You will be able to bring your own Windows 11 Pro or Enterprise product keys if they have a key that can be used to activate Windows.
Organizations can purchase Windows 11 through their normal Windows procurement process, and individuals can buy Windows 11 Pro through Microsoft.
Existing Parallels Desktop users can continue to use Windows without changing their current device setup. However, if you are not using one of the compatible editions, we recommend upgrading to Windows 11 Pro or Enterprise.
We recommend installing Windows 11 Pro or Enterprise.
End users can download and install Windows 11 Pro with Parallels Desktop for Mac in two simple steps.
IT administrators and organizations deploying Windows Enterprise will require a volume license agreement and can download Windows from Microsoft. You can download this from the Microsoft 365 admin center.
Some Windows 11 features may not be available or fully functional when running Windows 11 in a virtualized environment. Learn more about the limitations of running Windows 11 on Mac computers with Parallels Desktop.
Yes. Parallels Desktop is currently the only virtualization solution Microsoft has authorized to run Windows 11 Pro and Enterprise on Apple silicon Macs. In practice, that means your Windows environment is properly licensed, receives updates through Windows Update, and remains eligible for Microsoft support. Microsoft also offers Windows 365 Cloud PC as a cloud-based option, but Parallels Desktop is the only authorized solution for running Windows locally on a Mac through virtualization.
Yes. Parallels Desktop is authorized by Microsoft to run Windows 11 on all Apple silicon Macs, including M1, M2, M3, M4, M5, and MacBook Neo. Parallels Desktop is tested and optimized as each generation ships, so support keeps pace with Apple’s hardware roadmap.