Tips for Backing up Windows in Parallels Desktop for Mac
In recognition of World Backup Day, this post shows you how best to back up the Windows installation on your Mac in Parallels® Desktop.
Yes, you really should back up!
A few years ago, I had a Windows installation on my iMac that would no longer boot. In addition, I could not copy the Parallels Desktop file that contained this Windows installation (the “.pvm” file). This quickly led to the conclusion that at least a portion of the hard drive on my iMac had failed. The Apple Tech Support team I contacted was great, but nothing we tried fixed the issue, so Apple authorized a no-cost-to-me hard drive replacement. I was able to backup everything on the disk, except the Parallels Desktop file that contained Windows. If I had made a backup earlier before the drive failed, I would have lost very little.
This blog post is my attempt to help you avoid the data loss I had.
But I Have Time Machine (or iCloud Drive), So I Don’t Need to Do This, Right?
I run Time Machine also, and it is great, and it has saved me on a number of occasions. However, Time Machine is not a good choice to backup Windows on your Mac. Time Machine works by checking every hour for files that have changed on your Mac, and then backs them up. Anytime you start up or use Windows on your Mac, the .pvm file will change. The change might be really small, but Time Machine cannot see that. So, Time Machine backs up the entire .pvm file, which is usually more than 10GB, and can be hundreds of GBs. If this gigantic file is backed up once every hour, you will quickly fill up the Time Machine drive. For the same reason, backing up Windows to iCloud Drive is a bad idea.
What You Need
The steps below will work for any version of Windows. (Or, for that matter, any version of Linux, macOS, or any other OS that you have installed in Parallels Desktop on your Mac.) All you need is a high-capacity, speedy external drive attached to your Mac. For my home setup, I have a 10TB, external USB drive which I purchased new for about $175 USD. You will need to have this external drive connected to your Mac, and it should be visible on the Mac desktop.
Only 3 Steps Needed to Back Up Windows in Parallels Desktop
- Shut down Windows
- Reclaim any extra space
- Manually copy the .pvm file to the external drive
Notes:
- You must really shut down Windows. Not suspend Windows, not just close the Parallels Desktop window where Windows is running, but manually shut down Windows. Step 2 requires that Windows has shut down.
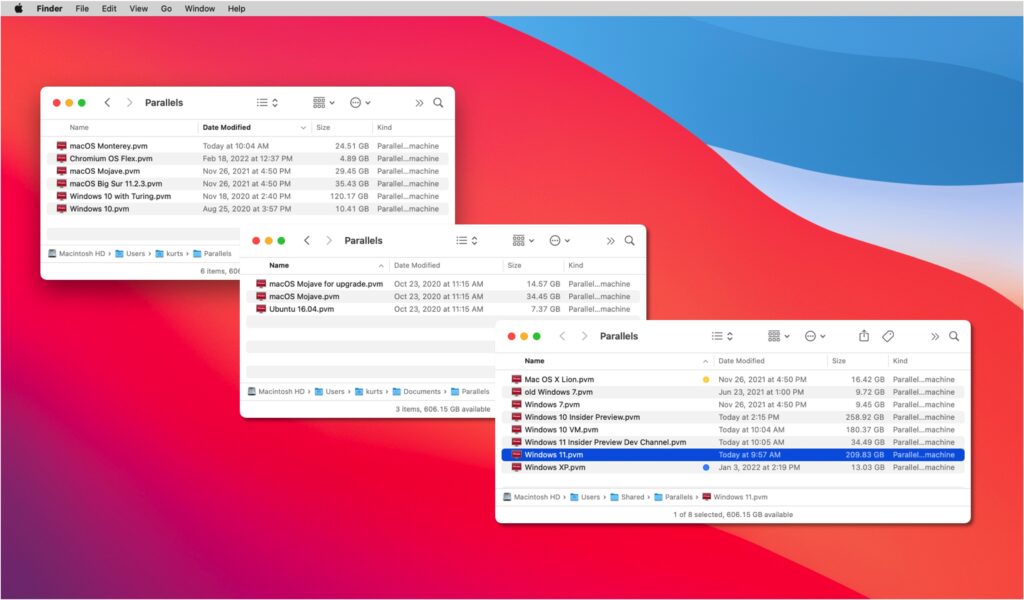
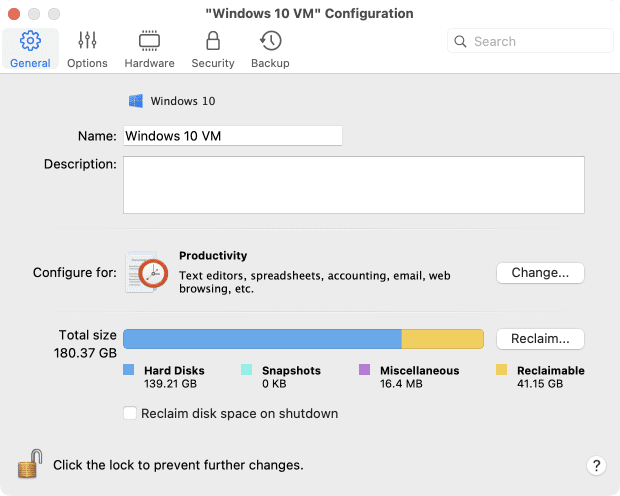
- The file that Parallels Desktop stores Windows, all your Windows applications, your Windows configuration setting, and (perhaps) any files you have created in Windows is called a Mac .pvm file. (Figure 1 shows all my .pvm files, though you may only have one .pvm file.) These pvm files grow as you install new Windows apps and create new files. Usually, but not always, these pvm files shrink when you delete apps and files. However, over time there can be some “empty” space that remains in the file. You should remove this by using the “Reclaim…” button shown in Figure 2. In that figure, this “empty” space is over 40GB, so it is definitely worth reclaiming this before you go on to the next step.


- Just manually copy this pvm file to the external drive. For me, copying a 120GB pvm file to my external drive takes about 9 minutes.
I recommend that you also add a recurring item to your calendar, reminding you to back up Windows. You can do this once or twice a month, depending on how much work you are willing to lose in case of hardware failure, or other problems.
Restoring Windows From a Backup
Suppose calamity strikes, and you have to restore your backup of Windows. No problem! Just copy the backup pvm file back to the same folder on your Mac where it was located when you backed it up. You will lose whatever work you have done since you made the backup, but this will usually be a lot smaller loss than if you had never backed up at all.
I hope this helps you evade the big data loss that I experienced when my hard drive failed. Let us know your experience and tips in the Forums or on Facebook and Twitter channels.

